About this Page
This page is a core feature within the Revyz Command Center, designed to facilitate the full-scale replication or standardization of your Jira instance settings. It enables administrators to clone selected global Jira configurations (such as workflows, custom fields, permission schemes, and issue type schemes) from a source site's snapshot to a new or existing destination site.
What is the Use Case?
This tool is ideal for a full-scale migration or for standardizing a new, separate Jira instance to match your primary one. The feature is used to clone selected Jira configurations from a source site to a new destination site or back to the current site.
This feature is applicable to:
Command center for jira config manager for jira
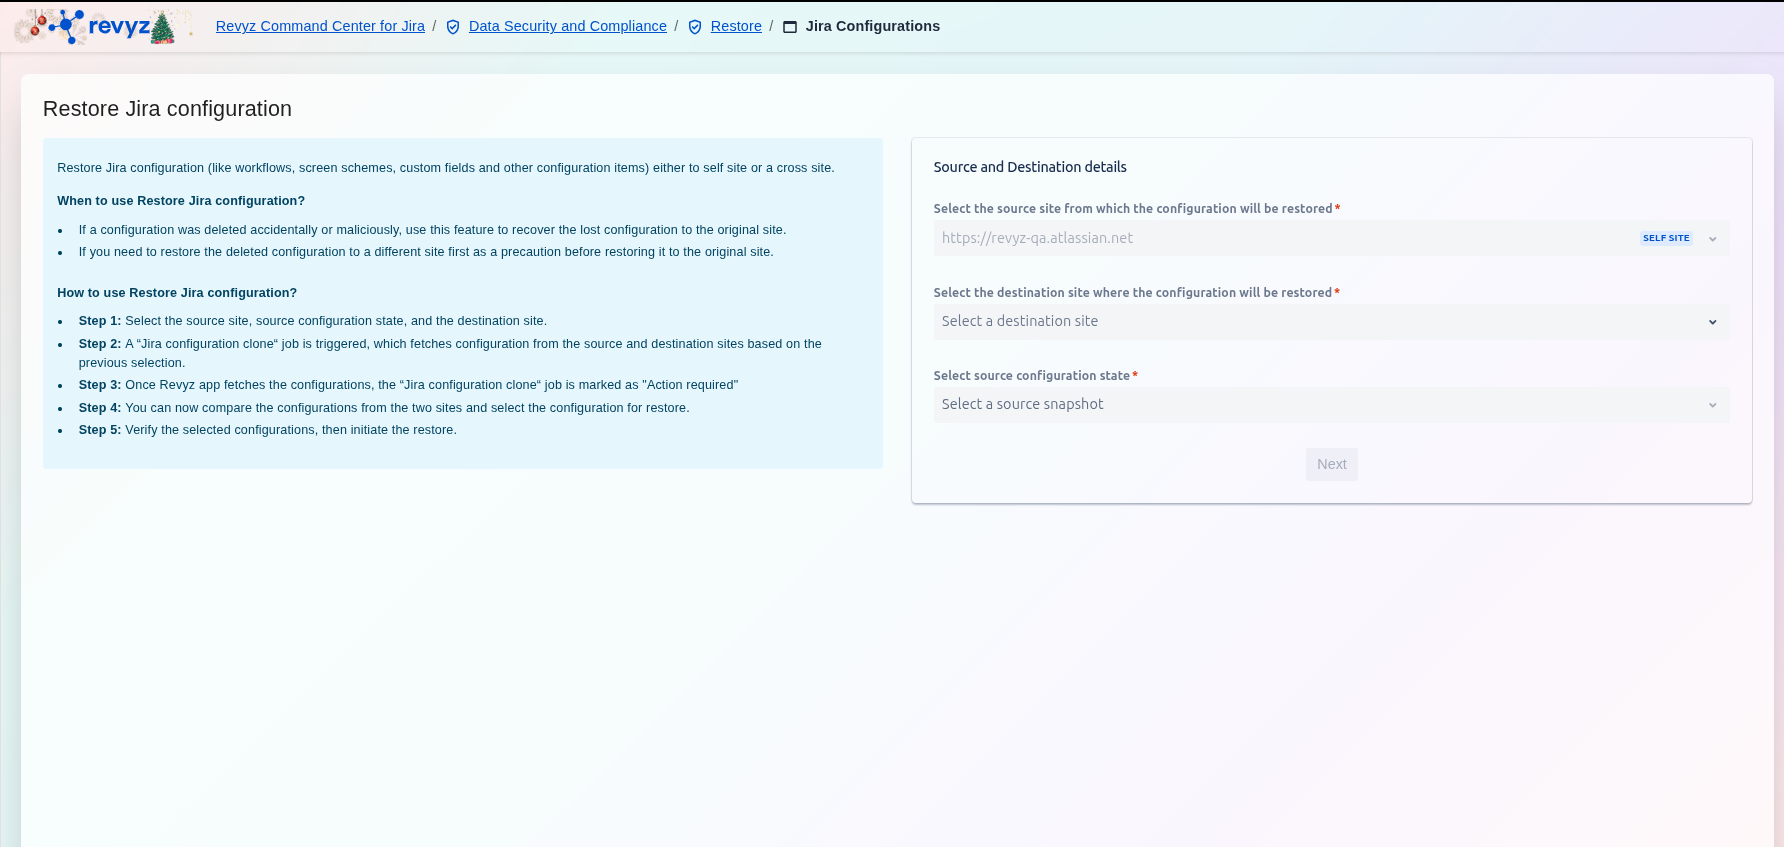
What is Restore Jira Configurations?
With this feature, you can replicate your core Jira configurations like workflows, custom fields, and permission schemes to another instance.
Use Case: This tool is ideal for a full-scale migration or for standardizing a new, separate Jira instance to match your primary one
The Jira configurations clone feature allows you to clone selected Jira configurations from a source site to a new destination site or back to the current site (self site). This process begins by selecting the backup snapshot you wish to use as the source.
How to restore Jira configurations with Revyz App?
Step 1: Access the Restore Card
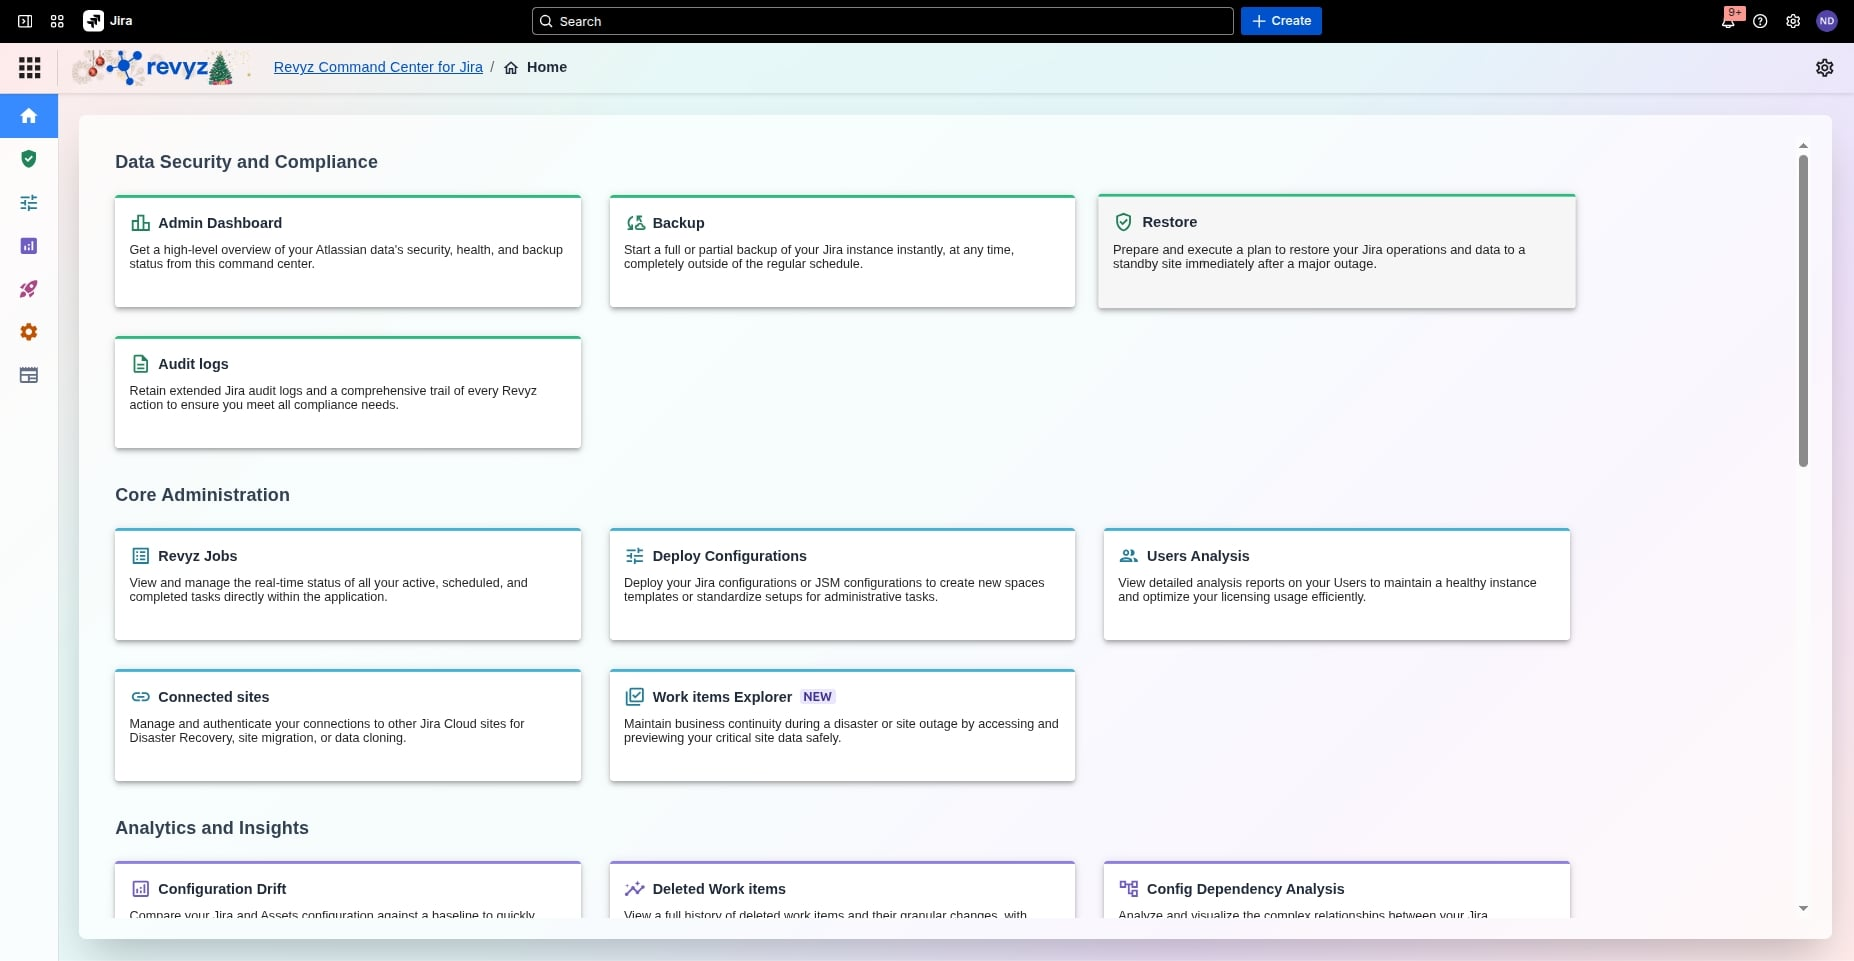
From the main Admin Dashboard, click the Restore card to begin preparing your recovery plan.
Step 2: Identify Restoration Type
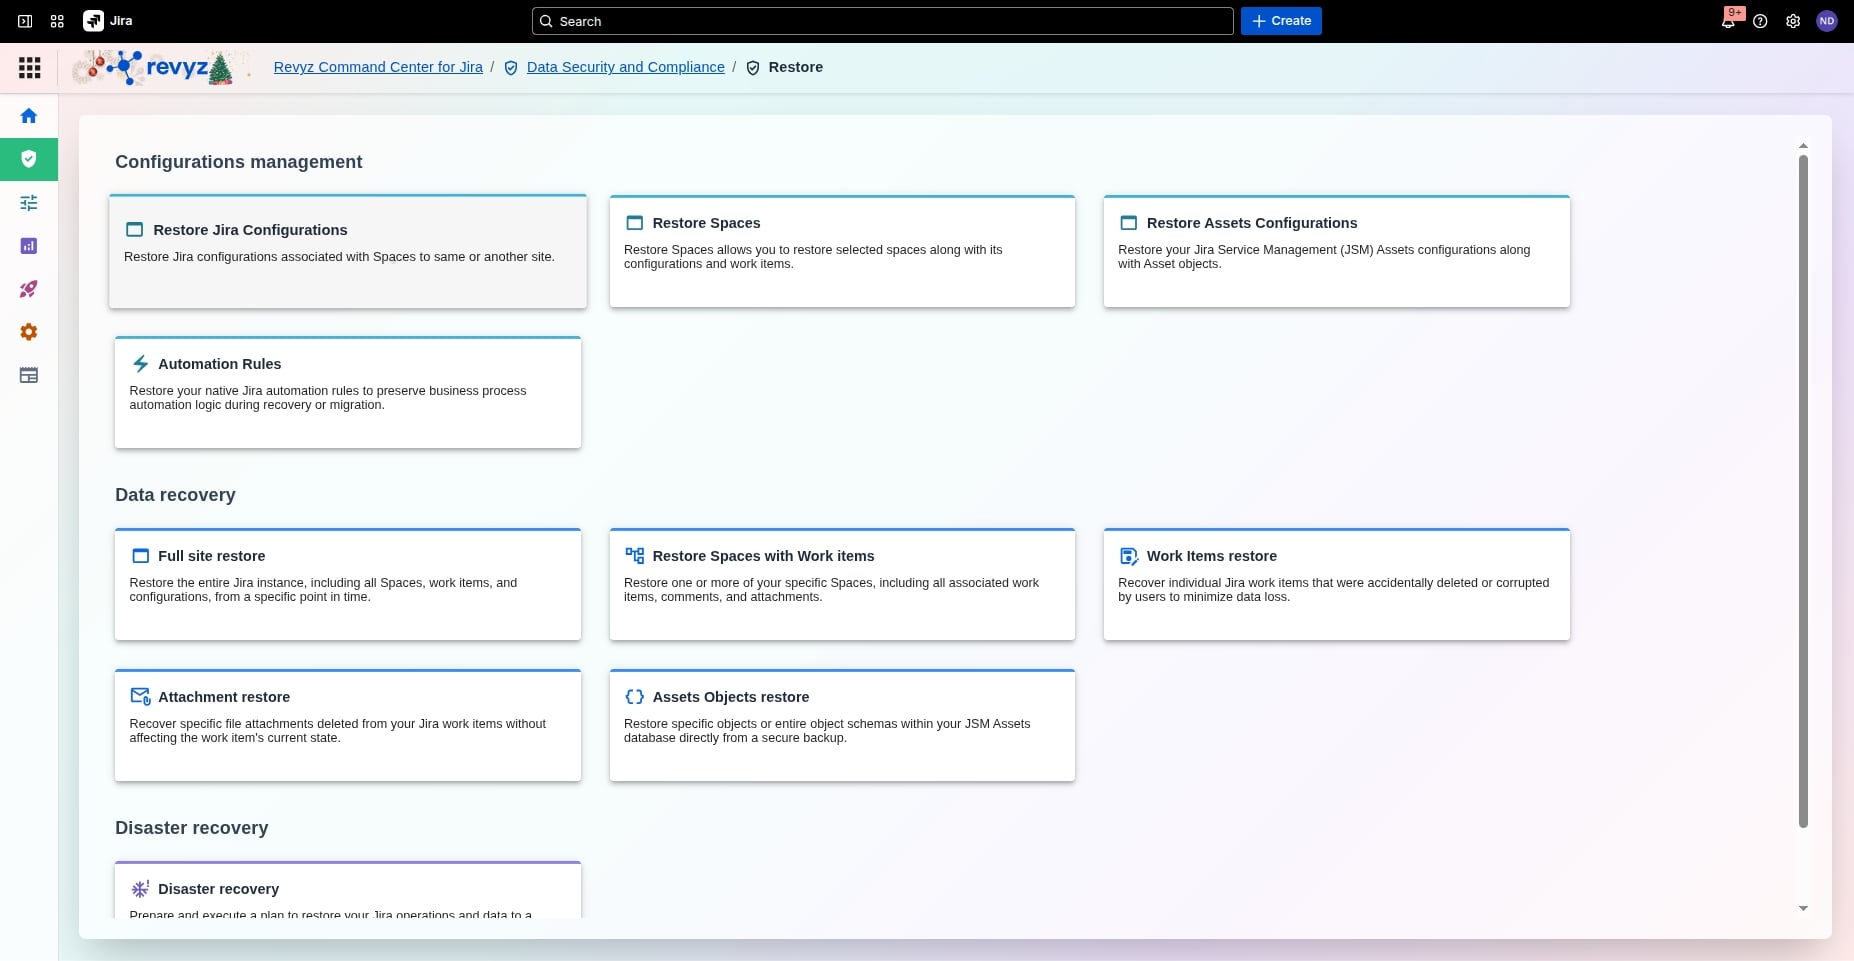
Under the "Configurations management" section, click Restore Jira Configurations to recover items associated with specific spaces.
Step 3: Choose Destination Site
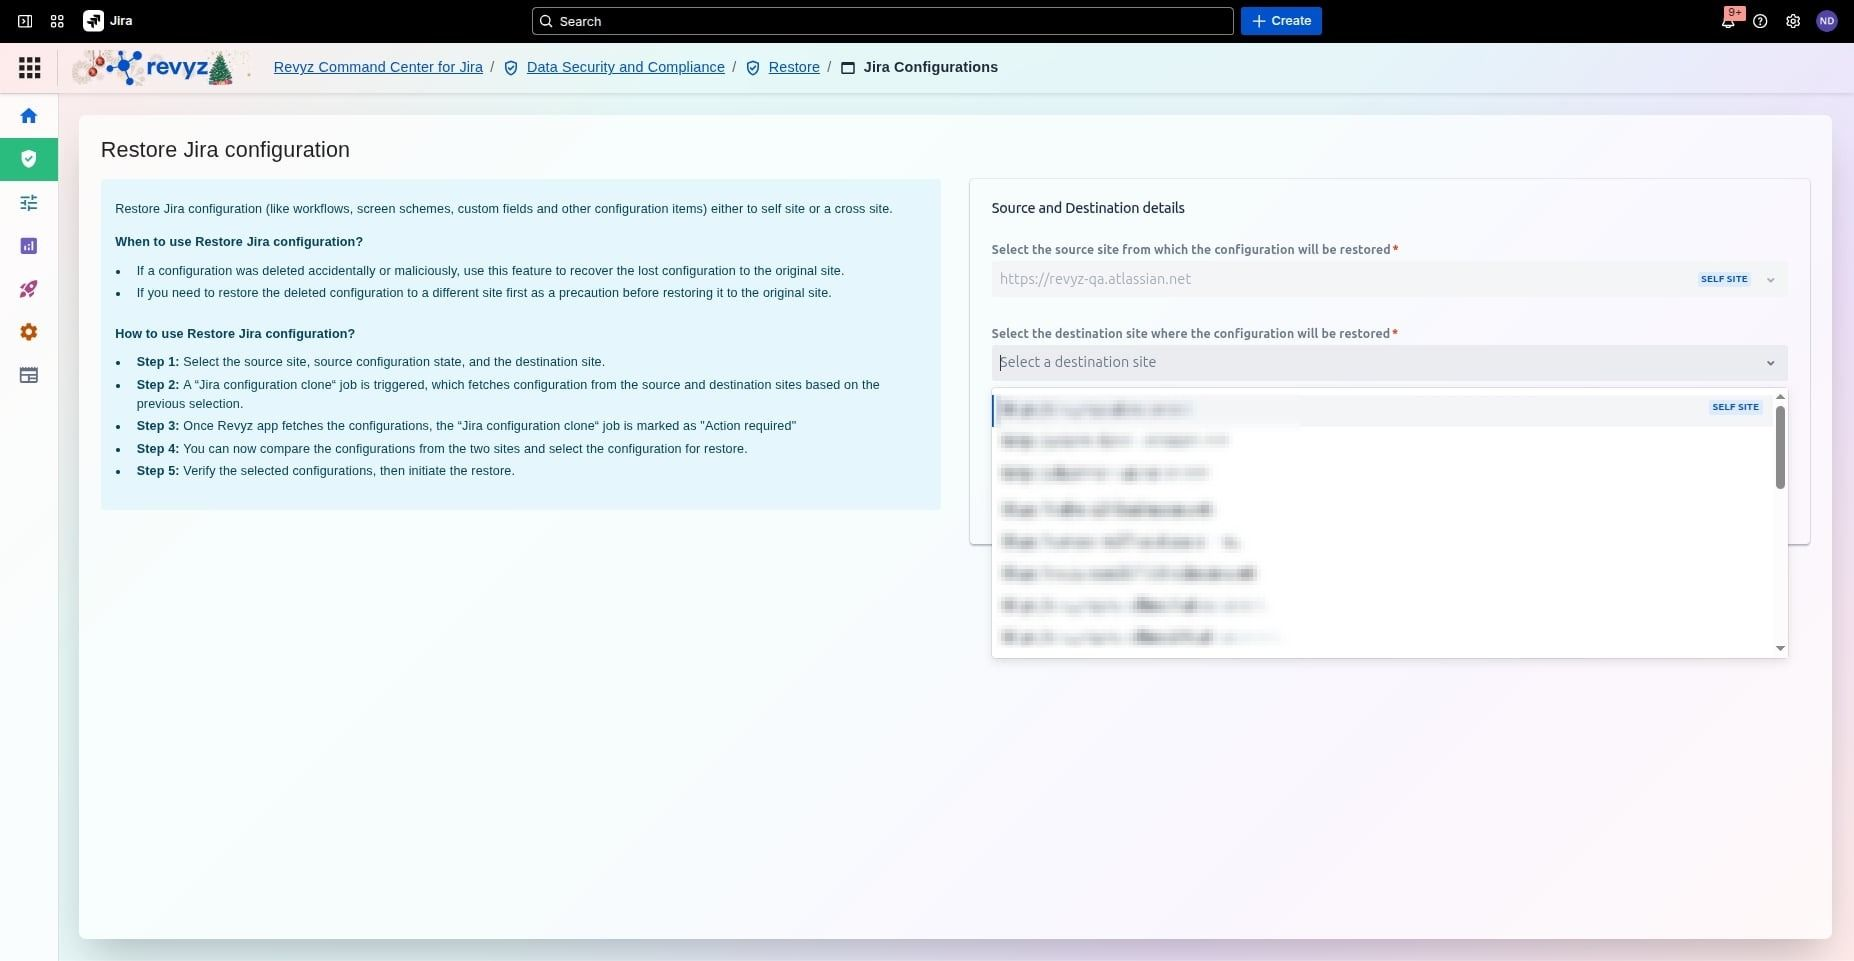
Choose Destination Site – Review the restoration workflow steps and click the dropdown arrow to see available destination site options and select one.
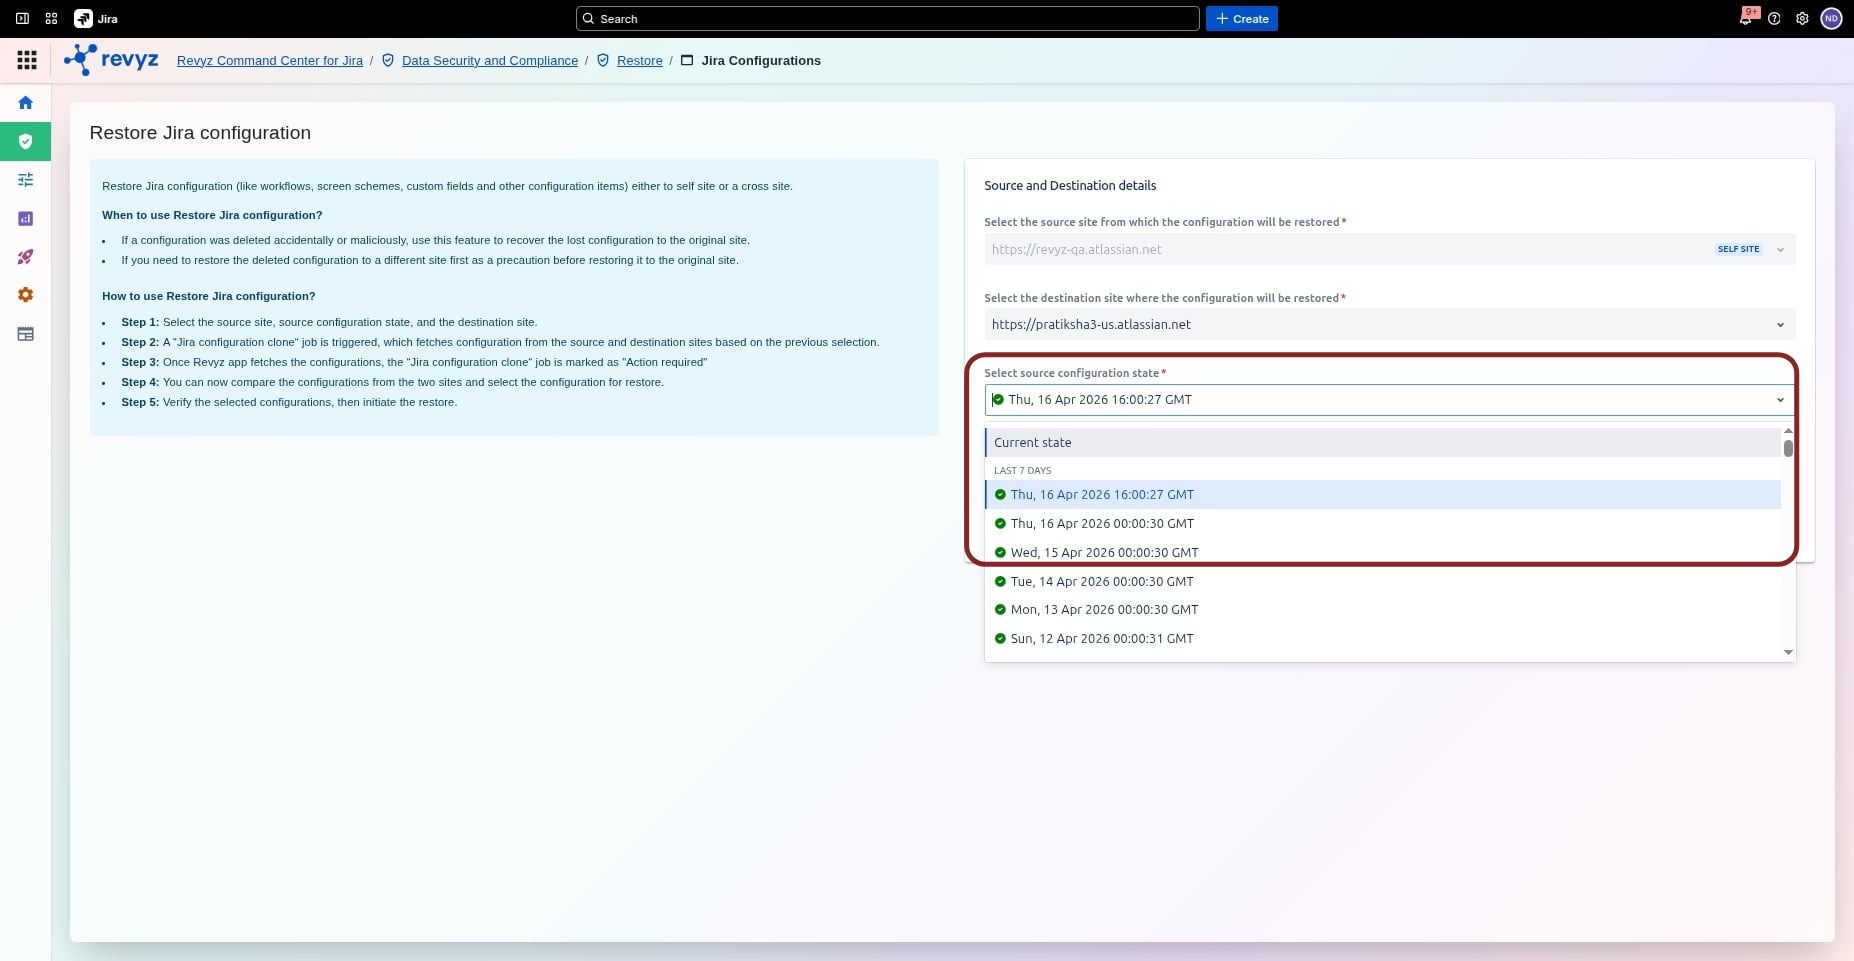
Step 4: Select Configuration State
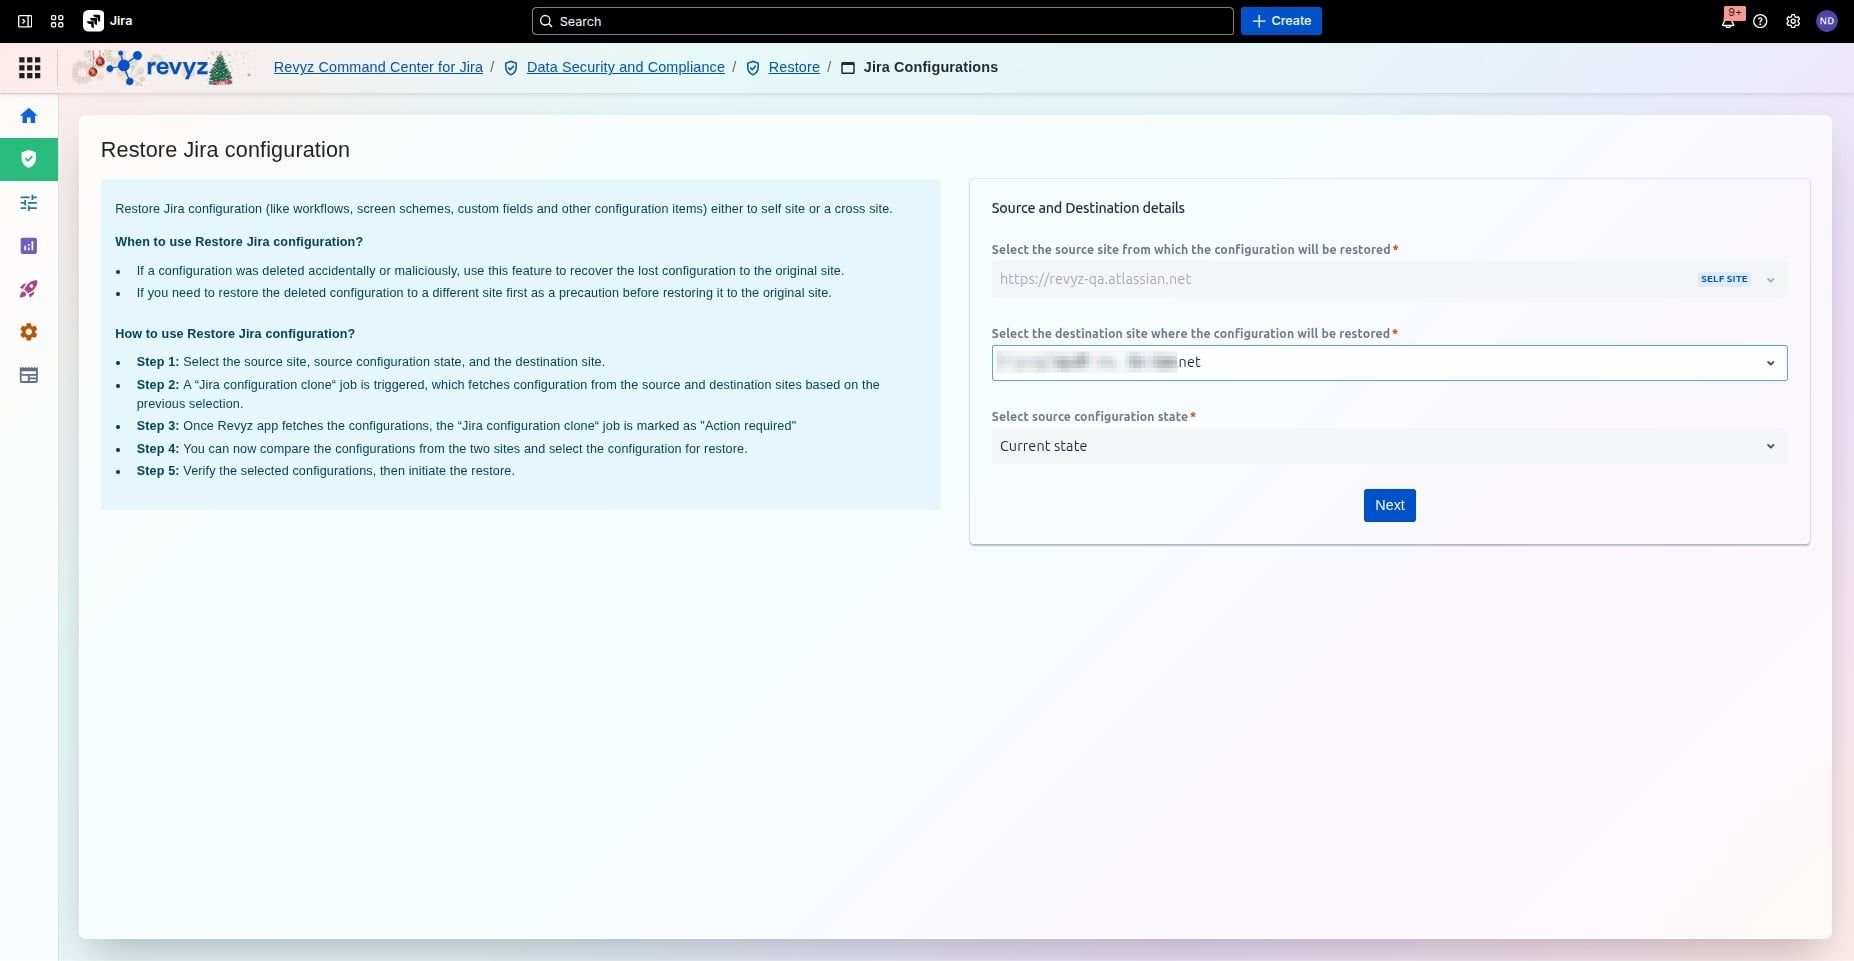
Verify your source and destination sites, then choose the Current state or a snapshot as the source configuration state before clicking Next.
New Feature: Users can now select a desired destination snapshot, instead of electing the current state. The Destination Snapshot feature allows users to substitute the "Current State" analysis with data from a previously captured backup snapshot. Check here to see details of how this new feature works.
Step 5: Confirm Analysis Job
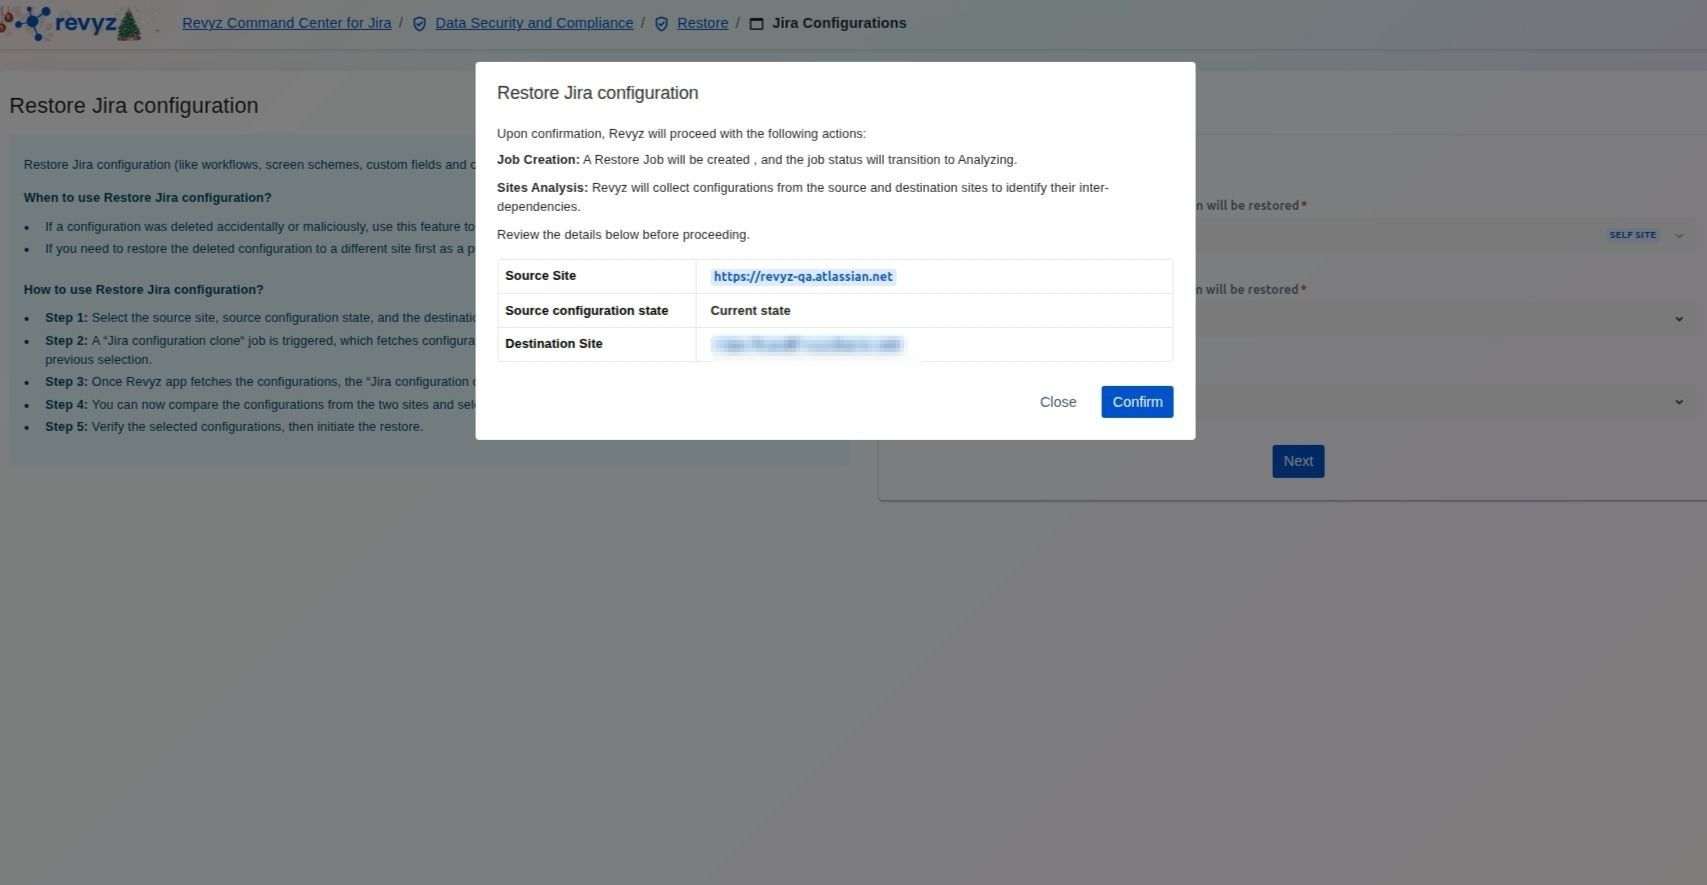
Review the job details, including the source and destination URLs, then click Confirm to allow Revyz to take backups of both the source and destination sites and analyze inter-dependencies.
Step 6: Monitor Job Status
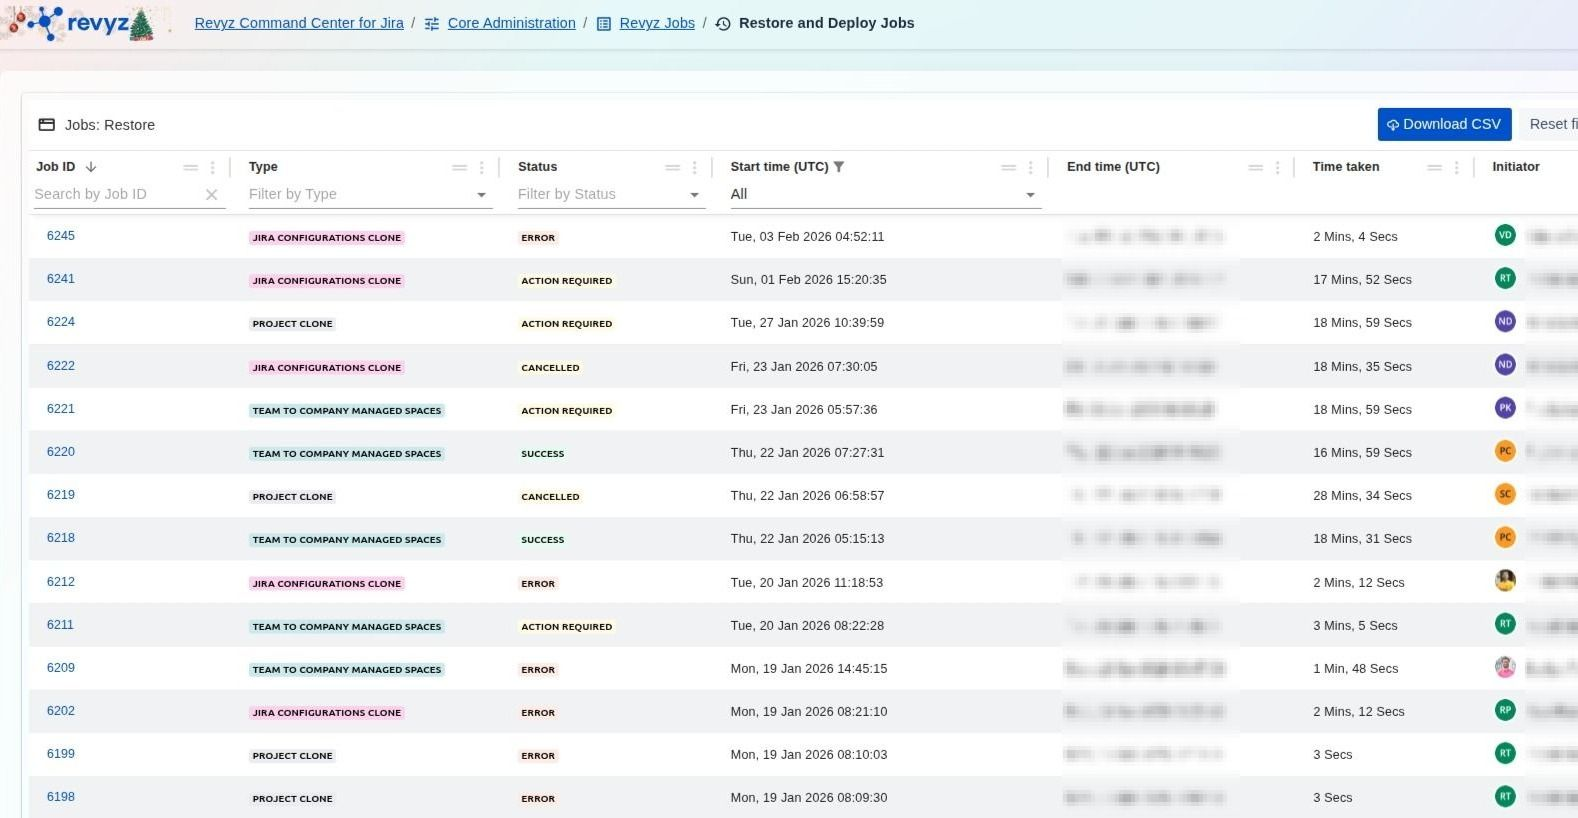
View the Revyz Jobs table where a JIRA CONFIGURATIONS CLONE job is automatically created; wait for it to reach the ACTION REQUIRED status.
Step 7: Review Analysis Completion
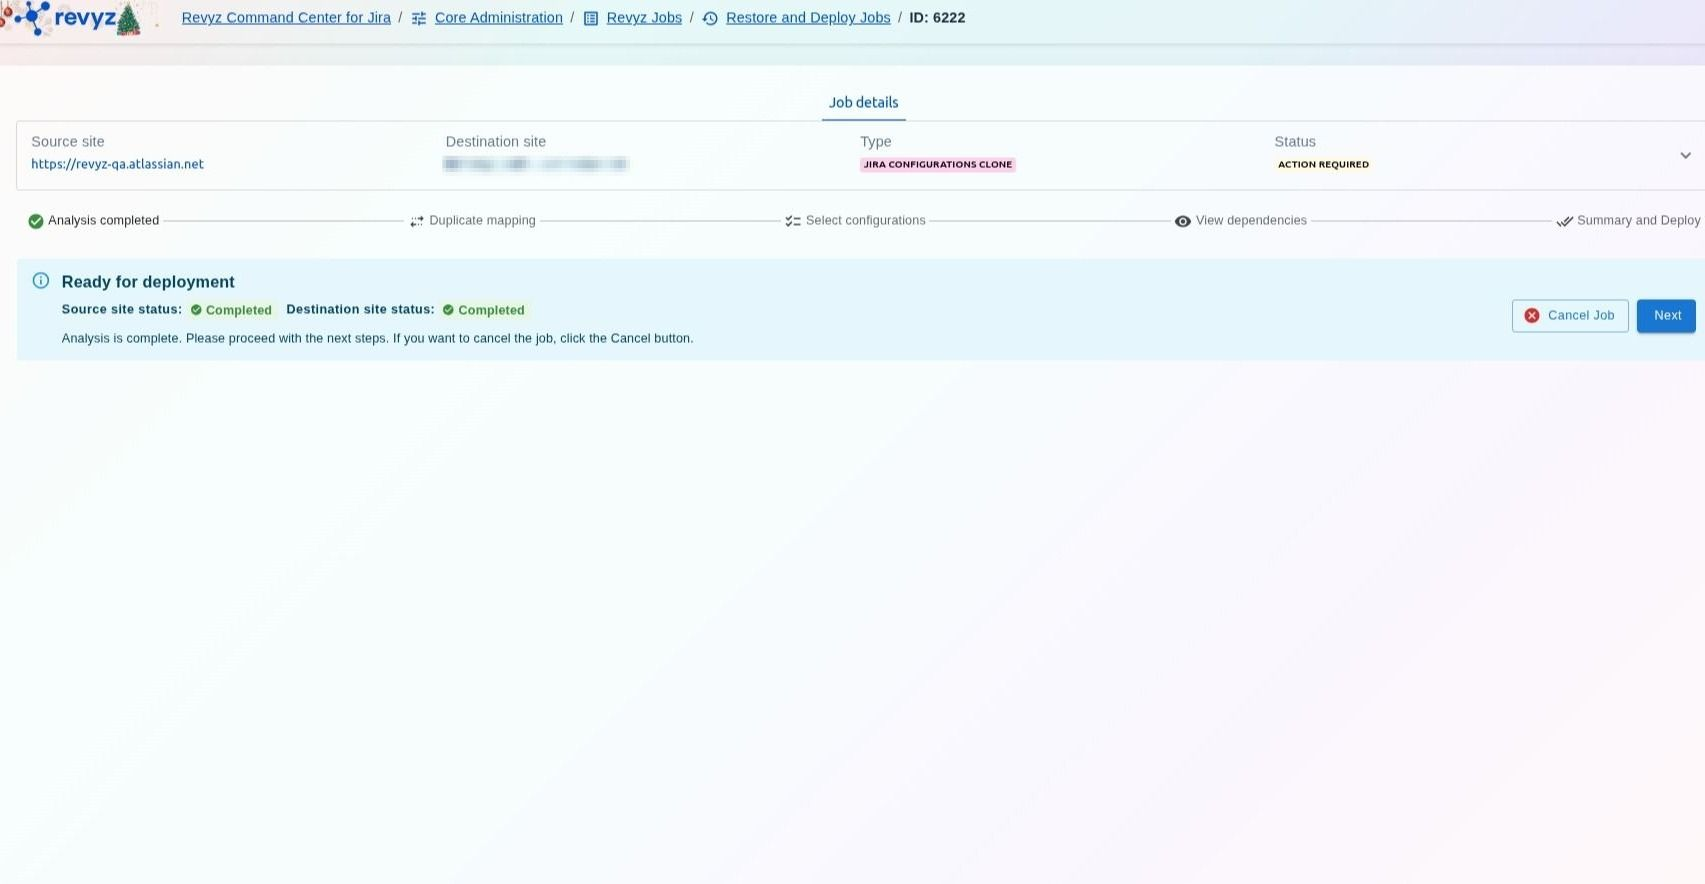
Once the analysis status shows "Analysis completed," verify the job type and status before proceeding. With the status set to "Action Required," click Next to begin reviewing the specific configurations for restoration.
If the job is marked as an Error (instead of Action Required):
This error may occur because the incremental backups that were triggered for either of the sites might have failed. To understand why the job is an error, go to the logs. If they are unclear, you can reach out to support.
Step 8: Field Mapping and Comparison
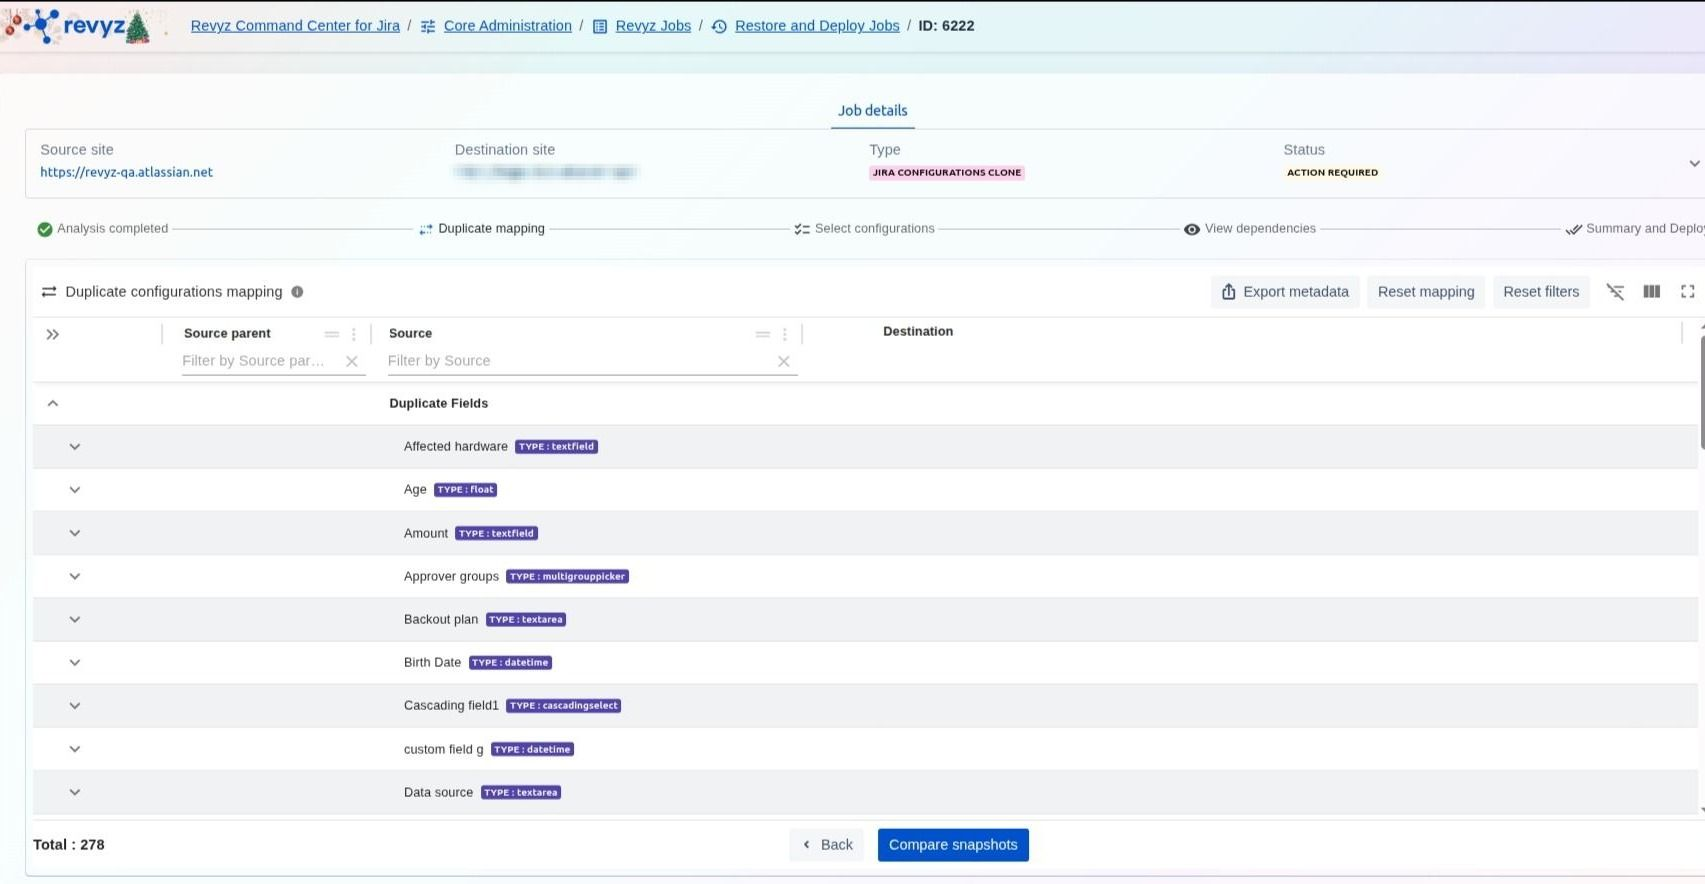
View the "Duplicate configurations mapping" table to see how source items correspond to destination items
Step 9: Resolve Duplicate Fields
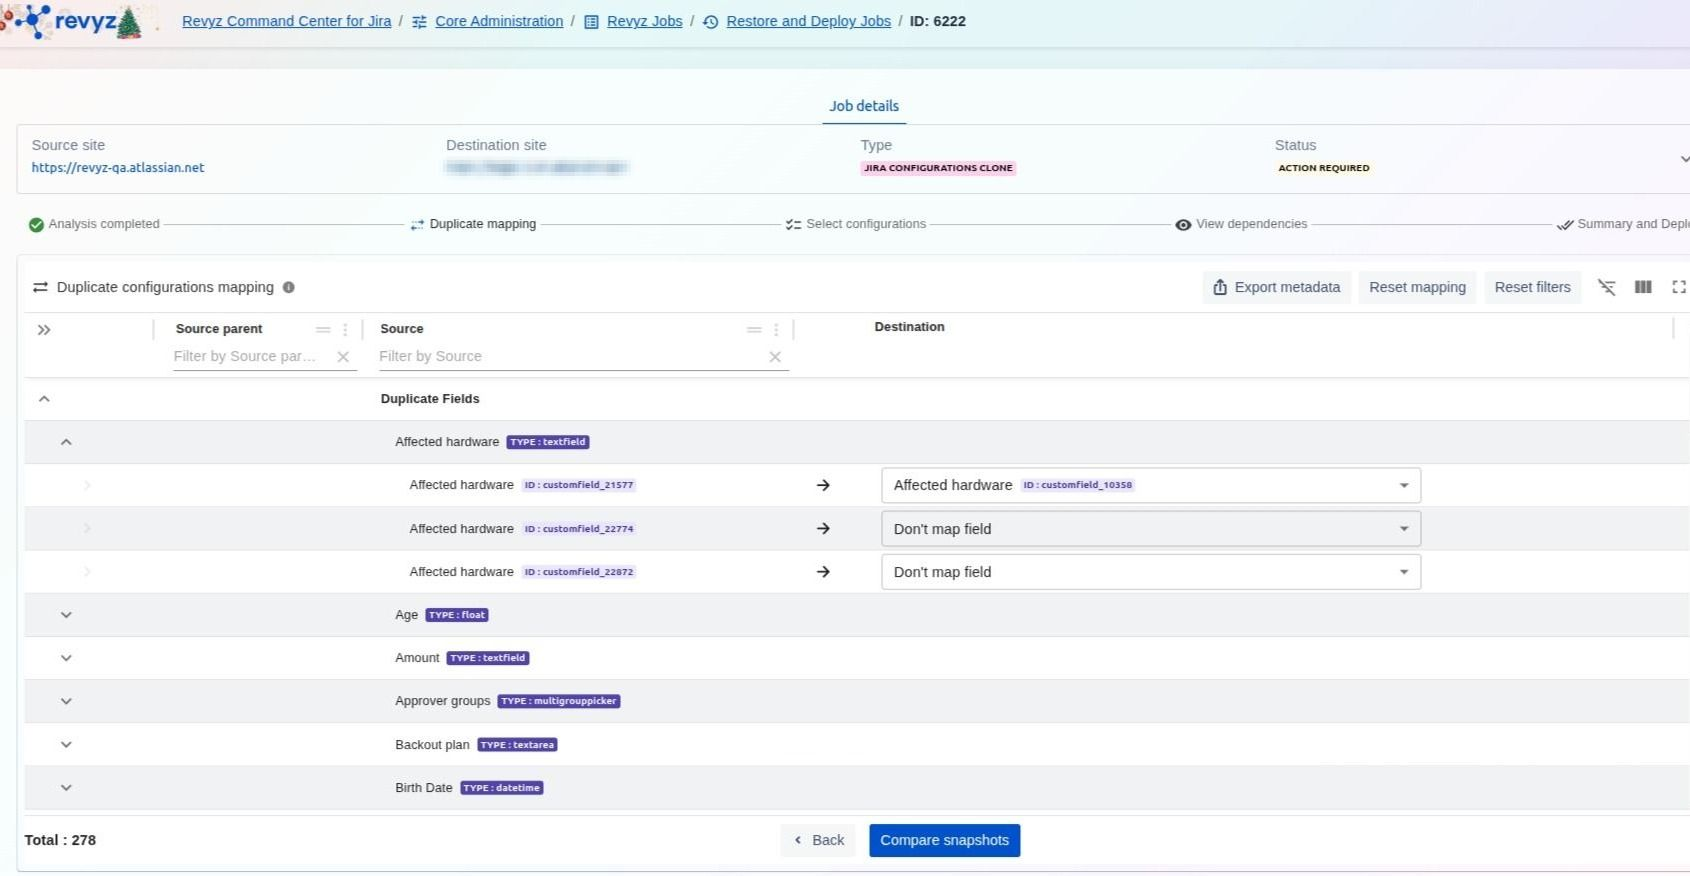
For specific fields like "Affected hardware," select whether to map to an existing destination field or choose "Don't map field"
Step 10: Execute Mapping
Complete the mapping for all duplicate fields in the provided interface and then click Compare snapshots.
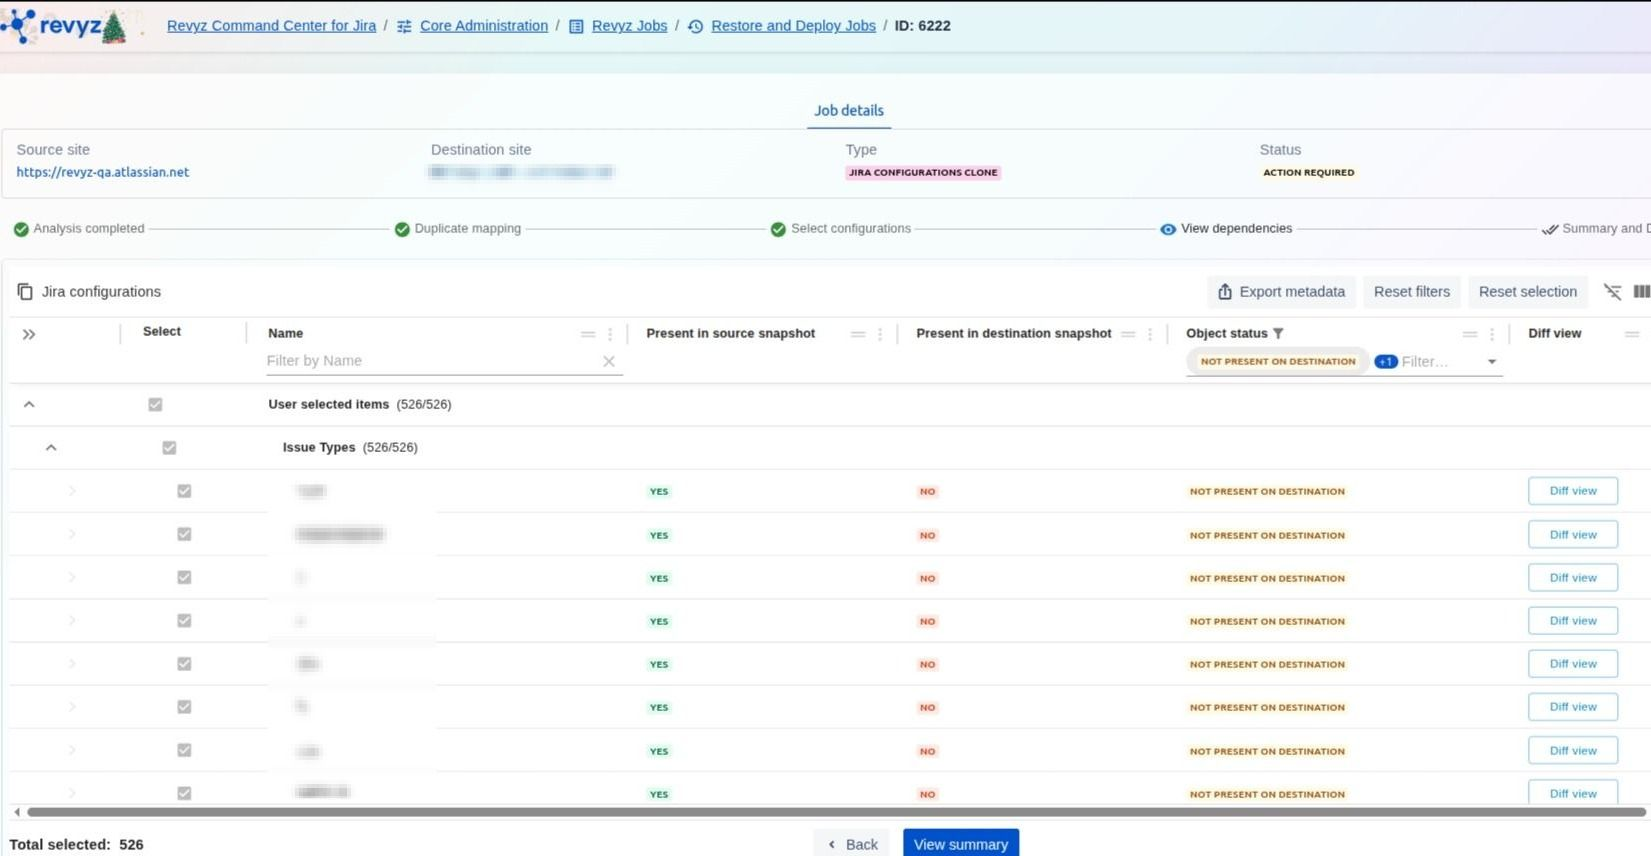
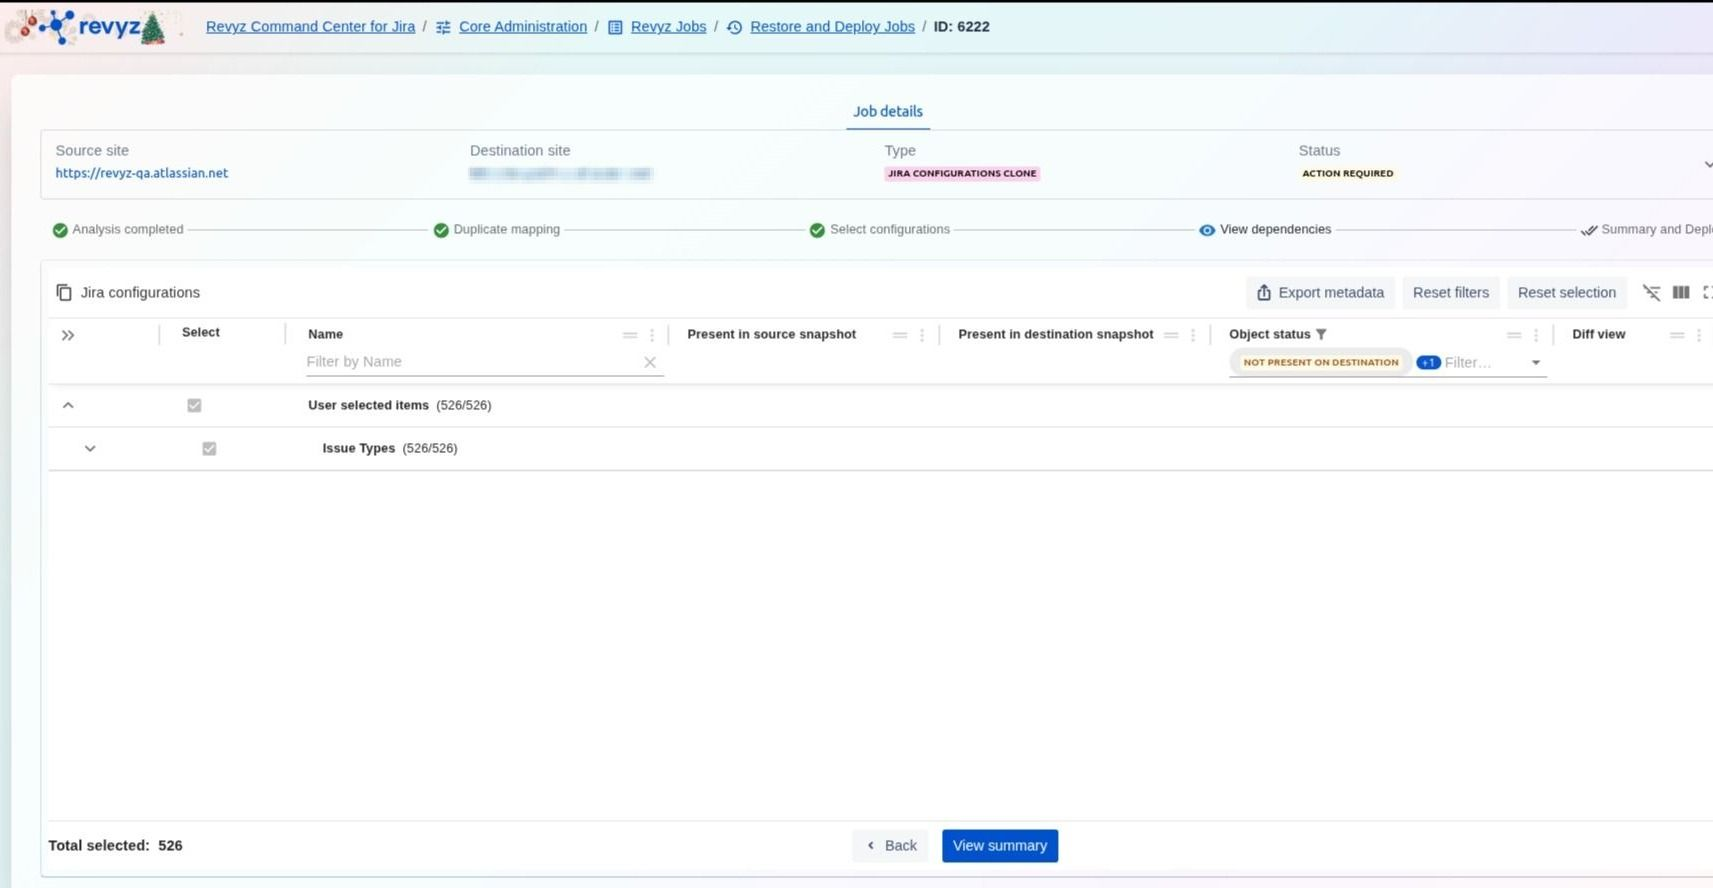
Step 11: Review Dependencies
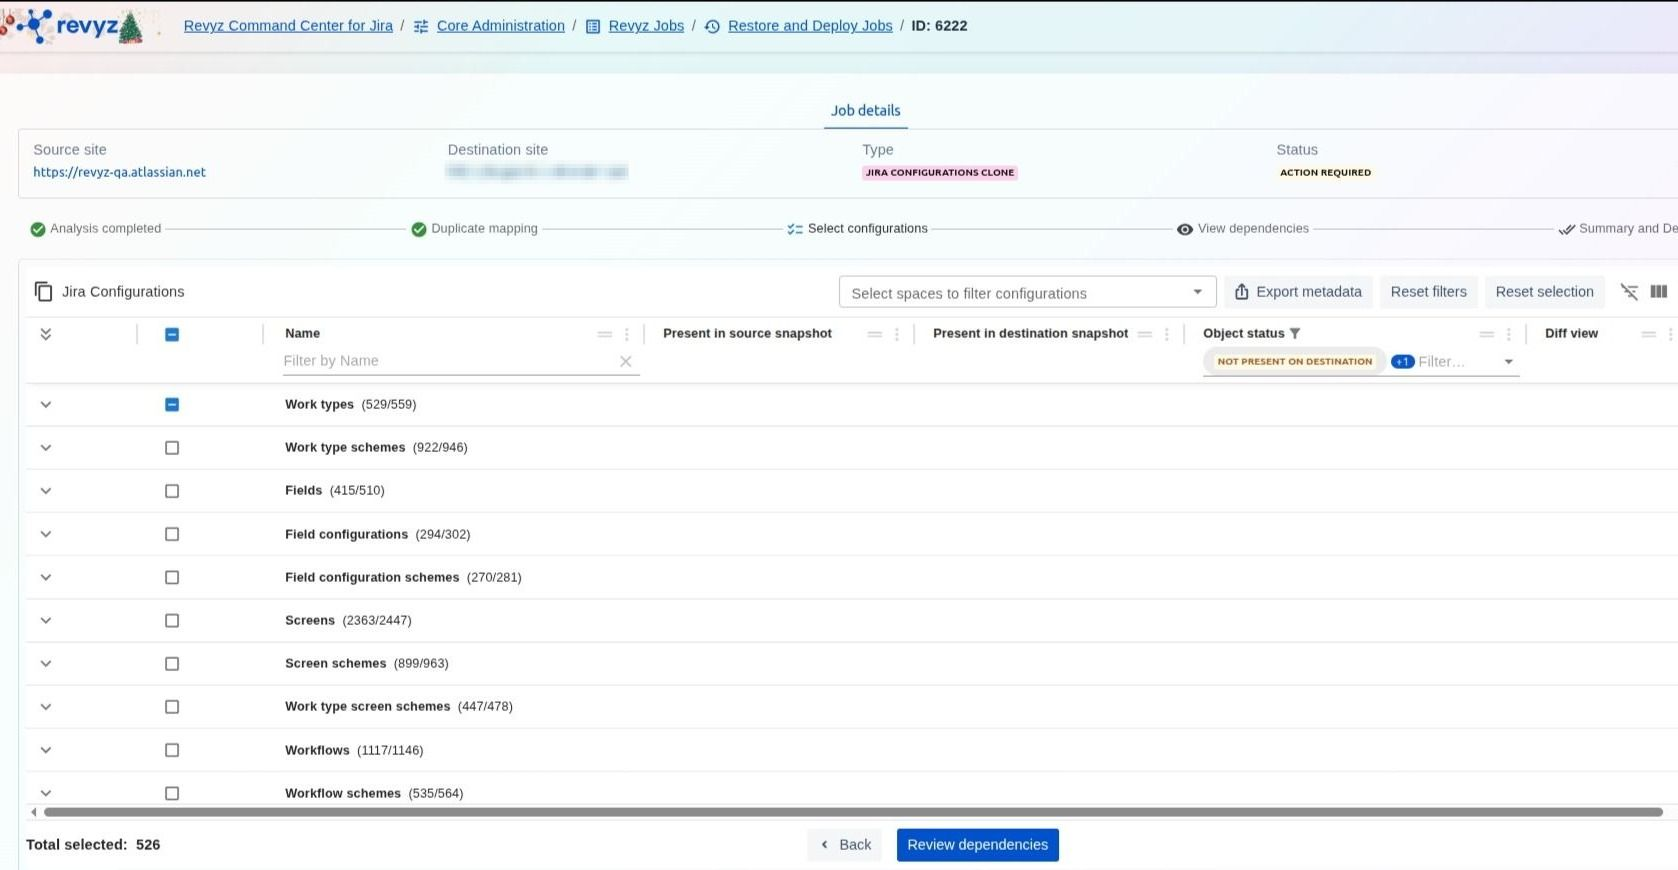
Filter and select the specific Jira objects you wish to restore, such as Workflows, Screens, or Fields, then click Review dependencies.
Step 12: Analyze Side-by-Side Diff
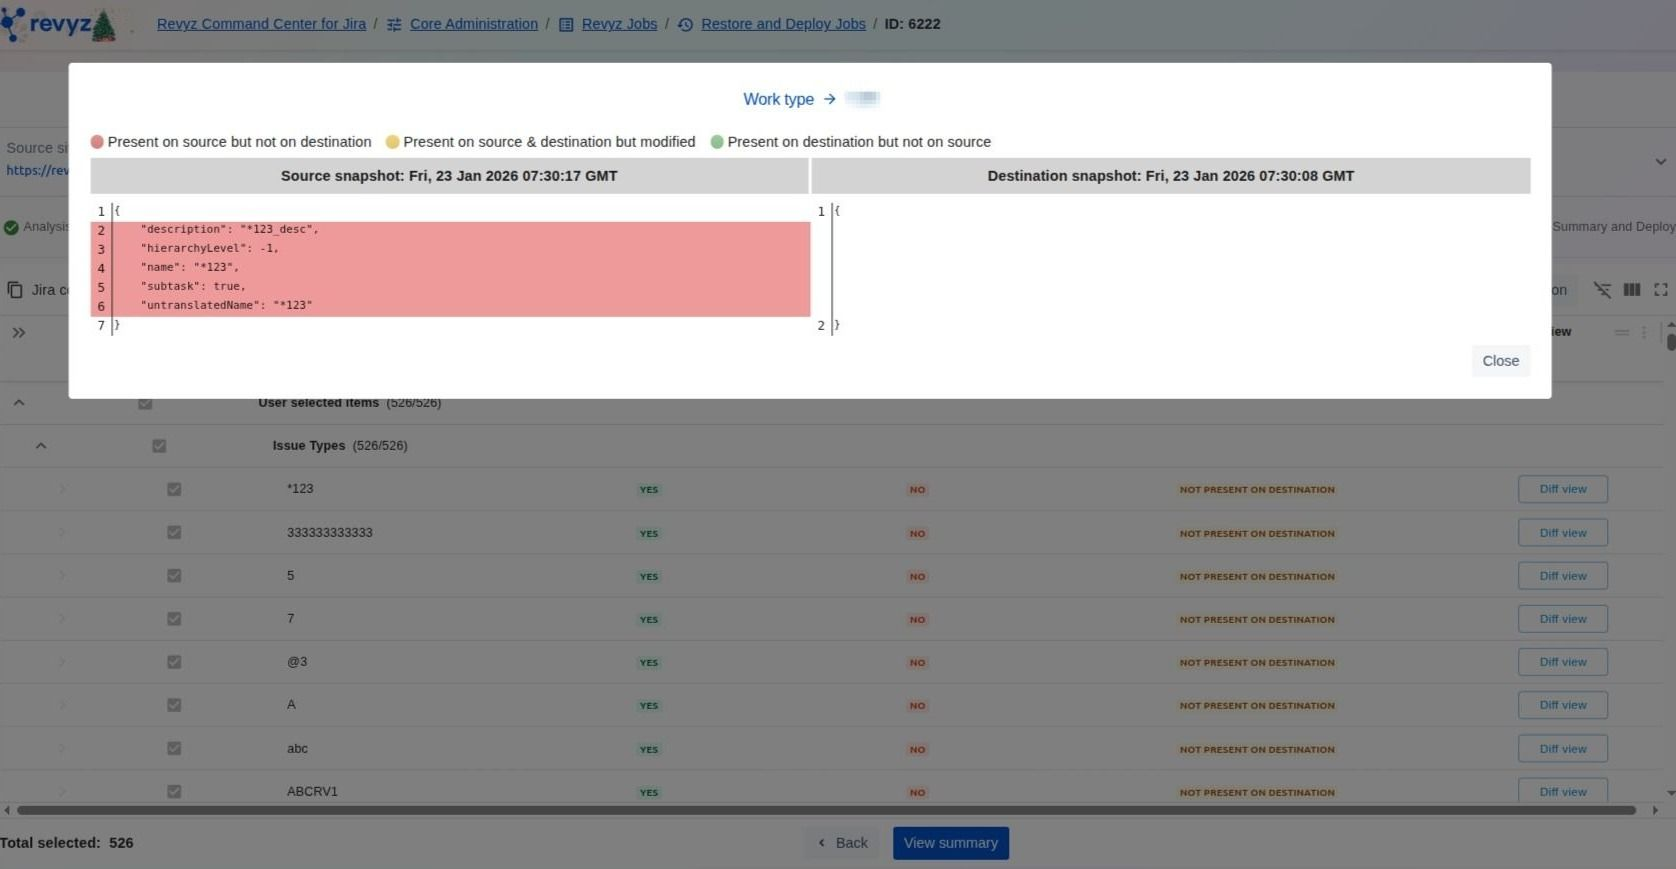
Review the detailed JSON comparison; items highlighted in red are present on the source but not on the destination.
Step 13: View Summary
After finalizing your selections in the Diff View, click the View summary button to proceed to the final stage.
Step 14: Initiate Deployment
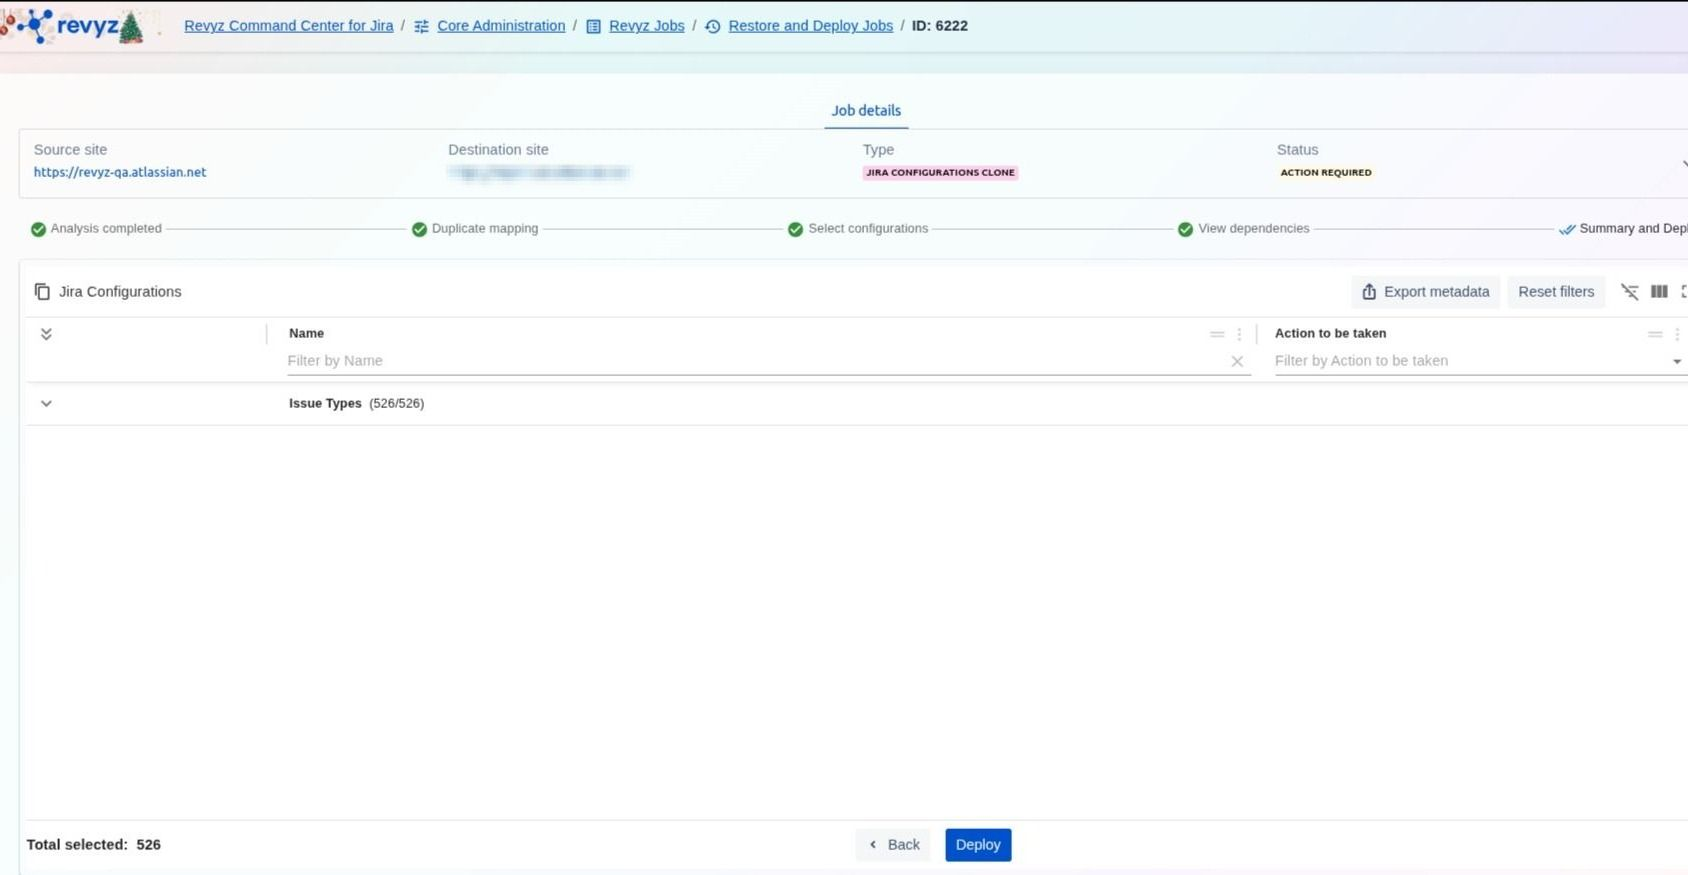
Review the "Action to be taken" column (e.g., CREATE) for all selected configurations and click Deploy
Step 15: Verfication
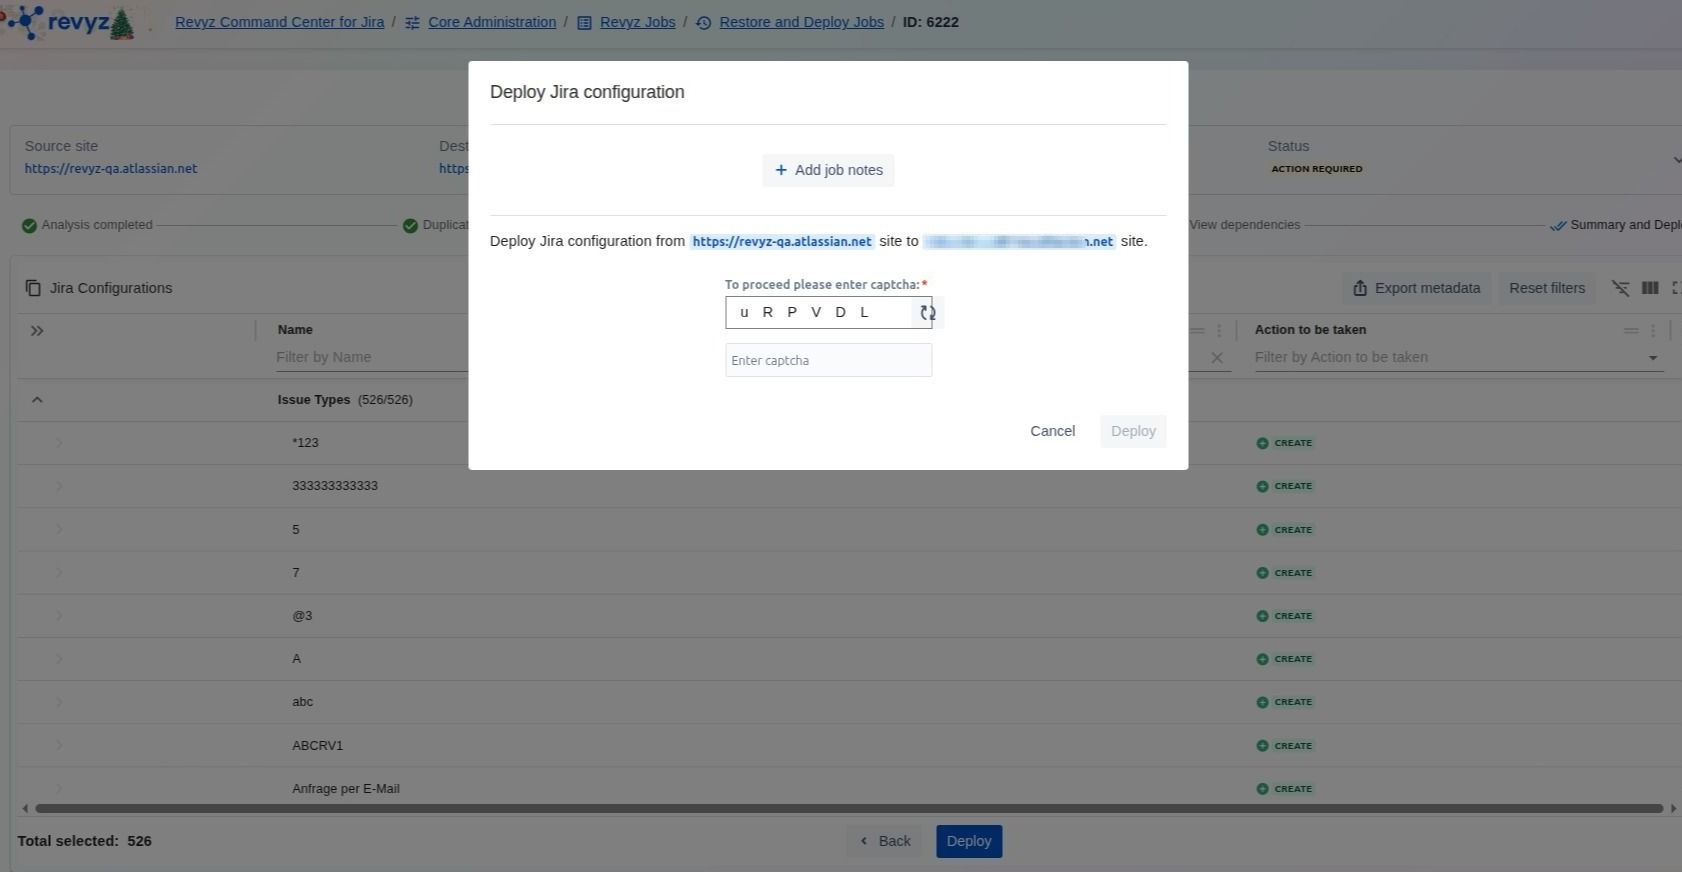
Enter the required Captcha code to authorize the deployment process and click the final Deploy button.