About this Page
This page talks about Work Items Restore feature, which allows you to perform a granular restore of individual Jira issues (work items) from a backup snapshot. It lets you select issues from a source project and restore them to the same project or a different one, even on another Jira site.
This feature is applicable to:
command center for jira
What is the Use Case?
Use this to recover one or more specific issues that were accidentally deleted or corrupted, without restoring the entire project. It is also a useful tool for migrating a specific set of issues from one project or instance to another.
How to Restore Work Items (Issues)
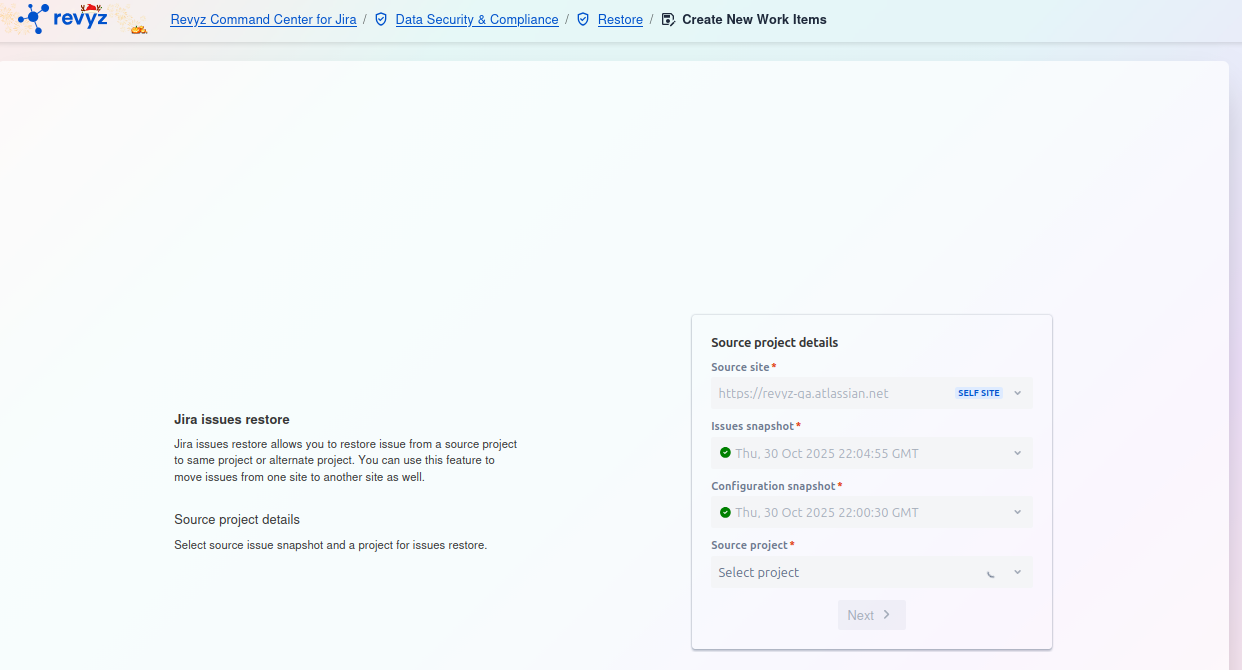
This is the first step in the "Jira issues restore" process. On this page, you must define the source of the issues you wish to restore by selecting the site, the specific snapshots, and the project.
To avoid JPD Restore failures, please follow these mandatory configuration steps to grant the Revyz app the necessary access. For more information, visit here.
Step 1: Define Source Project Details
Step 1: Define Source Project Details
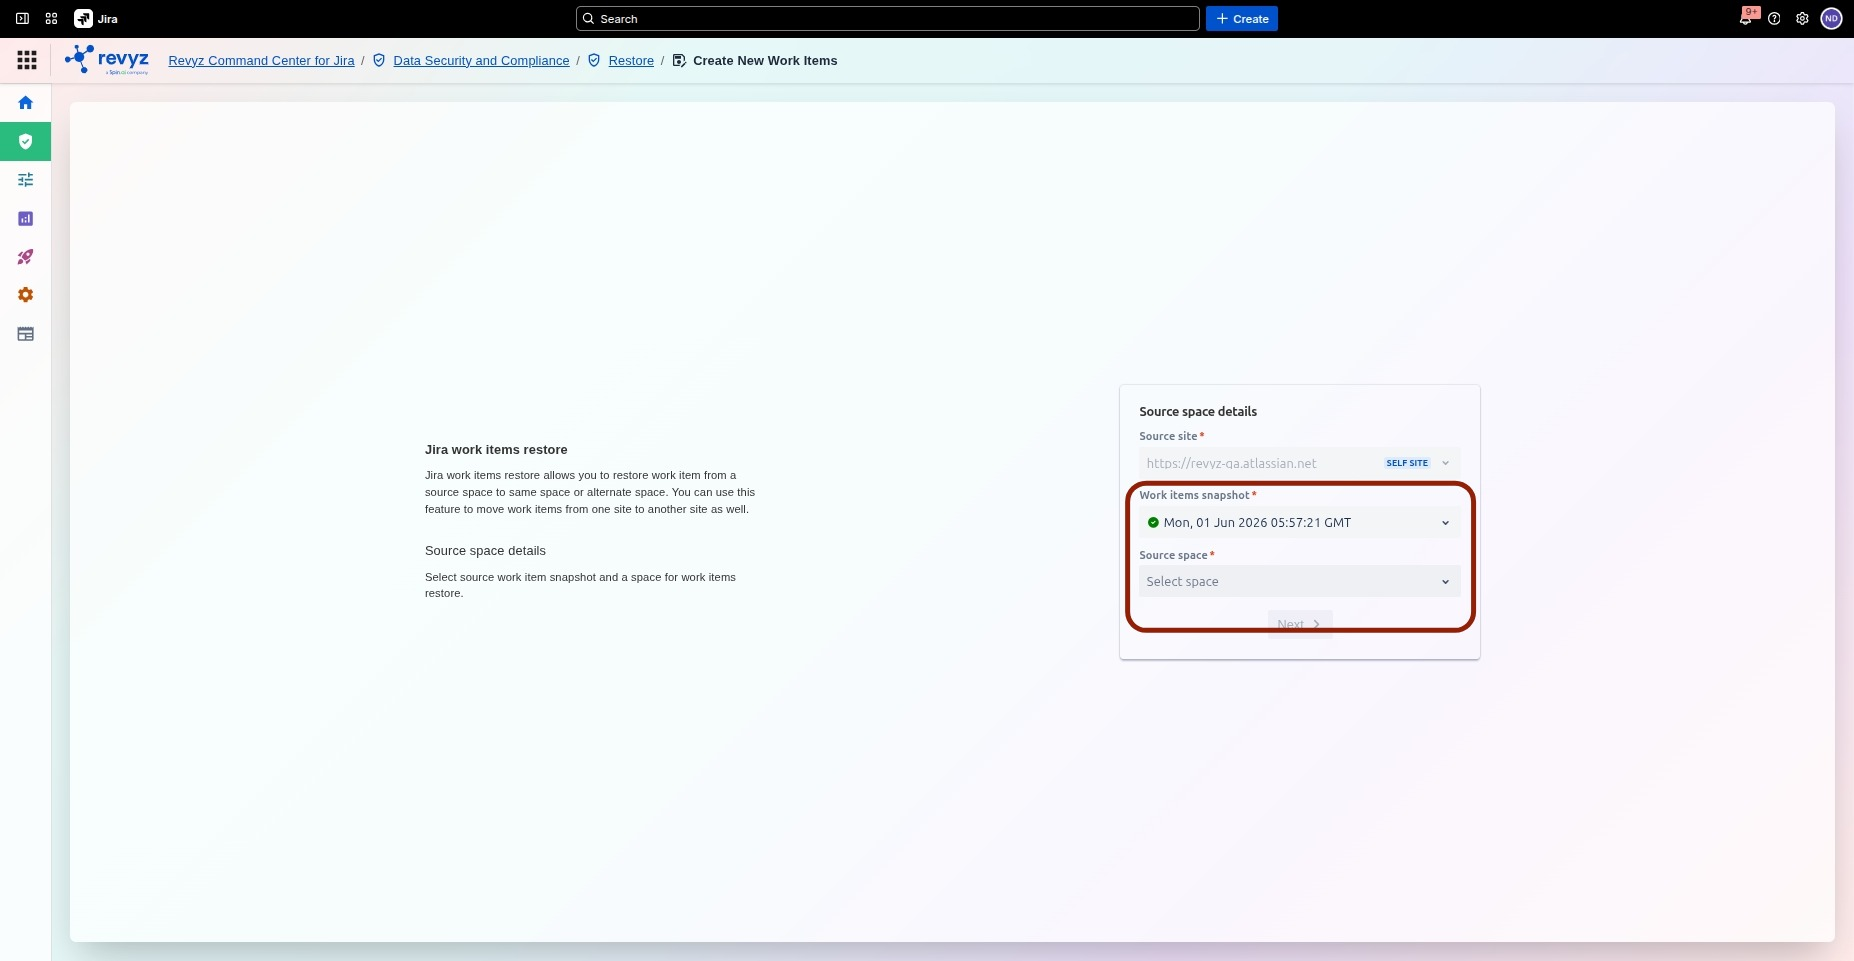
On the Jira work items restore screen, first define the source of the work items:
-
Select the Source site* from which the issues will be restored.
-
Choose a reliable Issues snapshot* and a corresponding Configuration snapshot*.
-
Select the specific Source project* containing the work items you wish to restore.
-
Click Next to proceed to the destination details.
Step 2: Define Destination Project Details
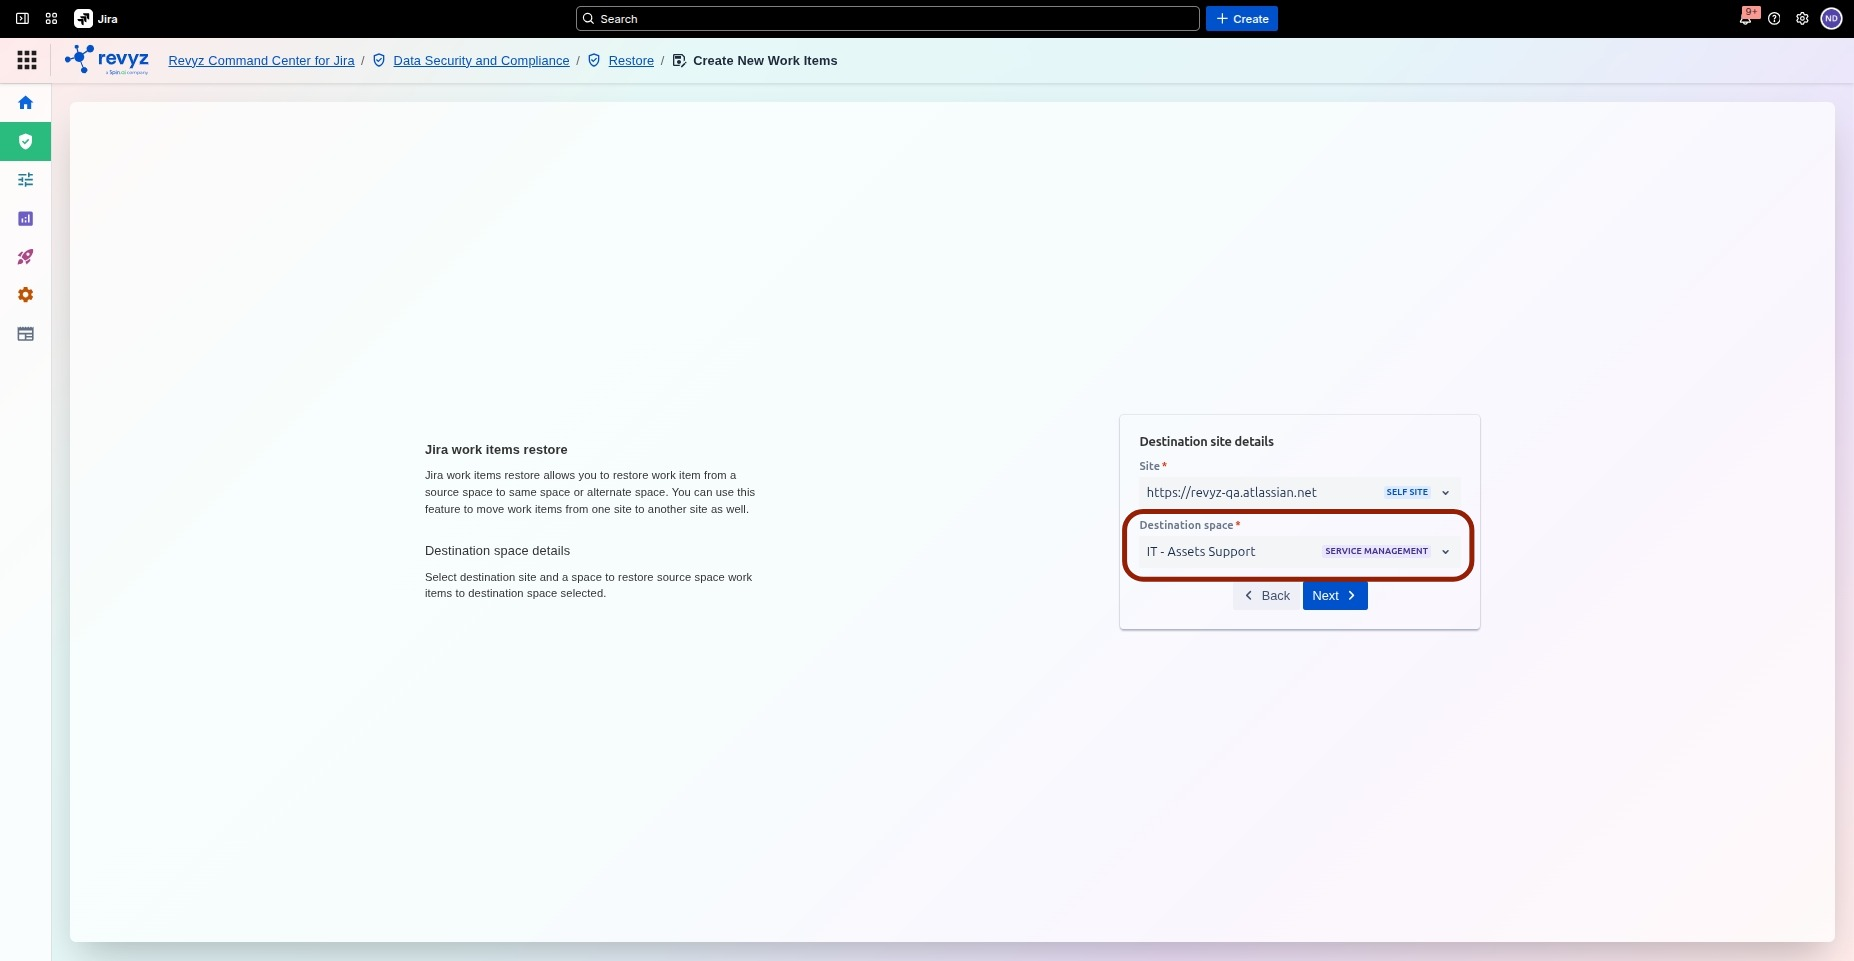
Next, specify the target location for the restoration:
-
Select the Site where the issues will be restored. This can be the source site itself or a different environment.
-
Choose the Destination project to which the source issues will be moved.
-
Click Next to proceed to the issue selection step.
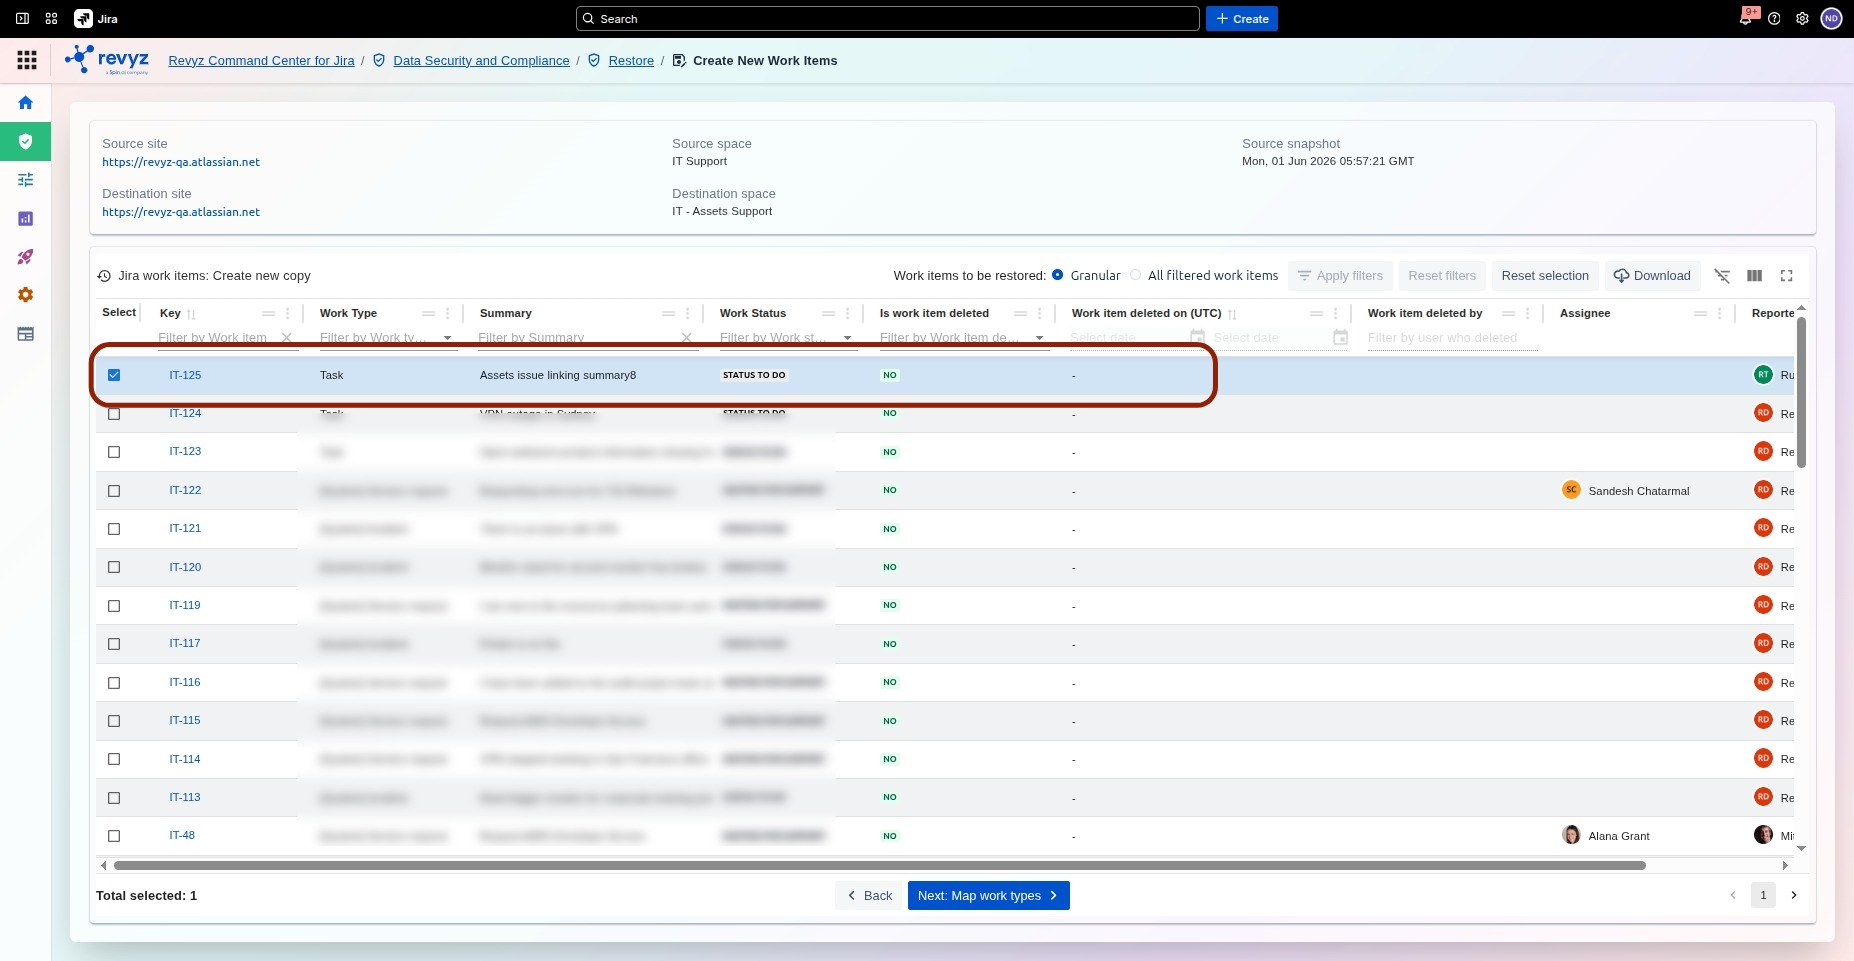
Step 3: Select Work Items for Restoration

The system will display the list of issues available in the source snapshot:
-
Use the table filters (e.g., Key, Summary, Work Type) to narrow down the list of issues, if needed.
-
Select the individual work items by checking the box next to their row. You can choose to restore all or filter to a Granular subset.
-
After selecting the required issues, click Next: Map work types at the bottom to continue with the mapping and final restoration setup.
Step 5: Select Work Items for Restoration
-
Review the Total selected count to ensure you have chosen all the correct issues for restoration.
-
Click the blue Next: Map work types button at the bottom of the screen to proceed to the configuration step where you will align the source and destination issue types.
Step 6: Work Item mapping screen
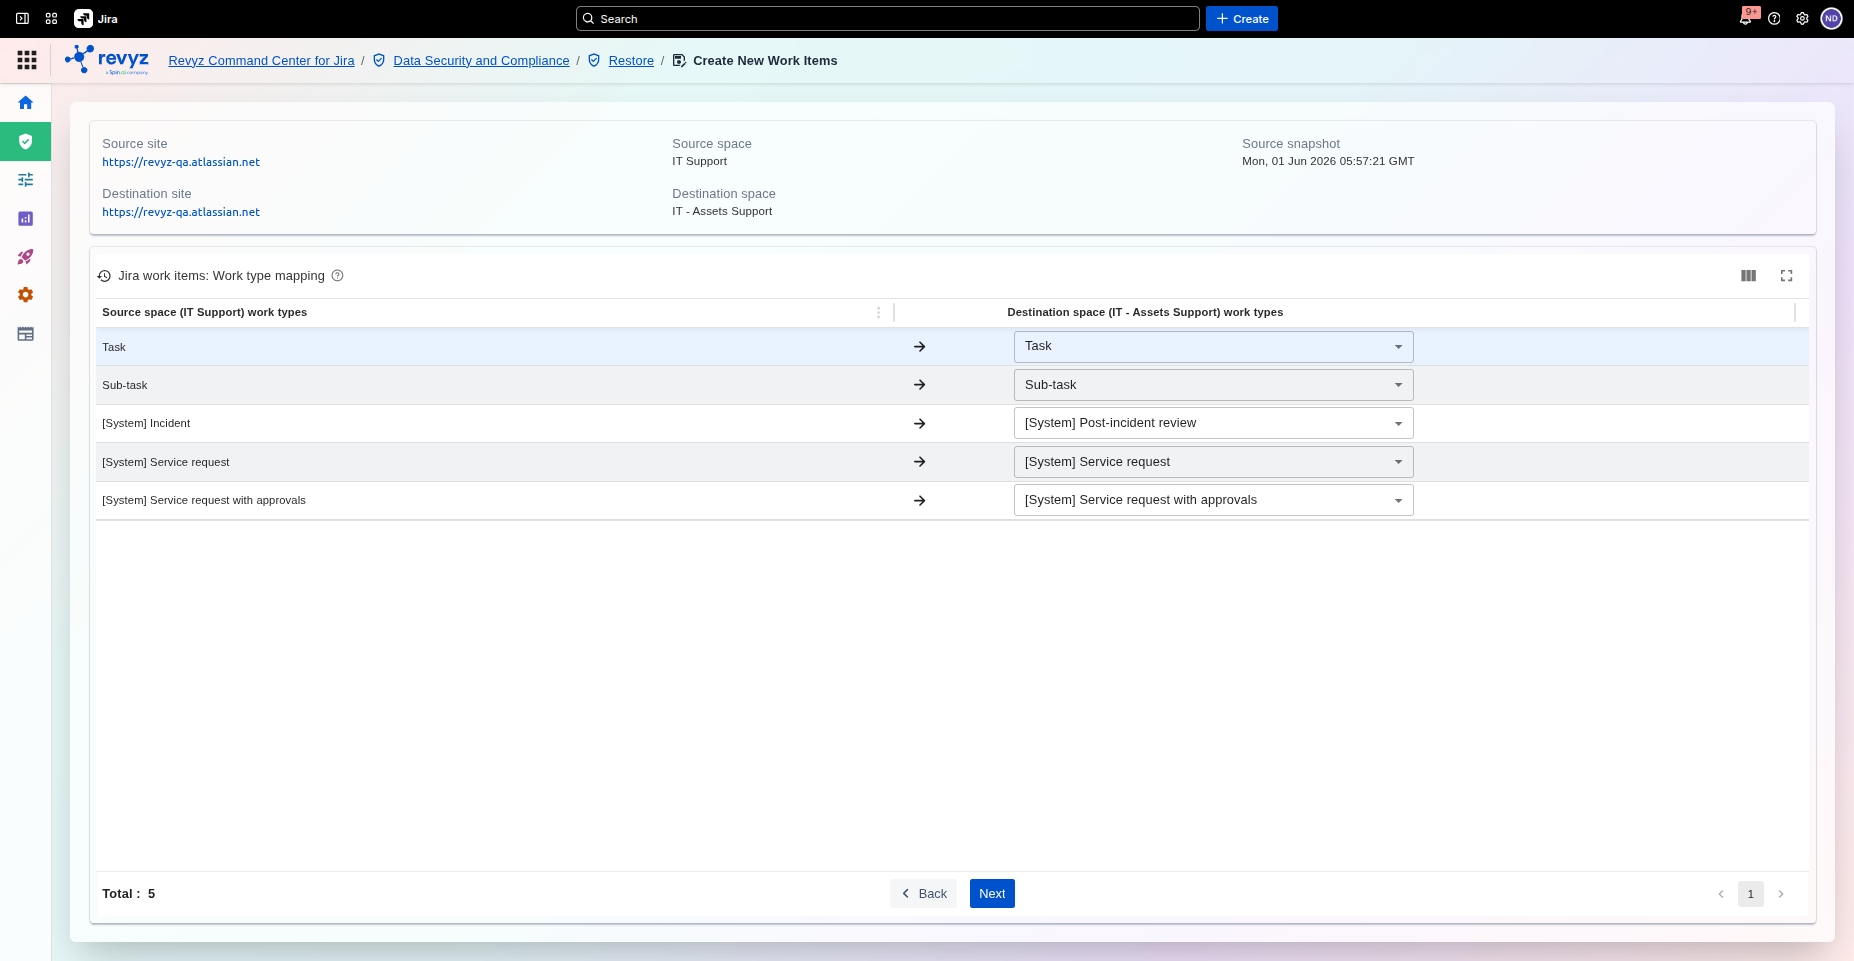
-
On the Jira Work item type mapping screen, align the issue types from your Source project with the corresponding issue types available in the Destination project.
-
Use the dropdown menu to adjust any mappings if the names are different or if you need to transform one type into another (e.g., mapping a custom source issue type to a standard destination issue type).
-
Step 7: Restore as Tempo Timesheets (optional)
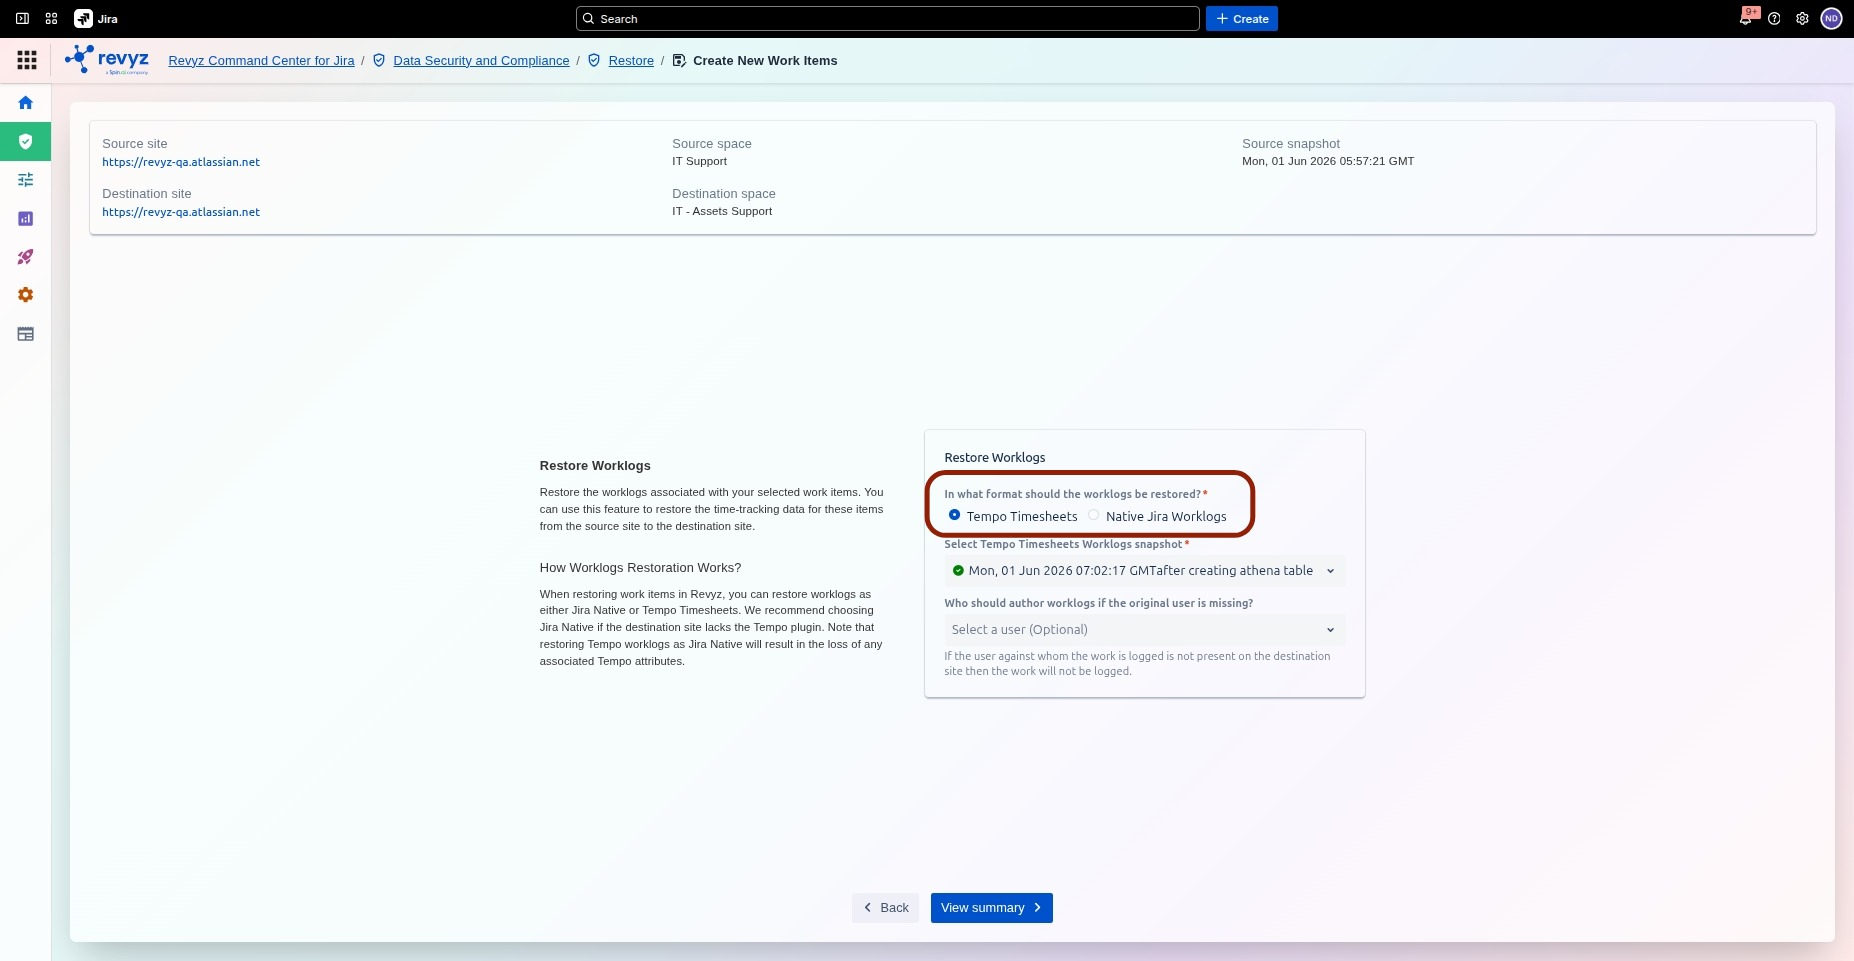
This step is optional and will only apply if you have any Tempo worklogs present in the site.
-
Filter and select the specific work items from the source snapshot that require restoration.
-
Choose the restore format (Tempo Timesheets or Native Jira Worklogs) to match the target site's configuration.
-
Note: Choosing Jira Native for Tempo data permanently removes Tempo-specific attributes and custom metadata.
-
-
Select an optional fallback user to author worklogs if the original user is missing from the destination site.
-
Note: If a fallback user is not specified, worklogs from missing users will fail to import entirely.
-
-
Click View summary to review your selections and finalize the restoration setup.
For detailed steps on how to restore worklogs as Tempo Timesheets, visit here.
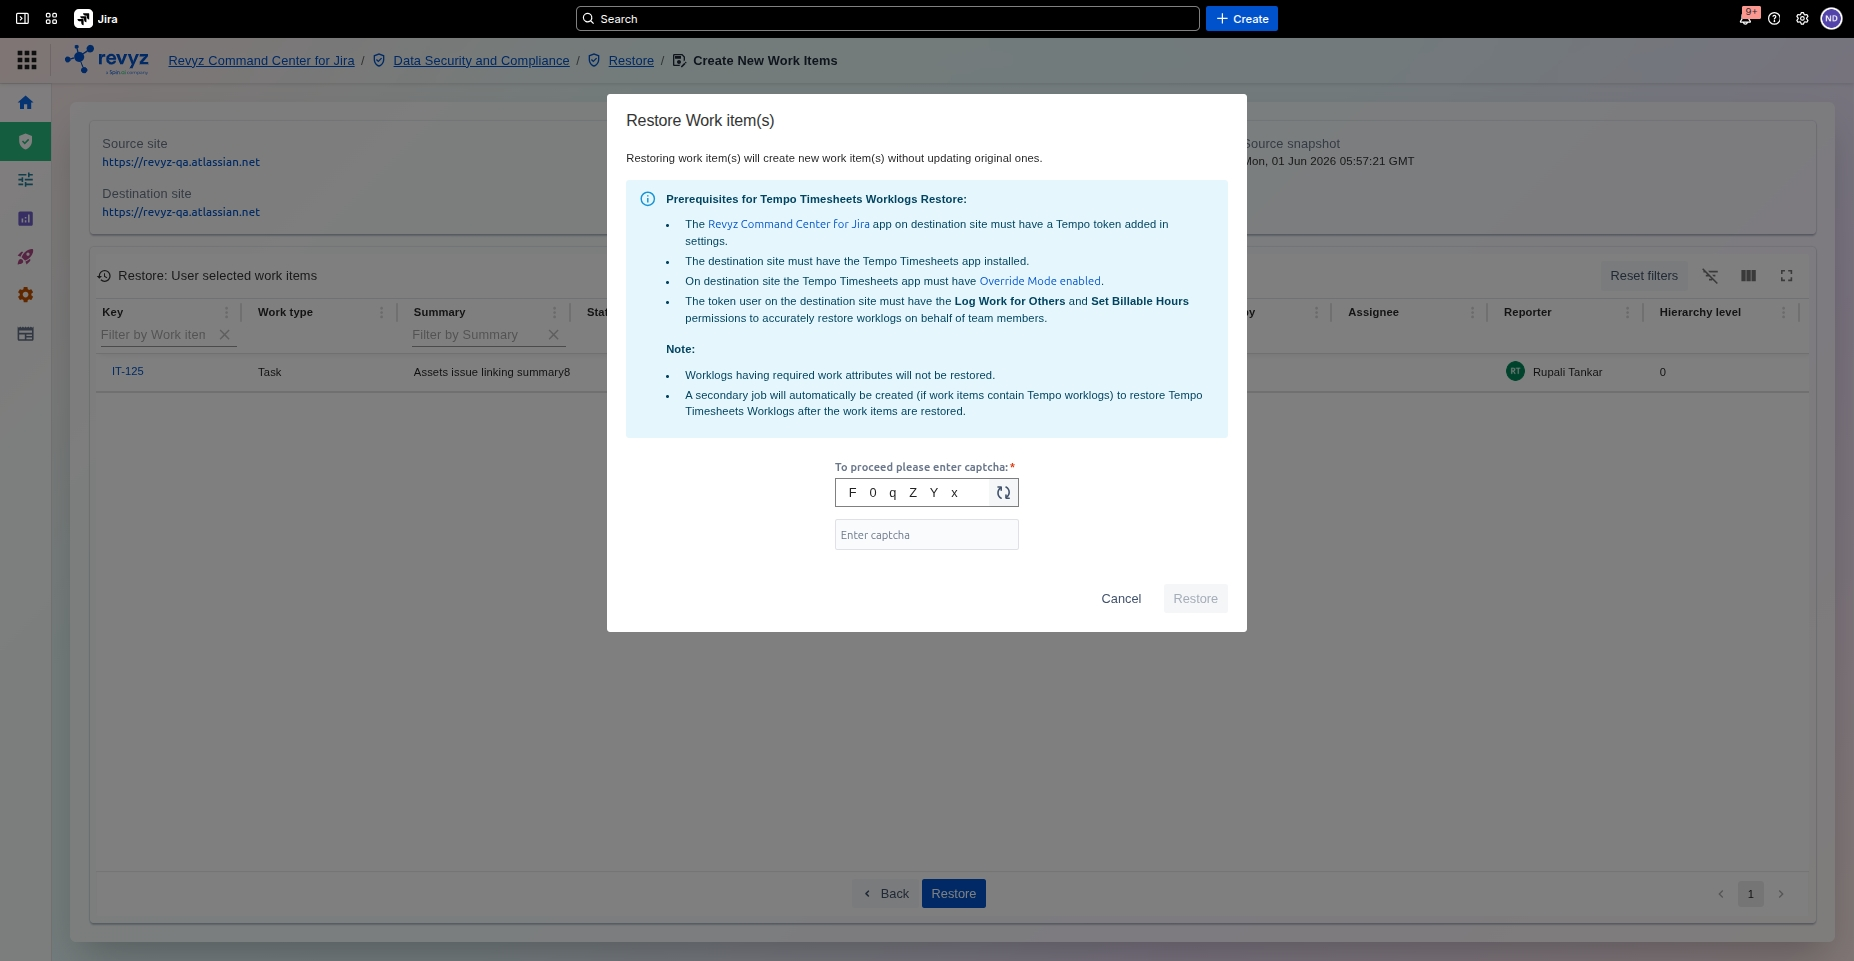
Step 7: Review and Initiate Restore

-
Review the final Restore: User selected issues summary table, ensuring the list of issues, issue types, and other details are correct for restoration.
-
Verify the Source and Destination details listed at the top.
-
If the entire configuration is correct, click the prominent blue Restore button at the bottom to initiate the job and create the new work items in your destination project.
Enter the CAPTCHA code to complete the process.
Step 8: Confirmation window
Click on Restore to proceed.