About this Page
This feature is a high-availability setting that allows you to establish a trusted, pre-authenticated connection between two separate Jira Cloud sites. It provides a dashboard to activate and manage these links, which authorize a "destination site" to pull data from a "source site" in an emergency.
What is the use case?
The use case is for a "cold-standby" disaster recovery strategy. An administrator uses this to link their primary Jira instance to a secondary, standby instance. If the primary site becomes completely inaccessible due to a major outage, this trusted connection allows the admin to log into the standby site and initiate a "pull" to recover critical data and restore operations.
This feature is applicable to:
command center for jira config manager for jira assets data manager for jira
Disaster Recovery Connections
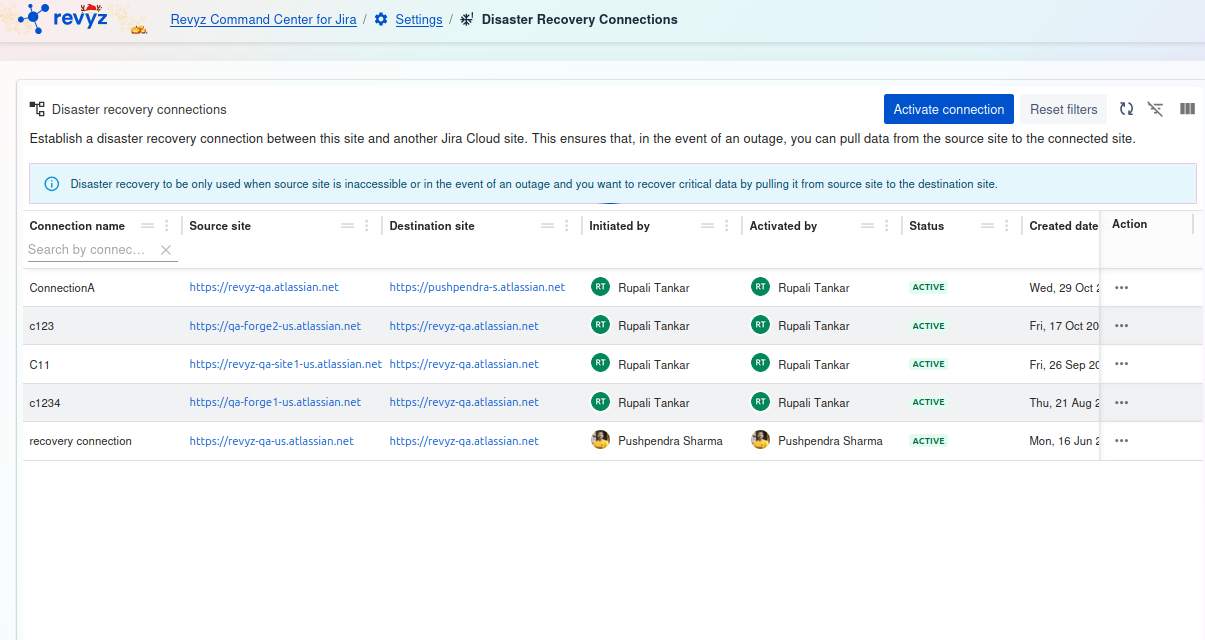
This page is the central hub for managing the connections between your primary Jira Cloud
site and another site for the purpose disaster recovery.
The goal is to establish a secure link between this site and another Jira Cloud site. This ensures that in the event of an outage, you can pull data from the source site to the connected site.
Connection Types
We offer two primary methods for connecting your sites: Cross-Site Connection and Disaster Recovery (DR) Connection, each designed for a specific purpose.
Available Actions
At the top right of the screen, you will find two main actions:
1. + Add recovery connection
Click this button to begin the process of setting up a new disaster recovery connection to another Jira Cloud site.

2. Activate connection
This button is used to activate an existing, pre-configured connection, typically during a migration event or a disaster recovery scenario.

Disaster Recovery Setup
A proactive setup is a mandatory step to ensure the Disaster Recovery feature works when a disaster occurs.
1. Proactive Setup (Before an Outage)
Establishing a connection before an emergency occurs is highly recommended to minimize downtime.
Step 1: Access Settings

-
Log into the Revyz Command Center for Jira.
-
Navigate to Settings and then select Disaster Recovery Connections.
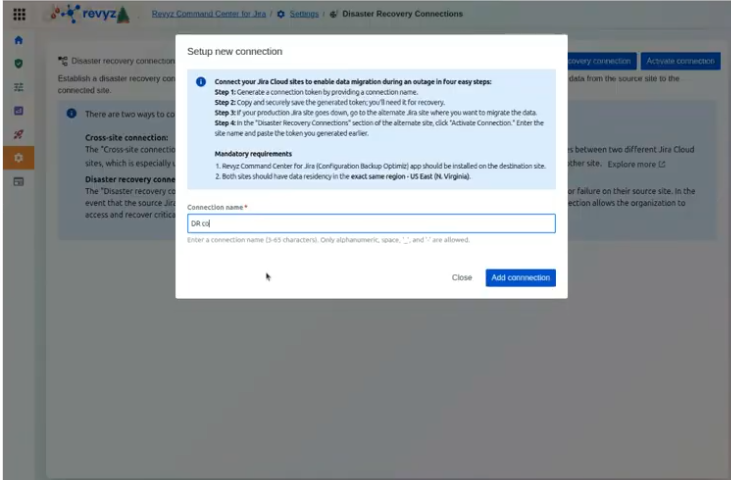
Step 2: Generate a Connection Token
-
Click + Add recovery connection.
-
Enter a Connection name (3–65 characters; alphanumeric, spaces,
_, or-are allowed). -
Click Add connection to generate your unique recovery token.
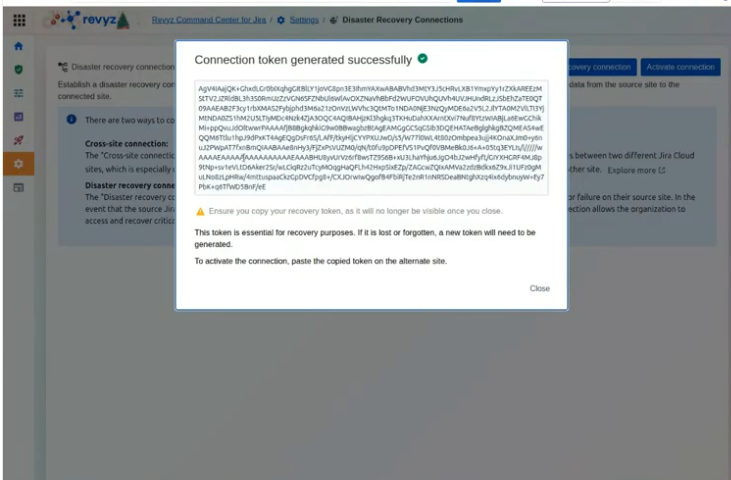
Step 3: Secure Your Token
-
Copy the token immediately.
-
Crucial: This token will no longer be accessible once you close the window.
-
Store the token in a secure location (e.g., a password manager) according to your organization's security policies.
2. Activating the Connection
Option A: Immediate Setup (Recommended)
If you have a standby site ready, navigate to that site’s Revyz app, click Activate connection, and enter the Source Site URL and the Recovery Token.
Option B: Activation During an Outage

If you do not have a fallback site ready, store the token safely. You will perform the activation steps below on your fallback site only when a disaster occurs.
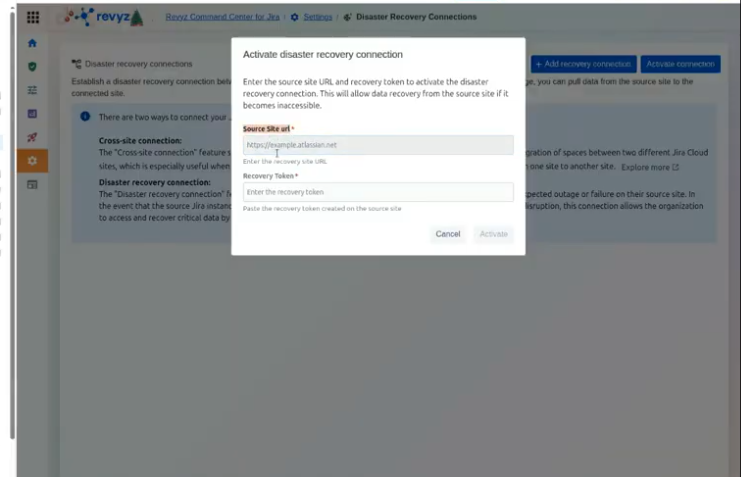
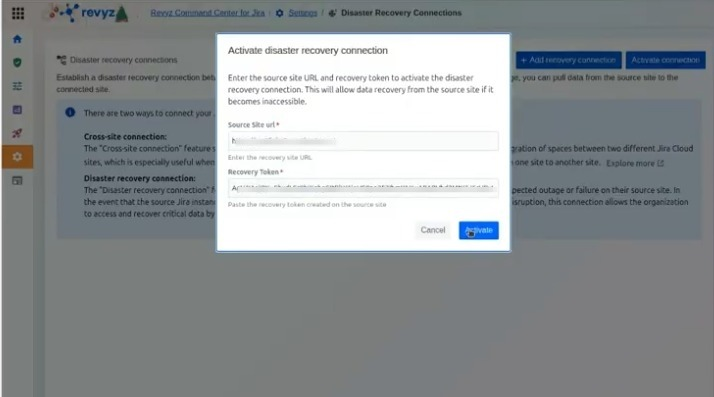
To Activate:
-
On the standby/fallback site, navigate to Disaster Recovery Connections.
-
Click Activate connection.
-
Provide the Source Site URL (the URL of the affected site) and paste the Recovery Token.
-
Click Activate.
3. Mandatory Security Verification
To protect your data from unauthorized access, a proactive connection is not immediately usable for recovery.
Verfication process


To protect your data from unauthorized access, a proactive connection is not immediately usable for recovery.
-
Support Activation Required: For security, the "Recover site" feature must be manually enabled by the Revyz support team.
-
Verification Process: Once the connection is established and active, you must Contact Support.
-
Checks: The support team will verify email addresses and other details to ensure the recovery request is legitimate before unlocking the feature.
Steps to take when the site is down: