About this Page
This tool allows you to copy all the specific configuration schemes (like workflows, screen schemes, and permission schemes) that are actively in use by one or more selected projects.
What is the Use Case?
Use this to migrate a specific project or a group of projects to another instance. It ensures you only bring over the necessary configurations, preventing clutter on the new instance.
This feature is applicable to:
command center for jira config manager for jira
How to Deploy Spaces (Create New)?
Step 1: Navigating the Deploy feature

Click on “Deploy Configurations”
Step 2: Click on Deploy Spaces
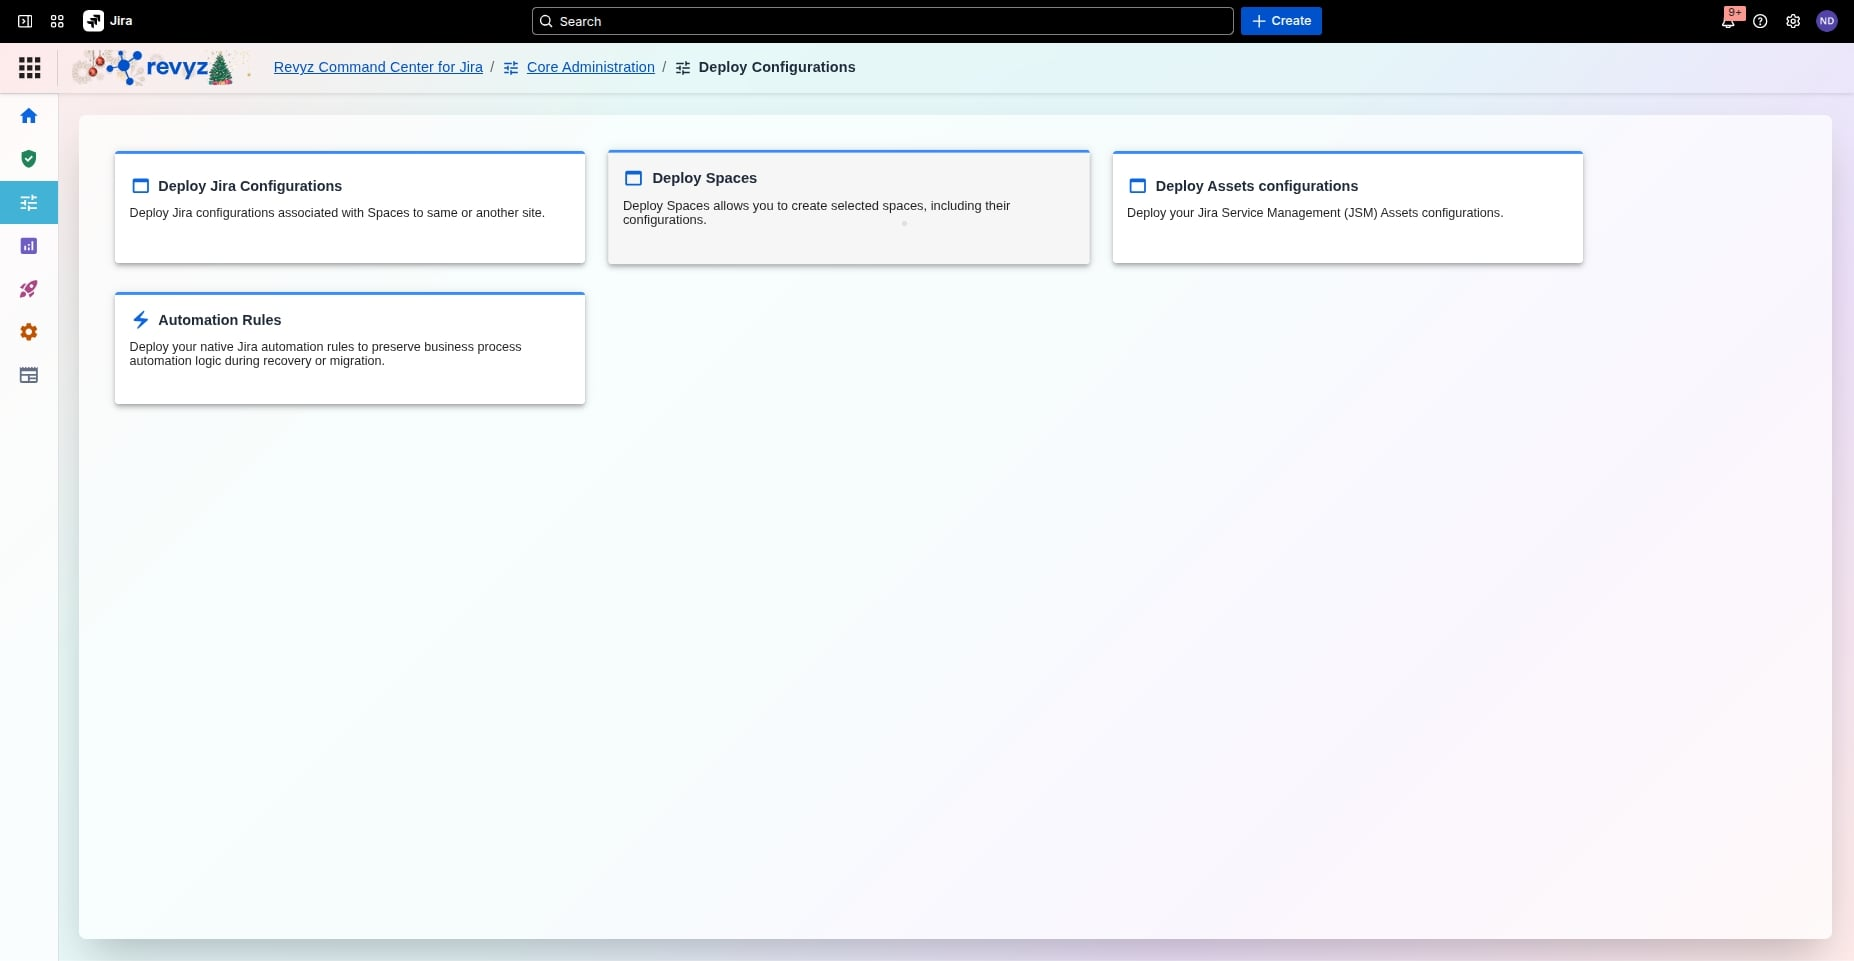
Click on “Deploy Spaces”
Step 3: Select Create New Copy or Update
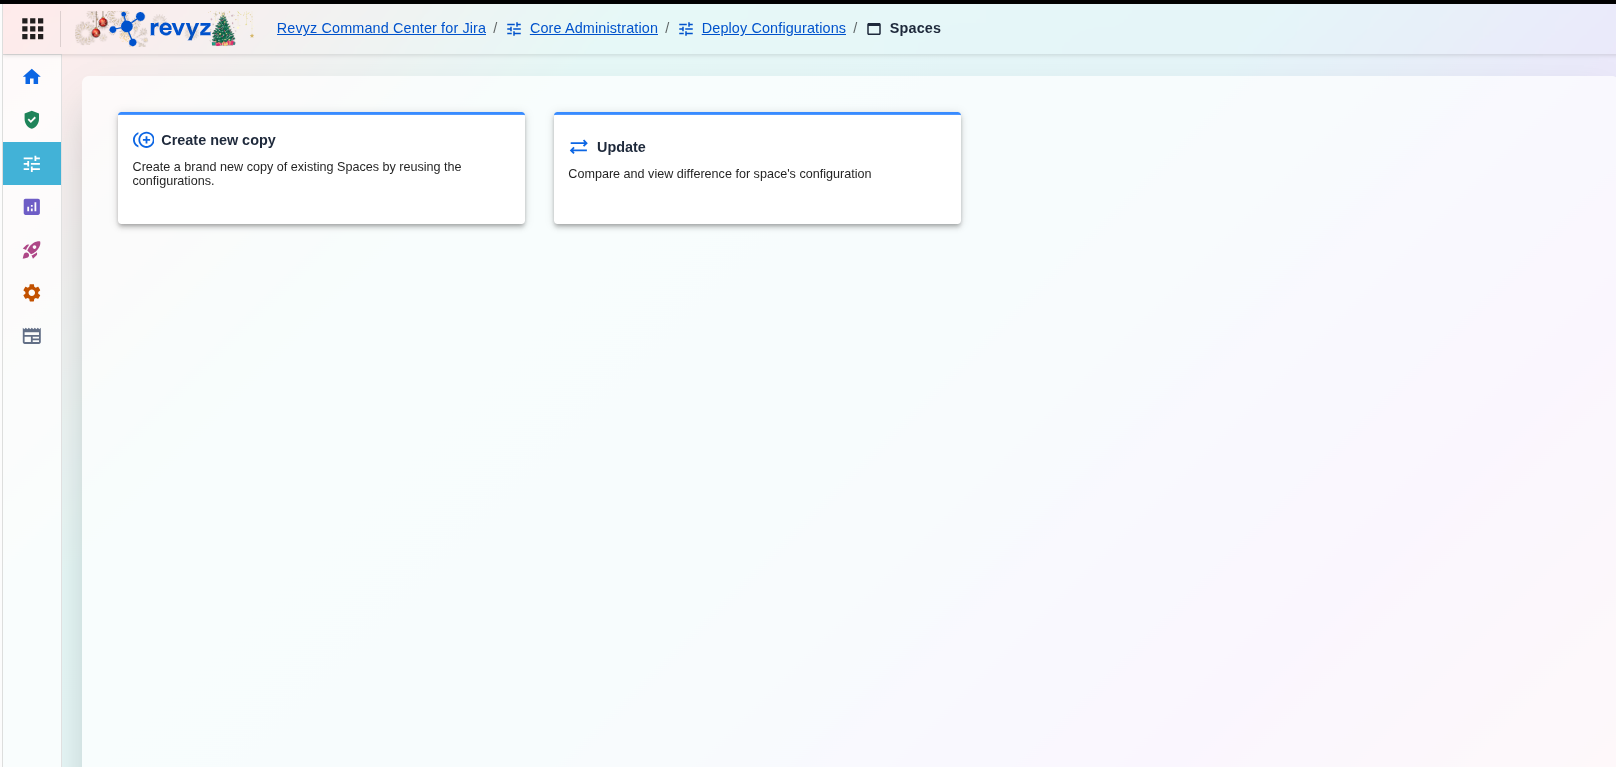
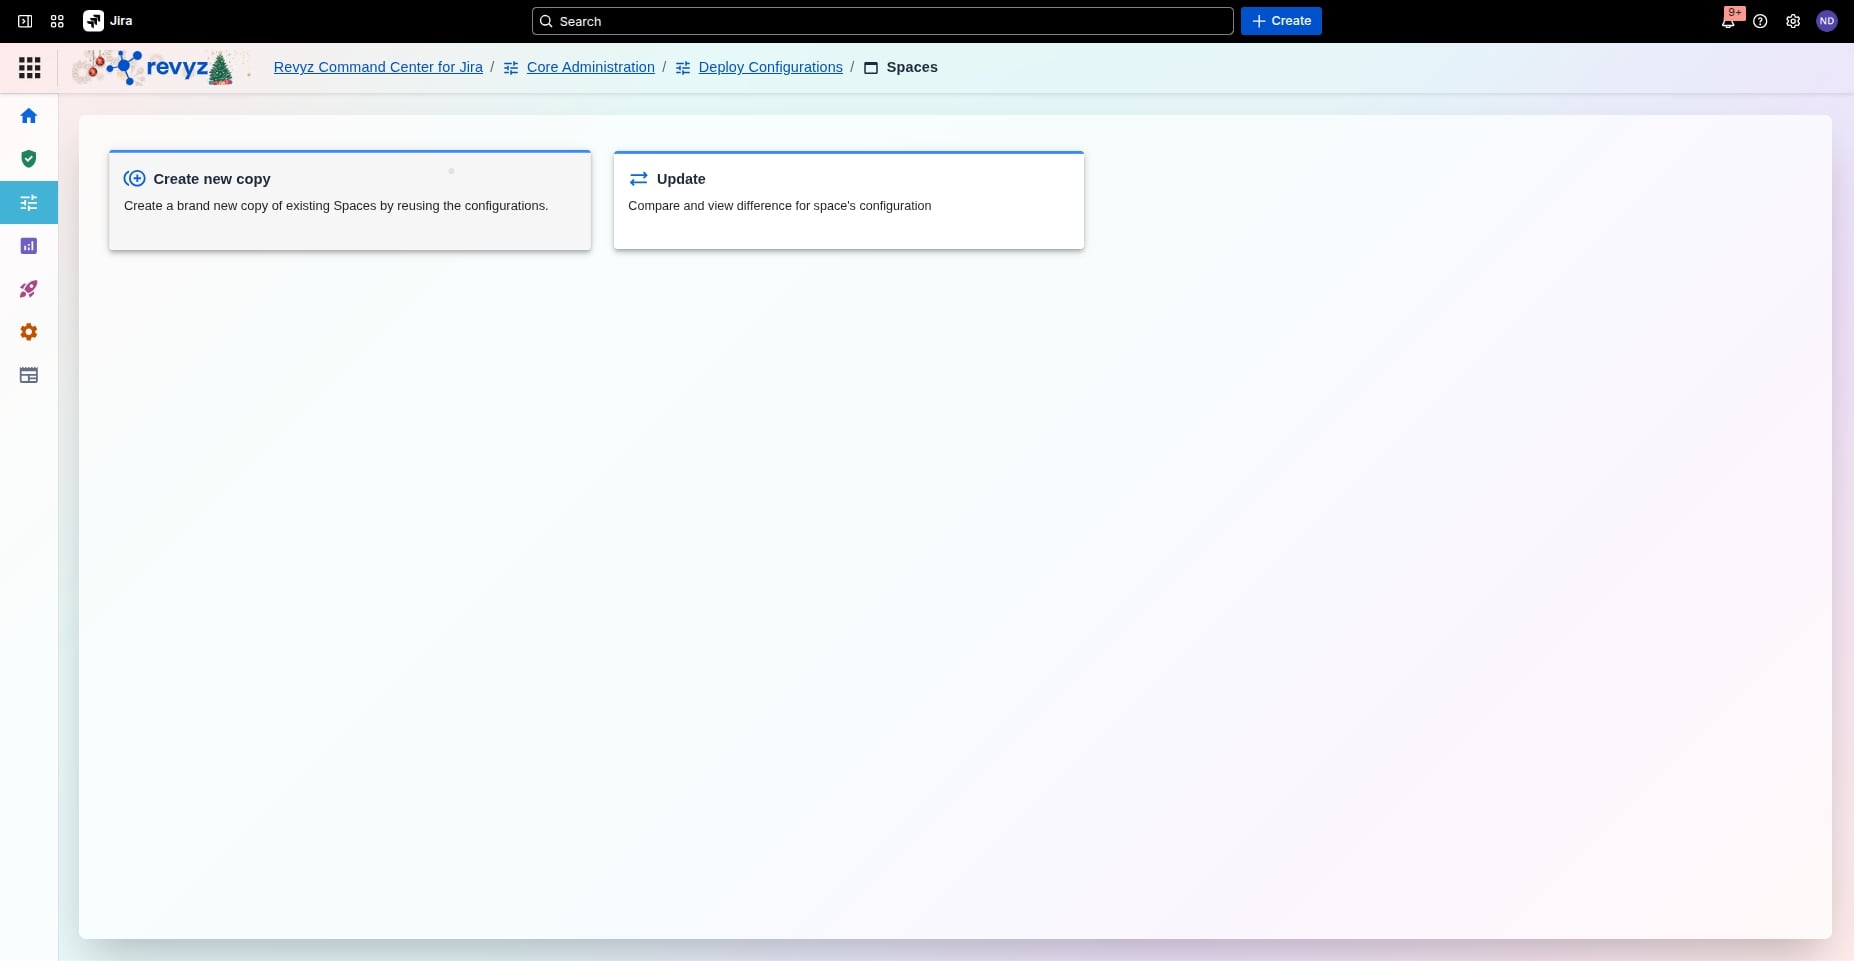
The center of the screen presents two interactive cards for managing "Spaces".
|
Create new copy |
Allows users to create a brand-new copy of existing Spaces by reusing current configurations. |
|
Update |
Focused on auditing; it lets users compare and view differences in space configurations. |
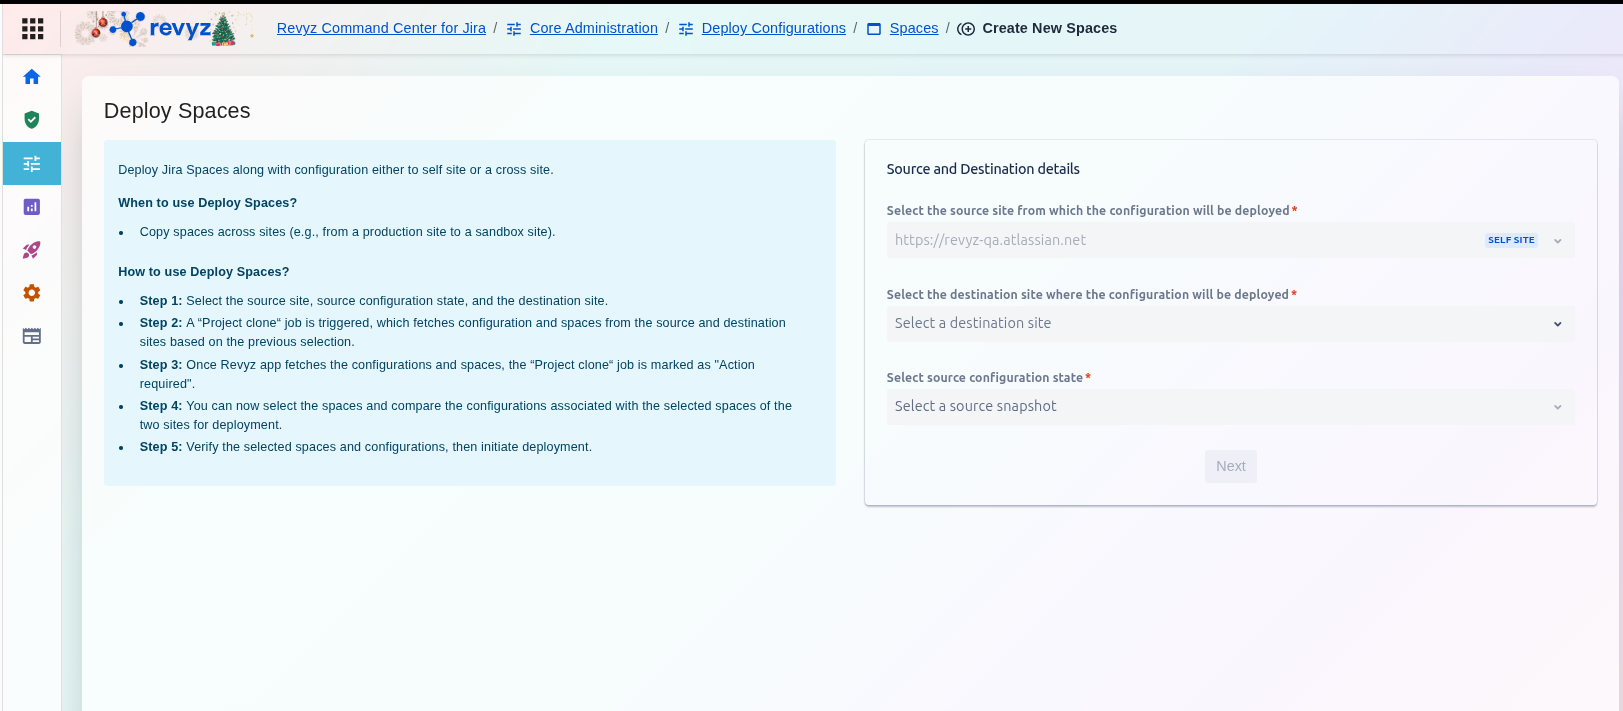
How to Deploy Spaces
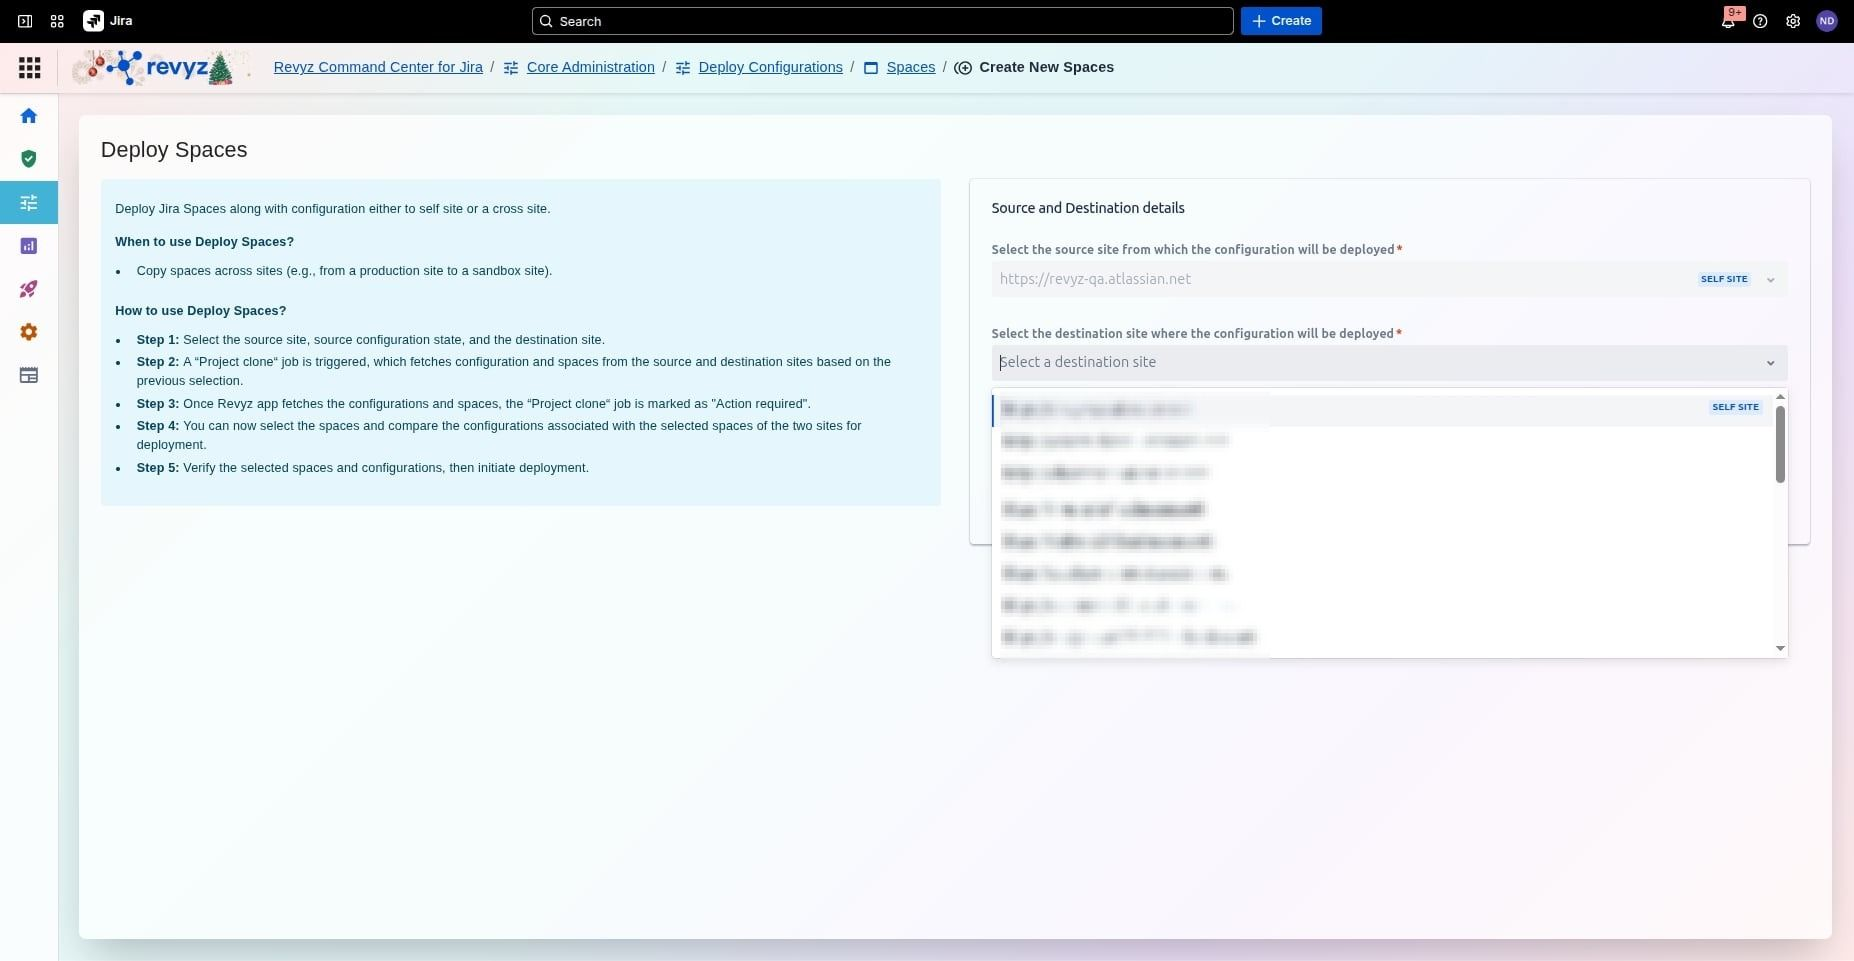
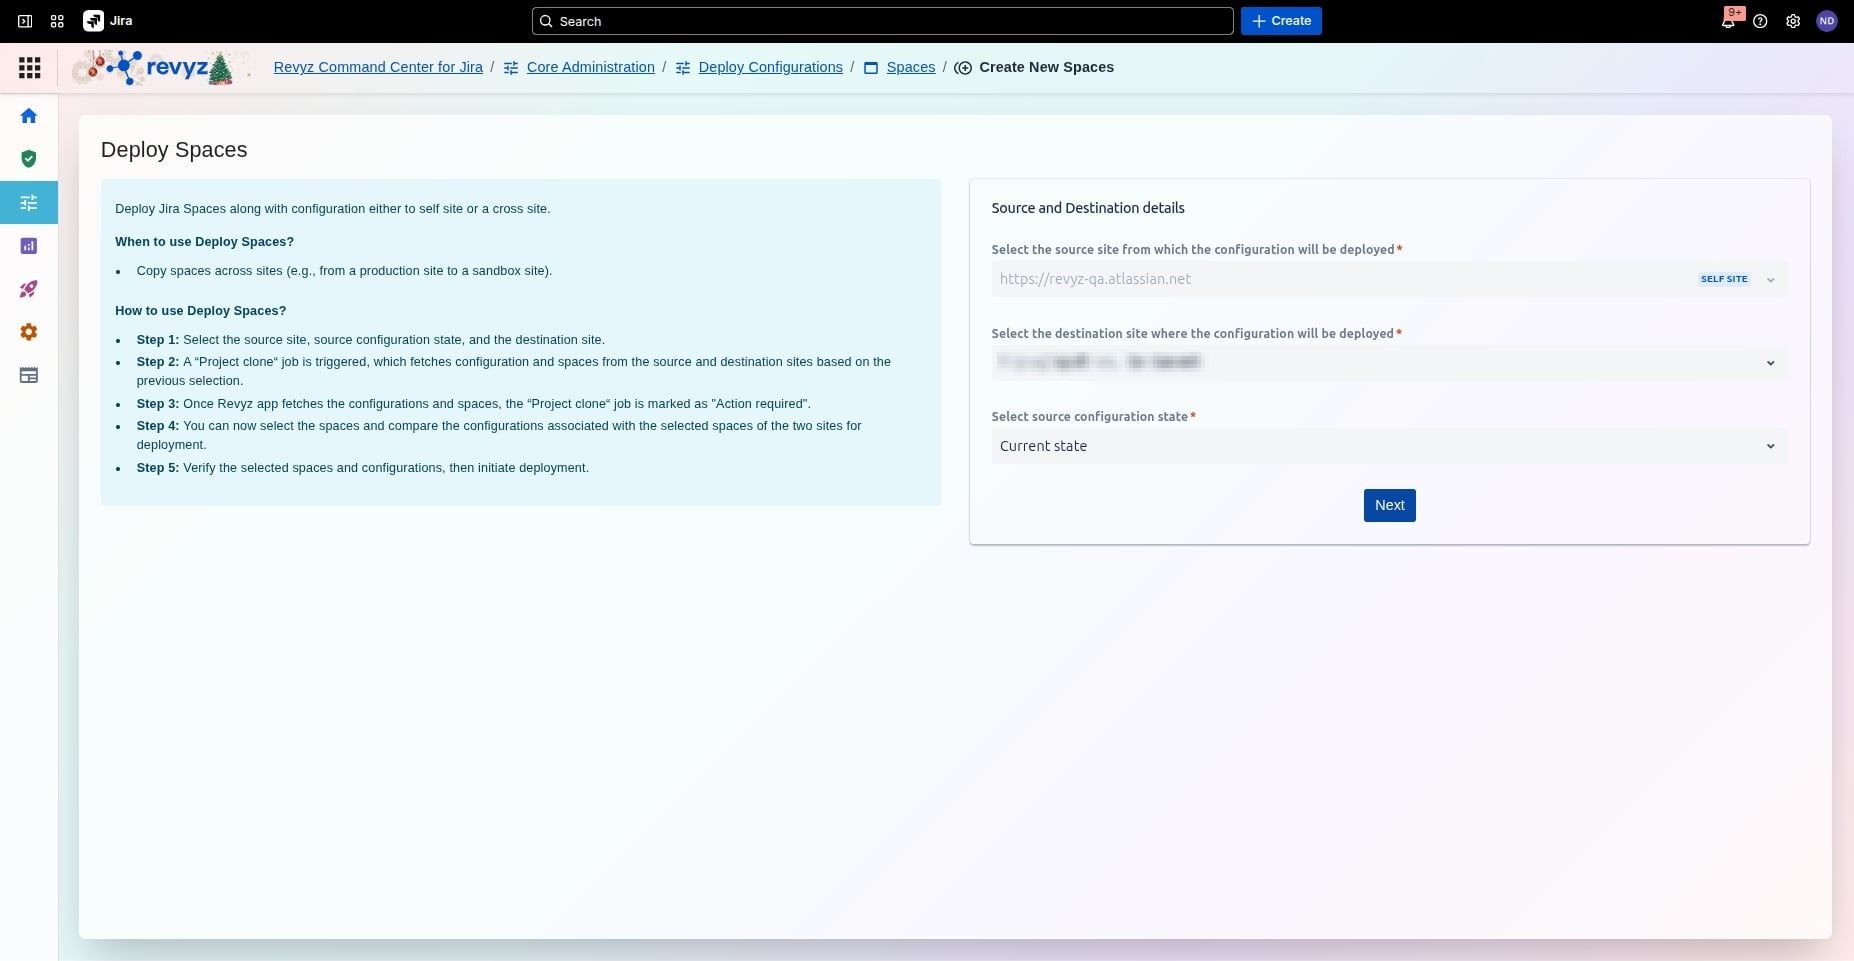
Step 1: Define Source Site Details
-
Select Source: Choose the source site from which the configuration will be deployed.
-
Select Destination: Choose the destination site where the configuration will be applied.
-
Trigger Analysis: Click Next to trigger a "Jira configuration clone" job, which fetches configuration data from both sites.
Step 2: Select Source Configuration State

Select the source configuration state: current or snapshot from earlier backups done.
Selecting the Source Configuration State is essential because it provides version control for your Jira environment, allowing you to choose between the live Current state or a historical Snapshot. This ensures you can either deploy the most recent changes or revert to a previously known stable configuration to fix errors or accidental deletions. By using a snapshot, you can confidently sync environments like Sandboxes and Production based on a specific, validated point in time.
Step 3: Selection Spaces Module
In the Spaces module, you can efficiently manage your Jira Service Management environments by duplicating existing
Structures or auditing current setups. You have the option to create a new copy to quickly replicate configurations for new projects, or use the Update feature to compare and view specific differences within a space's configuration.
Step 4: Transition the job status

Revyz will perform a deep comparison of both sites to identify all configurations and their inter-dependencies. The job status will transition to Analyzing.
-
Verify Sites: Confirm the Source and Destination instances are correctly assigned.
-
Check State: Ensure the Source configuration state (e.g., "Current state") reflects the version you intend to move.
-
Start Analysis: Click Confirm to create a deployment job and begin the automated dependency analysis.
-
Next Step: Wait for the job status to transition to Analyzing before proceeding to the configuration comparison.
Step 5: Click on the "Next" button
Following that, click the Confirm button to proceed with your deployment configuration.
Step 6: Click on "Confirm" button
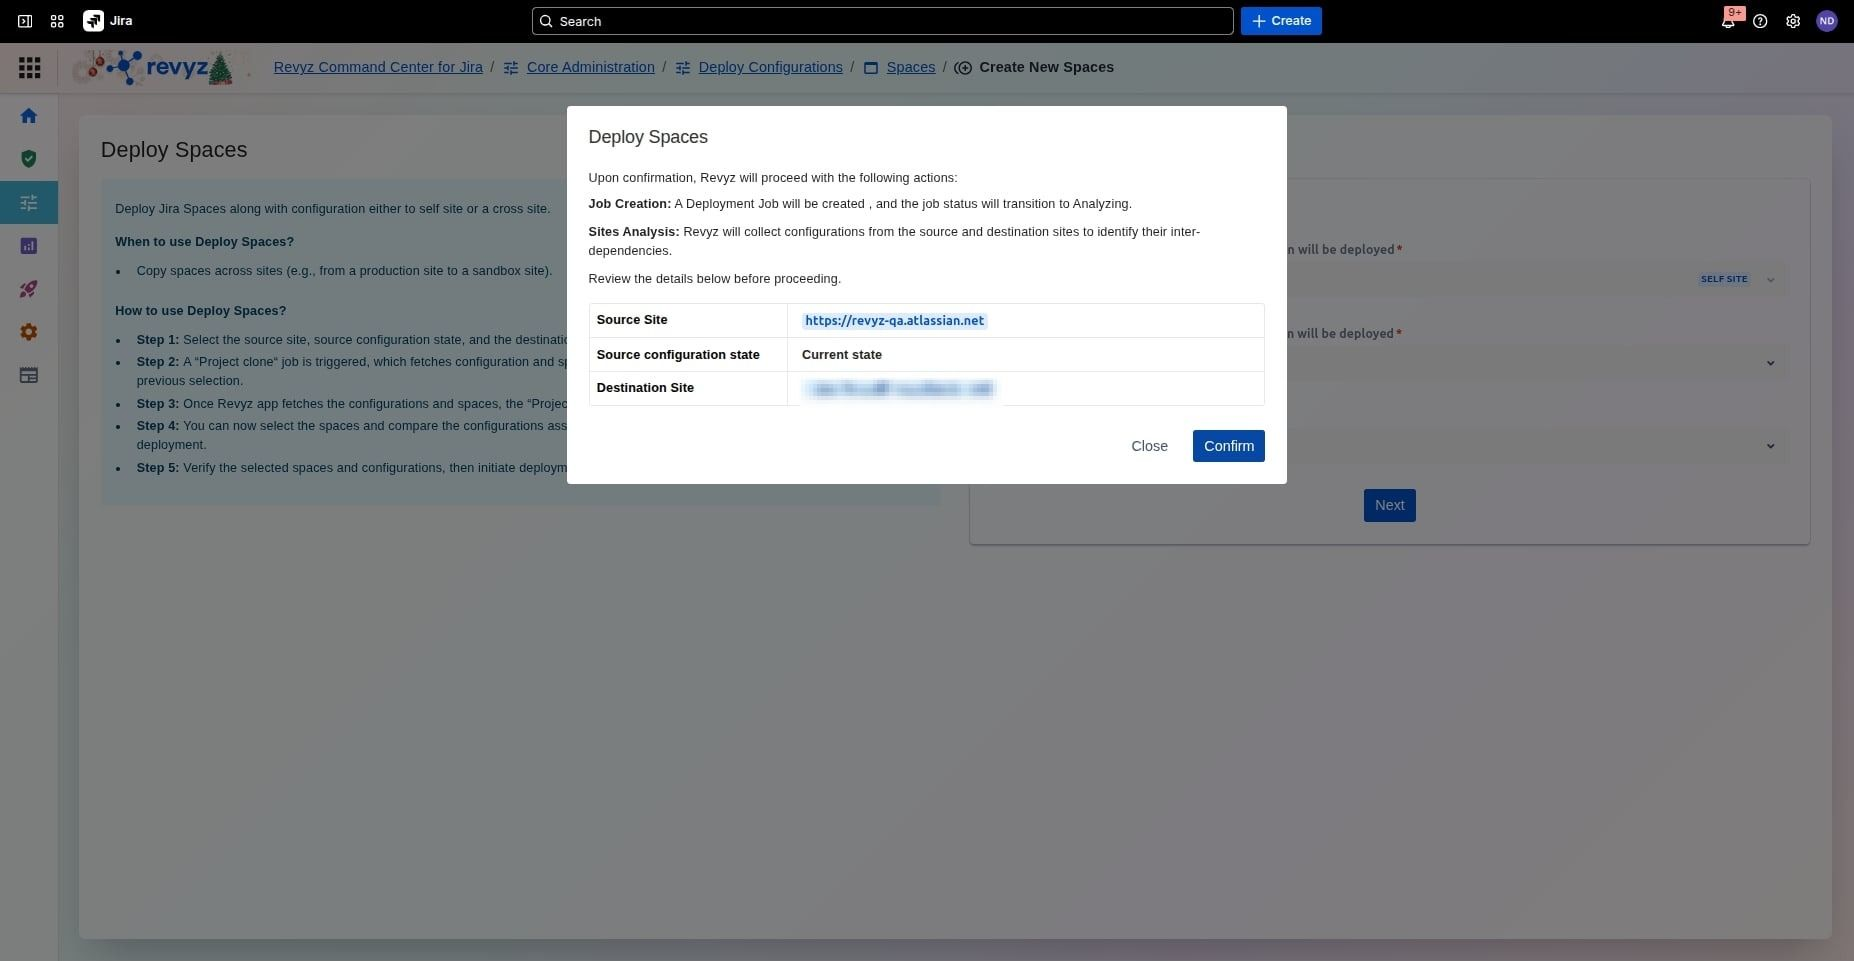
Click on “Confirm” button to proceed with the deployment configuration.
Revyz will perform a deep comparison of both sites to identify all configurations and their inter-dependencies. The job status will transition to Analyzing.
-
Verify Sites: Confirm the Source and Destination instances are correctly assigned.
-
Check State: Ensure the Source configuration state (e.g., "Current state") reflects the version you intend to move.
-
Start Analysis: Click Confirm to create a deployment job and begin the automated dependency analysis.
-
Next Step: Wait for the job status to transition to Analyzing before proceeding to the configuration comparison.
Step 7: See the job status
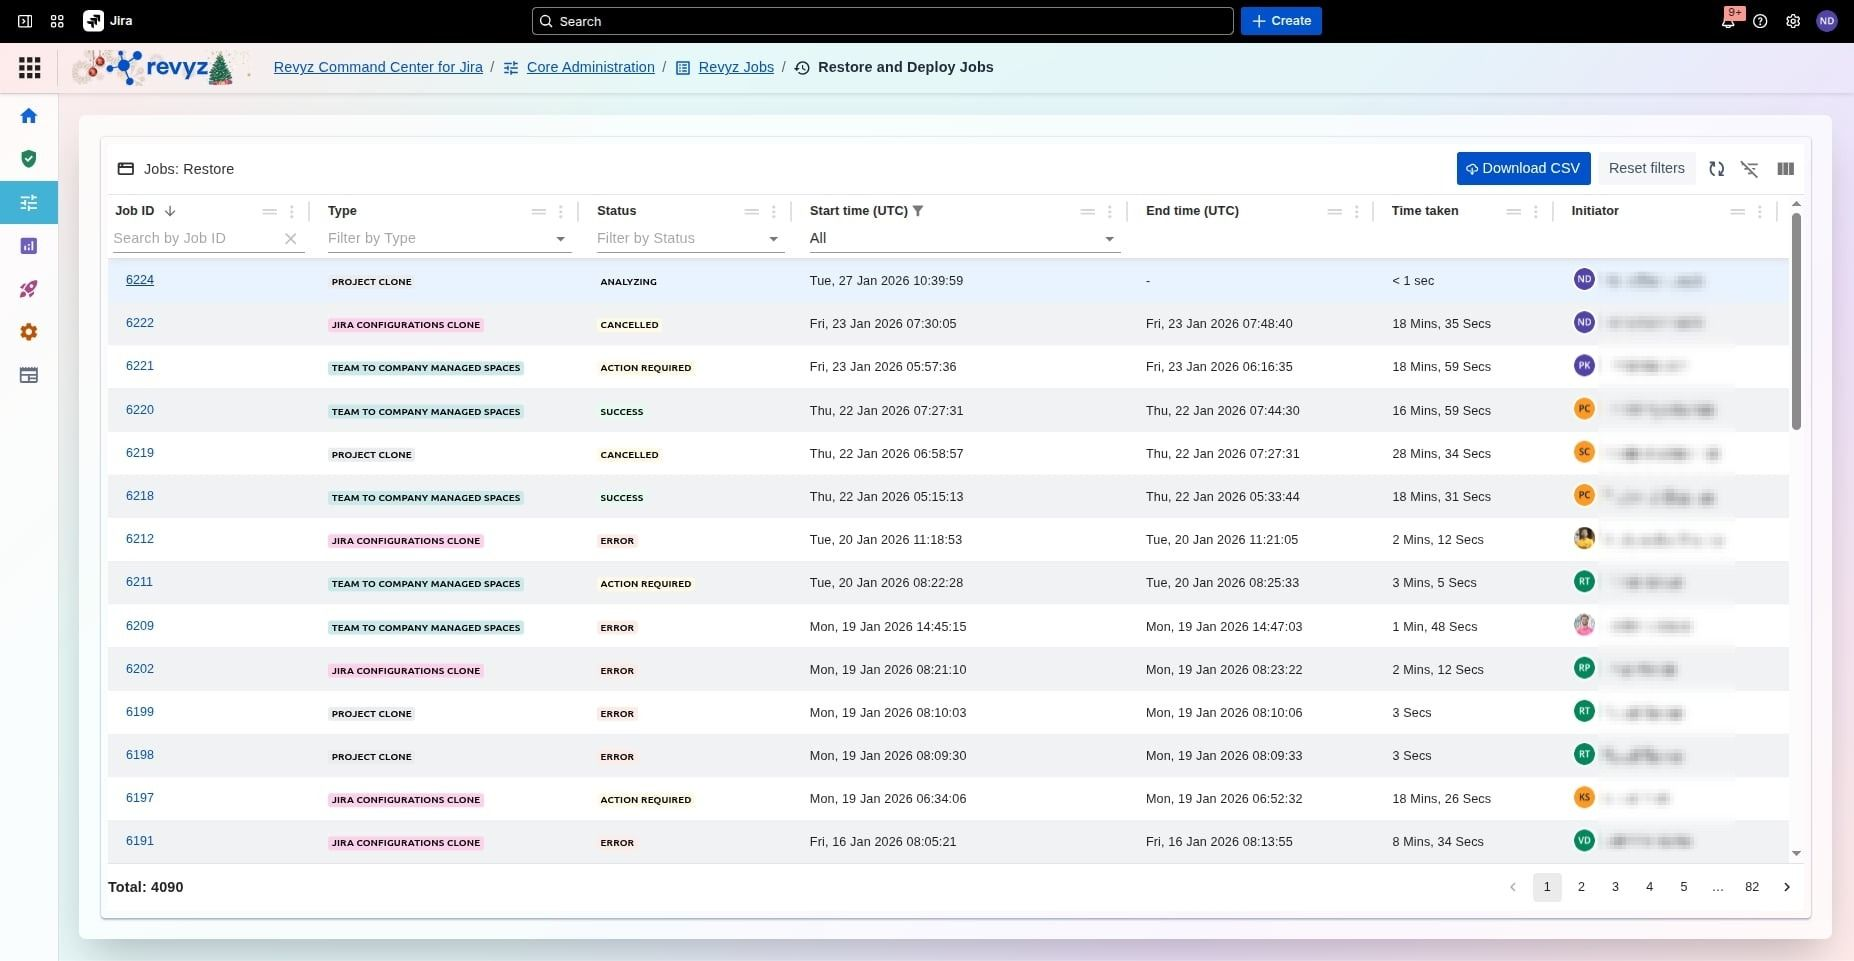
Click on the job id to check the relevant “Project Clone” details.
Step 8: Click on Next
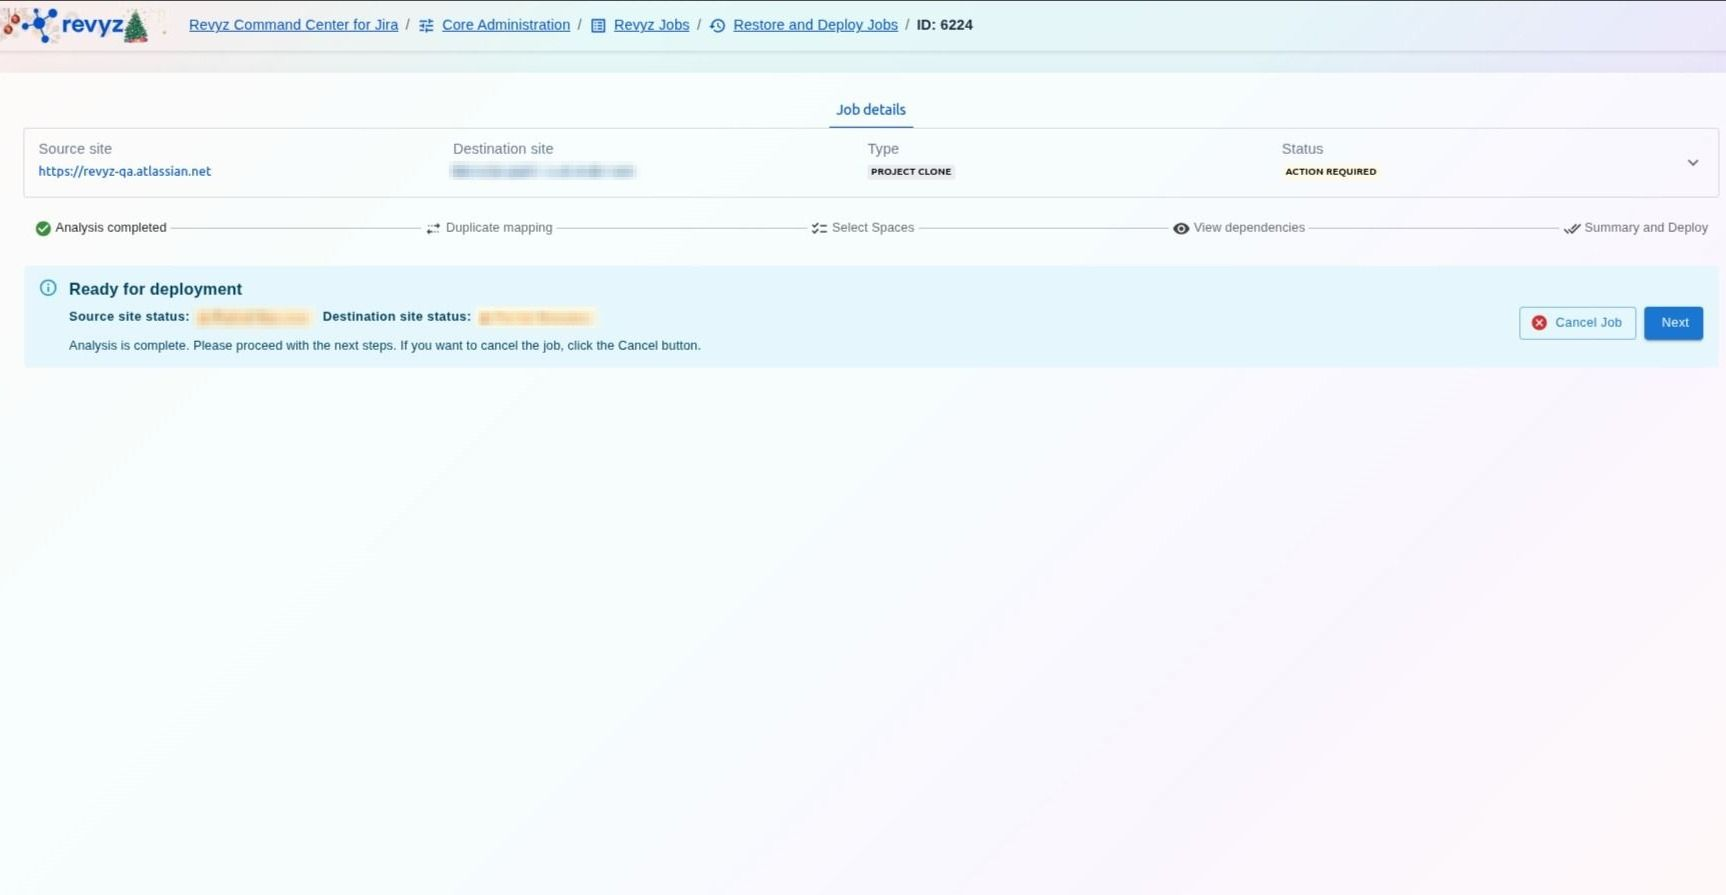
Once the analysis is marked as Action Required, click the Next button to move into the configuration mapping stage.
If the job is marked as an Error (instead of Action Required):
This error may occur because the incremental backups that were triggered for either of the sites might have failed. To understand why the job is an error, go to the logs. If they are unclear, you can reach out to support.
Step 9: Show Spaces
In the Spaces section, you can create brand new copies of your existing environments by reusing their current configurations or use the Update tool to compare and view specific differences in a space's setup. Within the Duplicate configurations mapping interface, you can manage how specific data fields, such as hardware types or custom IDs, translate from your source site to your destination. This workflow ensures you have full control over field mapping and can resolve any duplicate dependencies before finalizing your project clone.
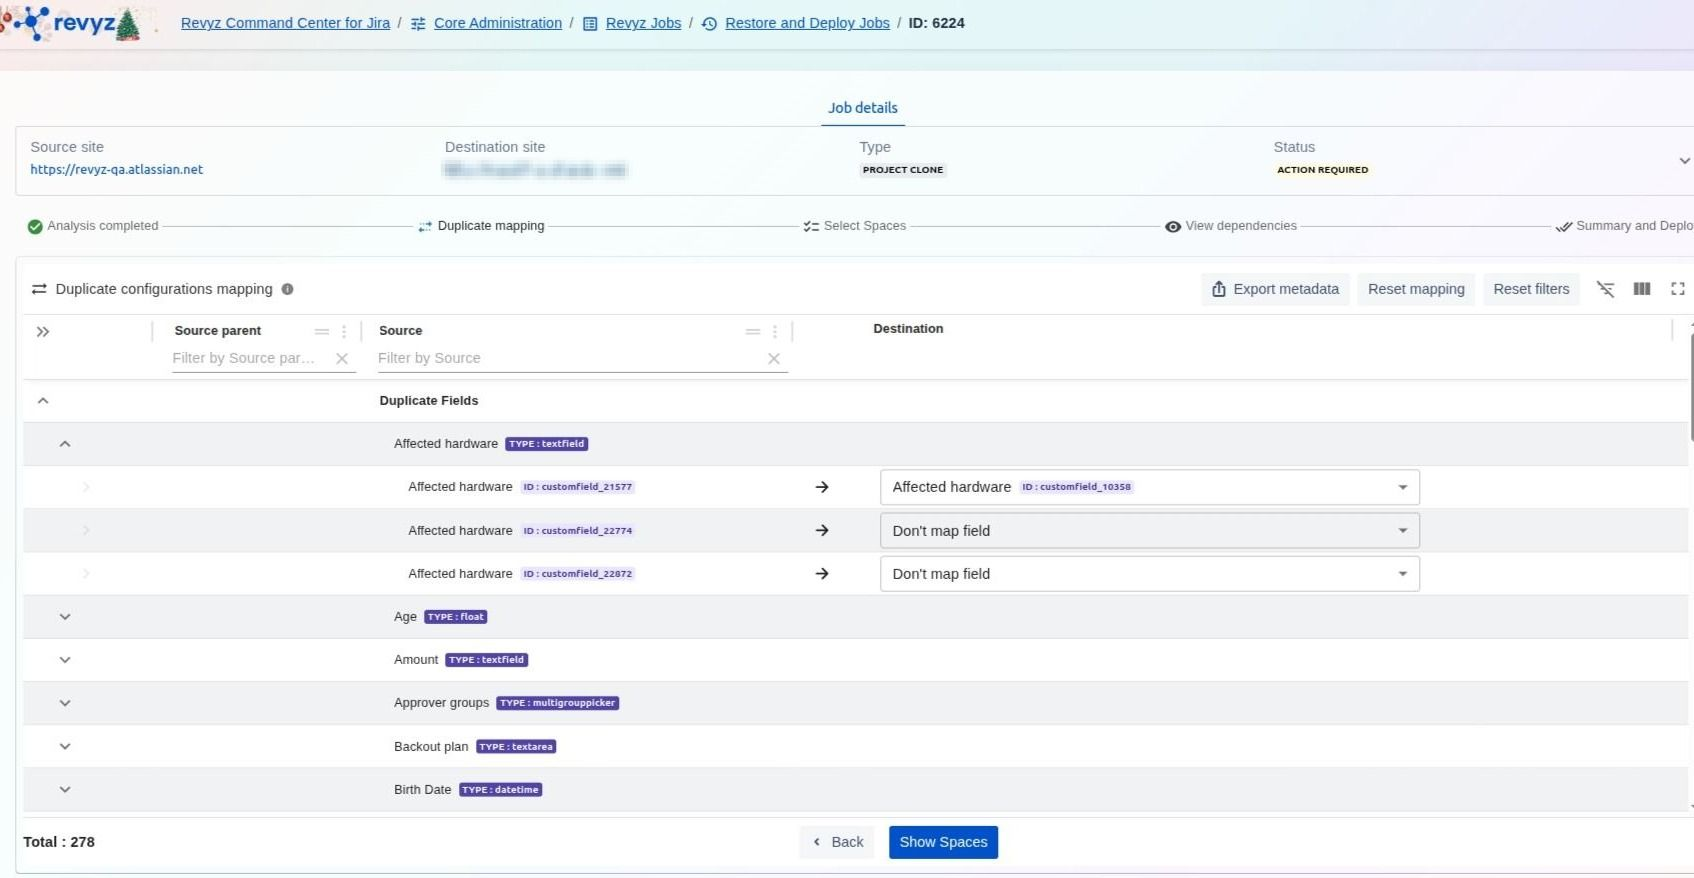
Step 10: Duplicate Configurations Mapping
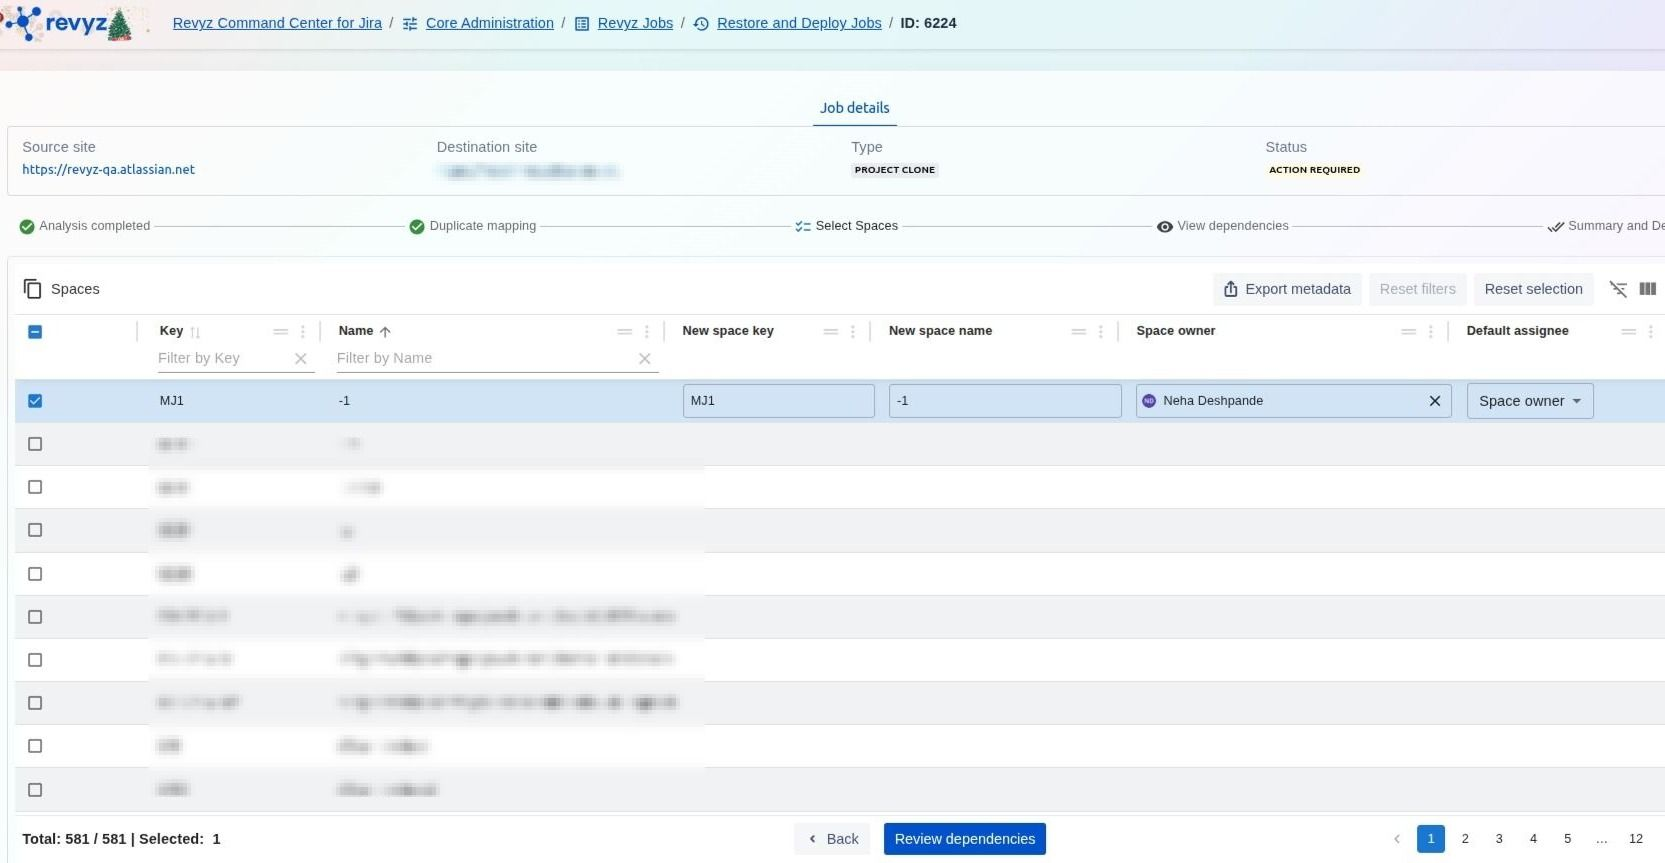
In the Spaces module, you can perform a Project Clone to create brand-new copies of existing spaces by reusing their configurations or use the Update tool to compare differences. During the duplication process, you can resolve potential conflicts in the Duplicate configurations mapping view by choosing to map source fields to specific destination IDs or selecting "Don't map field". Finally, you can select specific spaces to deploy and customize their identity on the destination site by defining a New space key, New space name, Space owner, and Default assignee.
Step 11: Mapping Fields

In the Spaces module, you can perform a Project Clone to create brand-new copies of existing spaces by reusing their configurations or use the Update tool to compare differences. During the duplication process, you can resolve potential conflicts in the Duplicate configurations mapping view by choosing to map source fields to specific destination IDs or selecting "Don't map field". Finally, you can select specific spaces to deploy and customize their identity on the destination site by defining a New space key, New space name, and Space owner.
Step 12: Review Dependencies

In the Review dependencies phase of a project clone, you can identify and manage any linked configurations or assets required for a successful deployment. This step allows you to ensure that all necessary dependencies are accounted for before finalizing the move to your destination site. Once you have reviewed these items, you can proceed to the final summary to deploy your selected spaces.
Step 13: Review dependencies and click on 'Next'
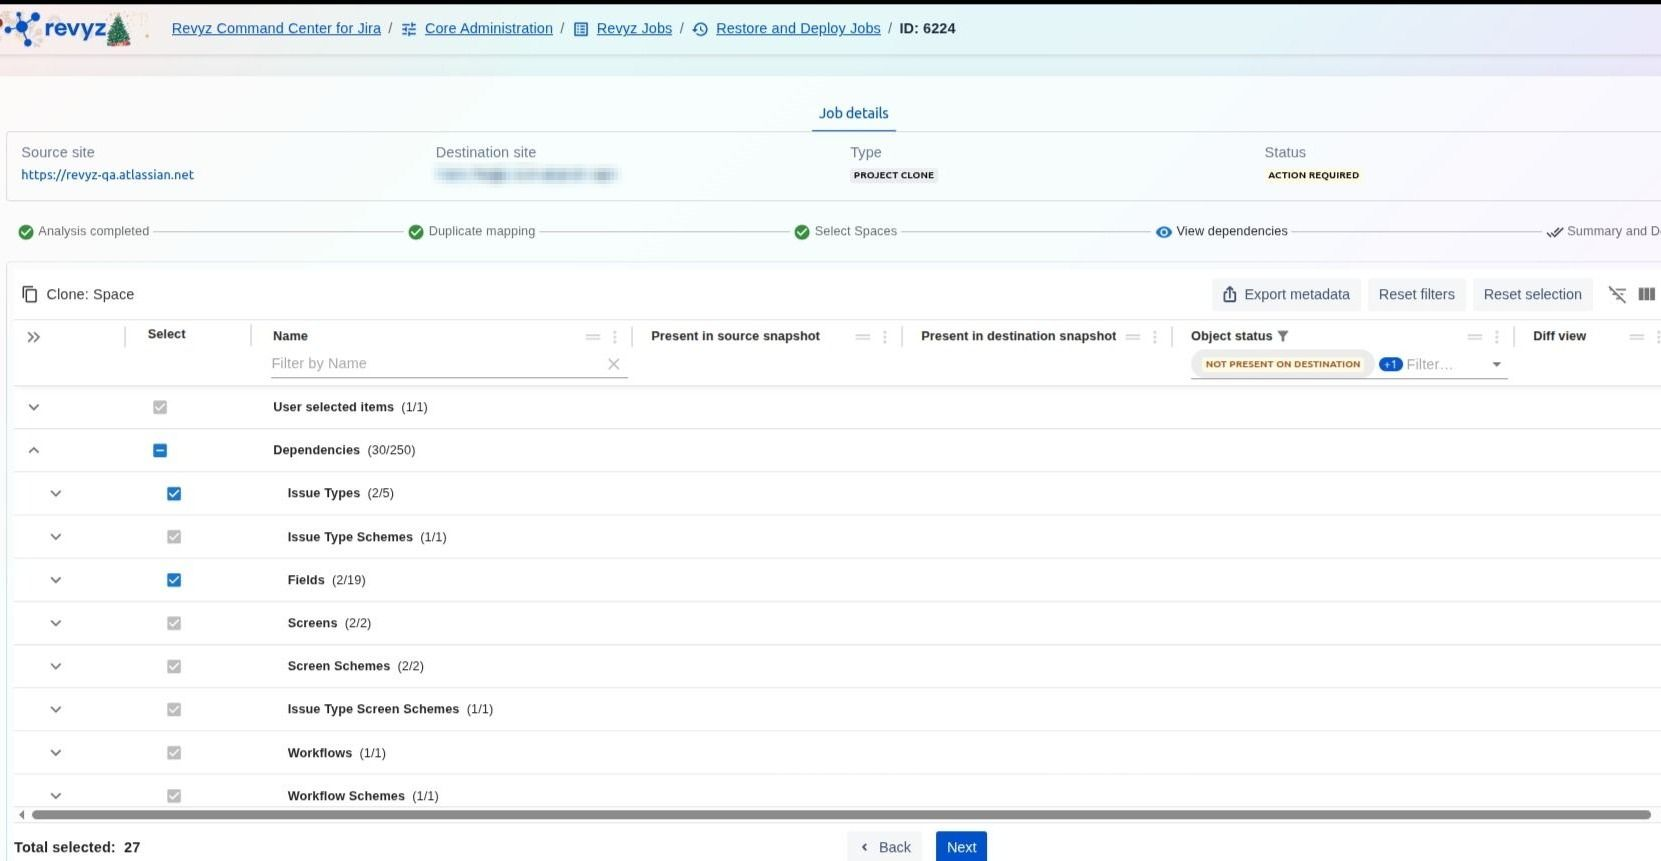
You can use the Object status filters to pinpoint items not currently present on the destination, ensuring all critical dependencies are included before proceeding. This step gives you granular control over exactly which underlying components are deployed alongside your project data.
Step 14: Enter the CAPTCHA code
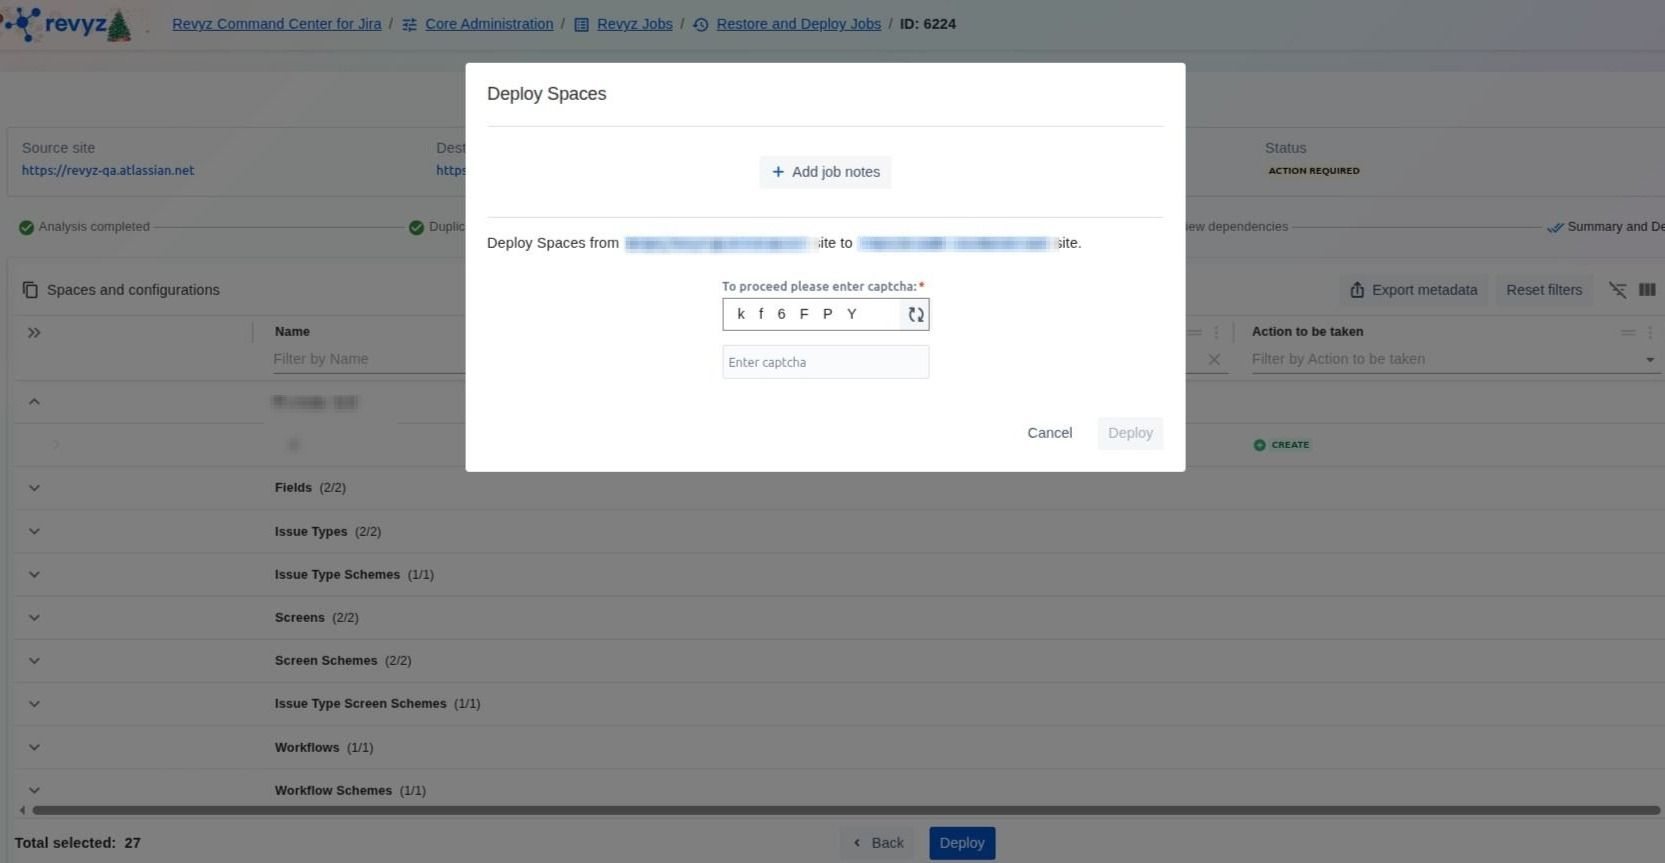
Enter the CAPTCHA code to finish the task.
How to Deploy Spaces (Update)?
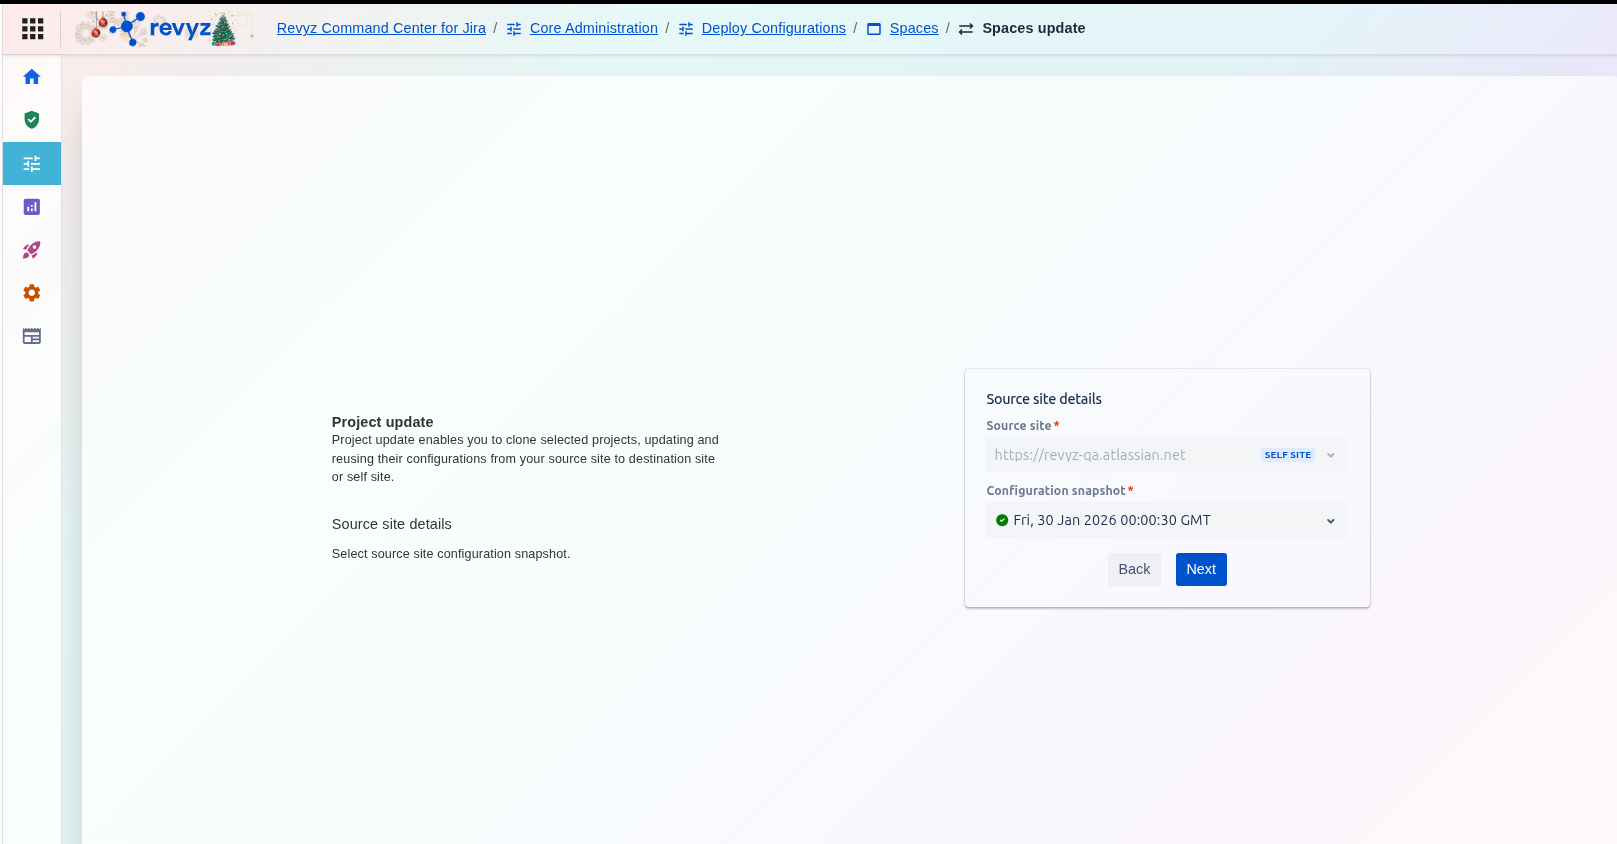
Step 1: Define Source Site Details
-
On the Spaces update screen, select the Source site* containing the updated configurations you wish to clone.
-
Choose the specific Configuration snapshot* that holds the desired source configuration data.
-
Click Next.
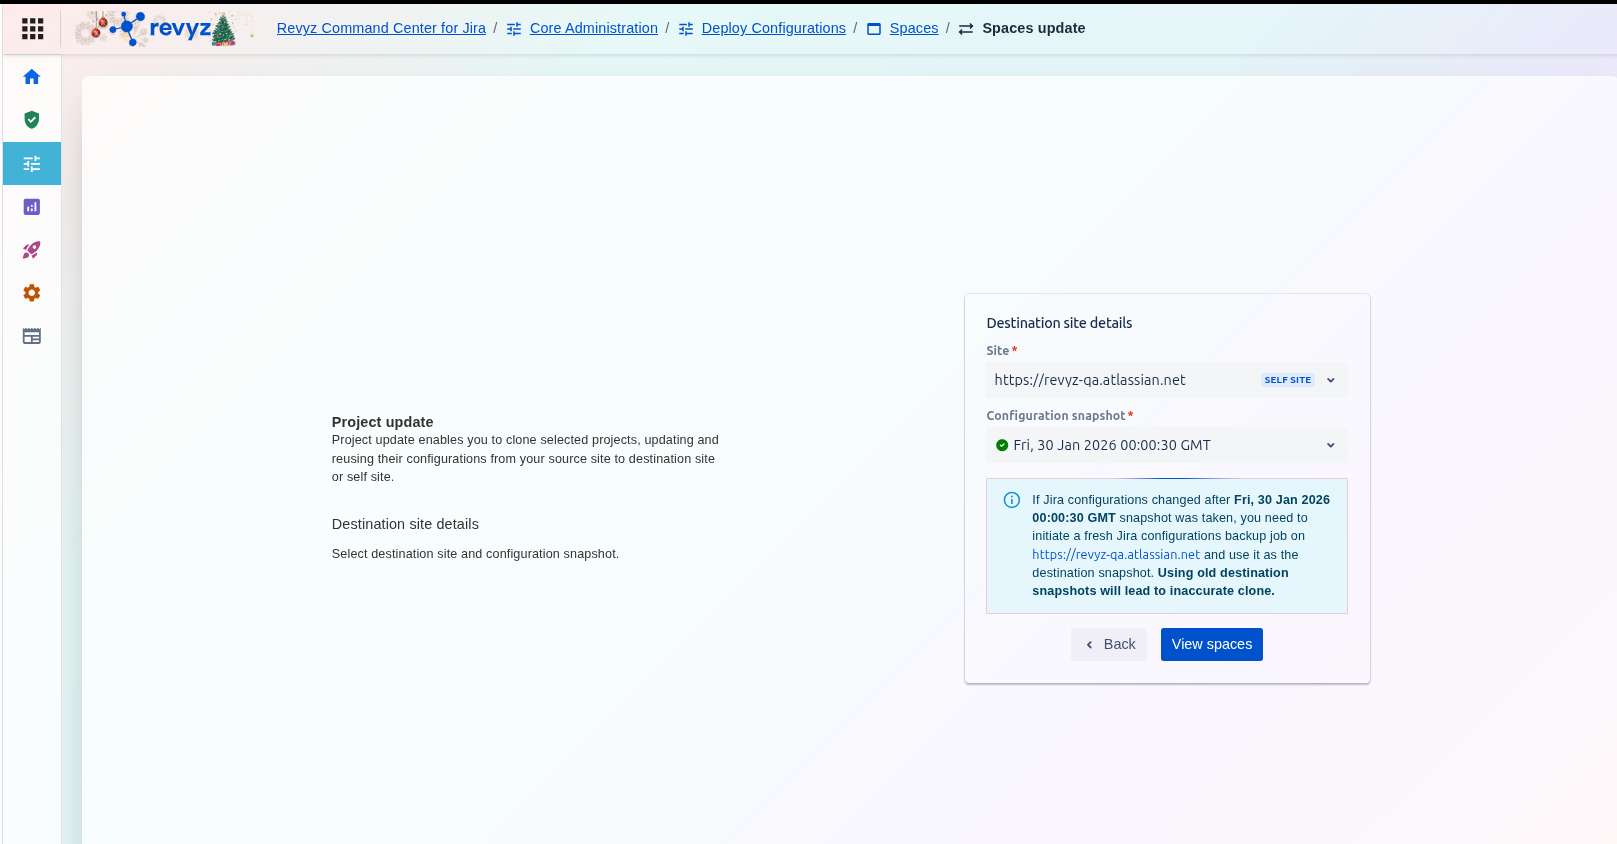
Step 2: Define Destination Site Details
-
Purpose: You select the Site* where the existing projects reside and need to be updated.
-
Snapshot Selection: You must choose a recent Configuration snapshot* from the destination site. Revyz uses this snapshot as a baseline to compare against the source configuration, identifying the specific differences that need to be applied during the update.
-
Action: After selecting the site and an accurate snapshot, you click View spaces to proceed to the comparison screen where you can select the projects to update.
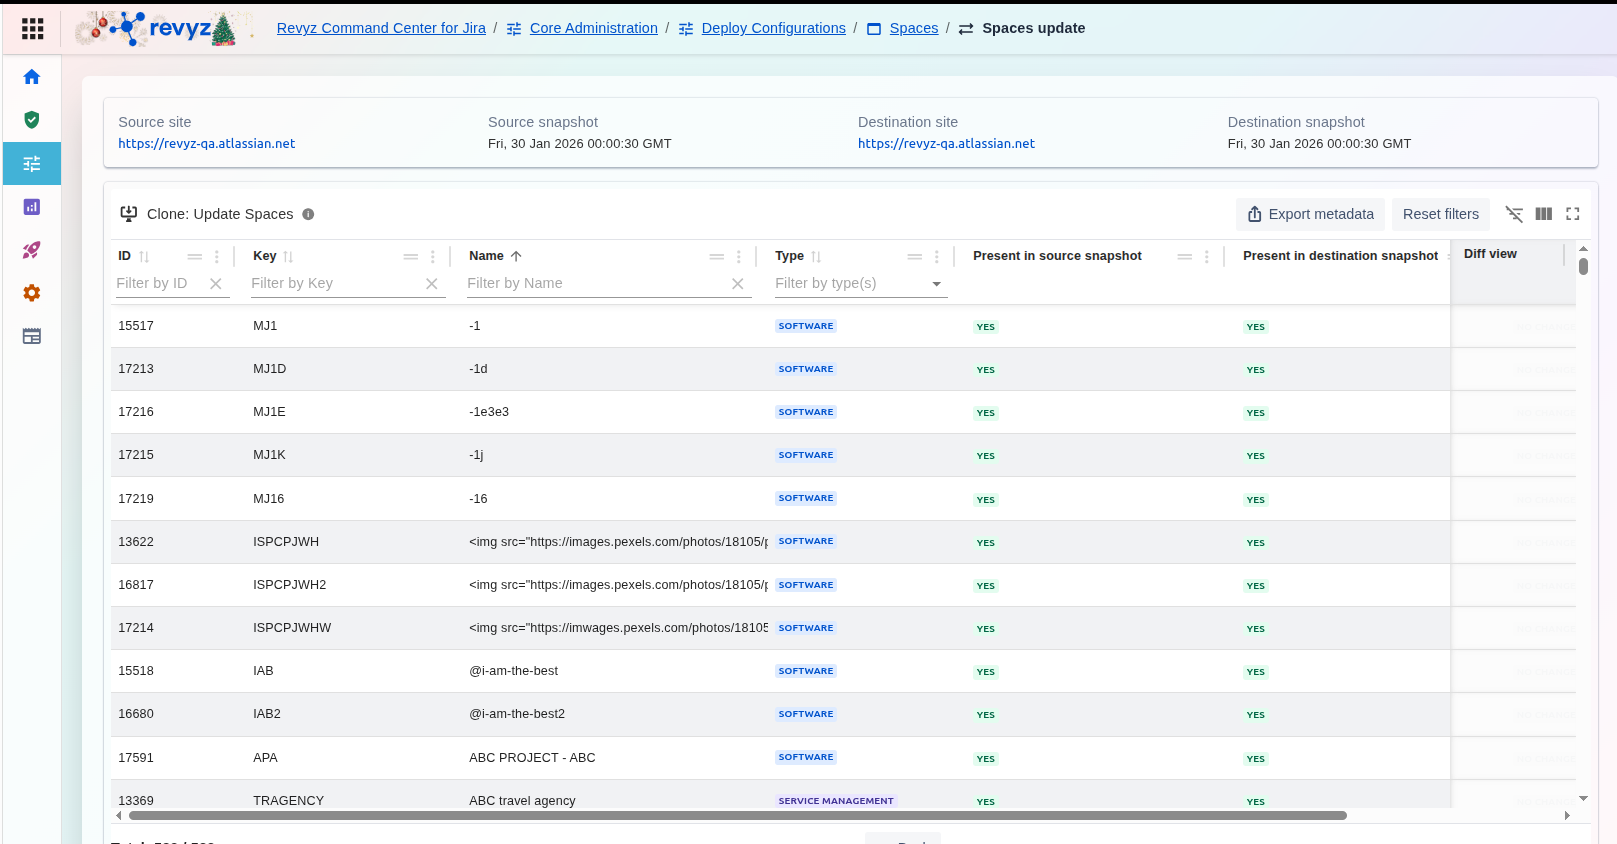
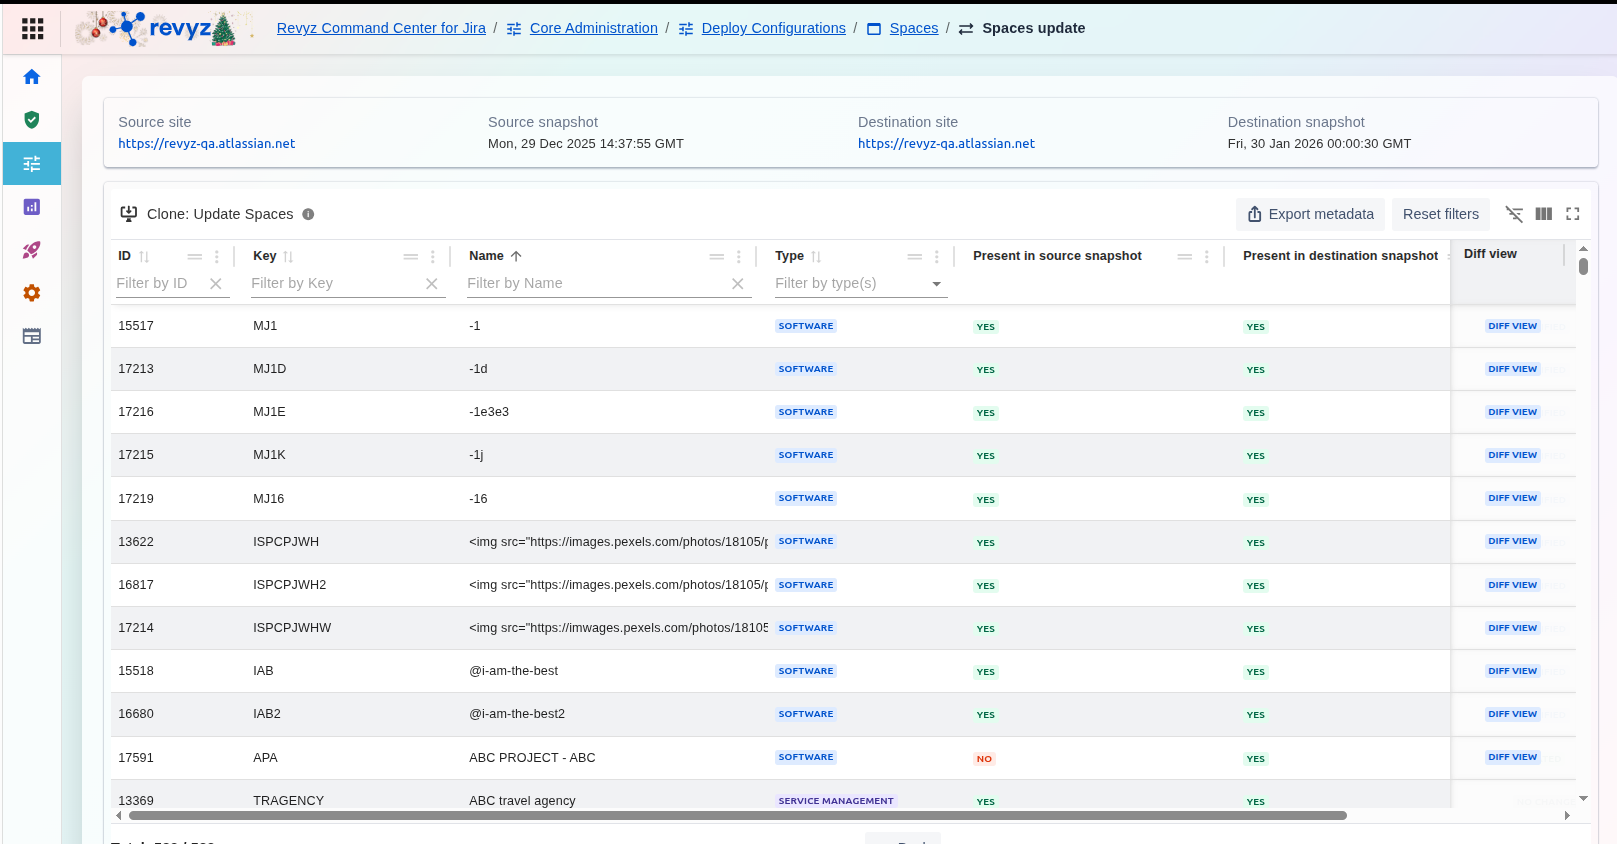
Step 3: Compare and Select Projects for Update
-
The Update Projects screen displays a list of projects from the source snapshot that can be used to update existing projects on the destination site.
-
Use the table filters (e.g., Key, Name, Type) to locate the projects you are interested in.
-
For each project, you can see if it is Present in source snapshot (Yes).
-
Click Diff View next to a project to examine the specific differences between the source configuration and the destination configuration.
Step 4: Review Configuration Differences (Optional)
Step 5: Initiate Project Update
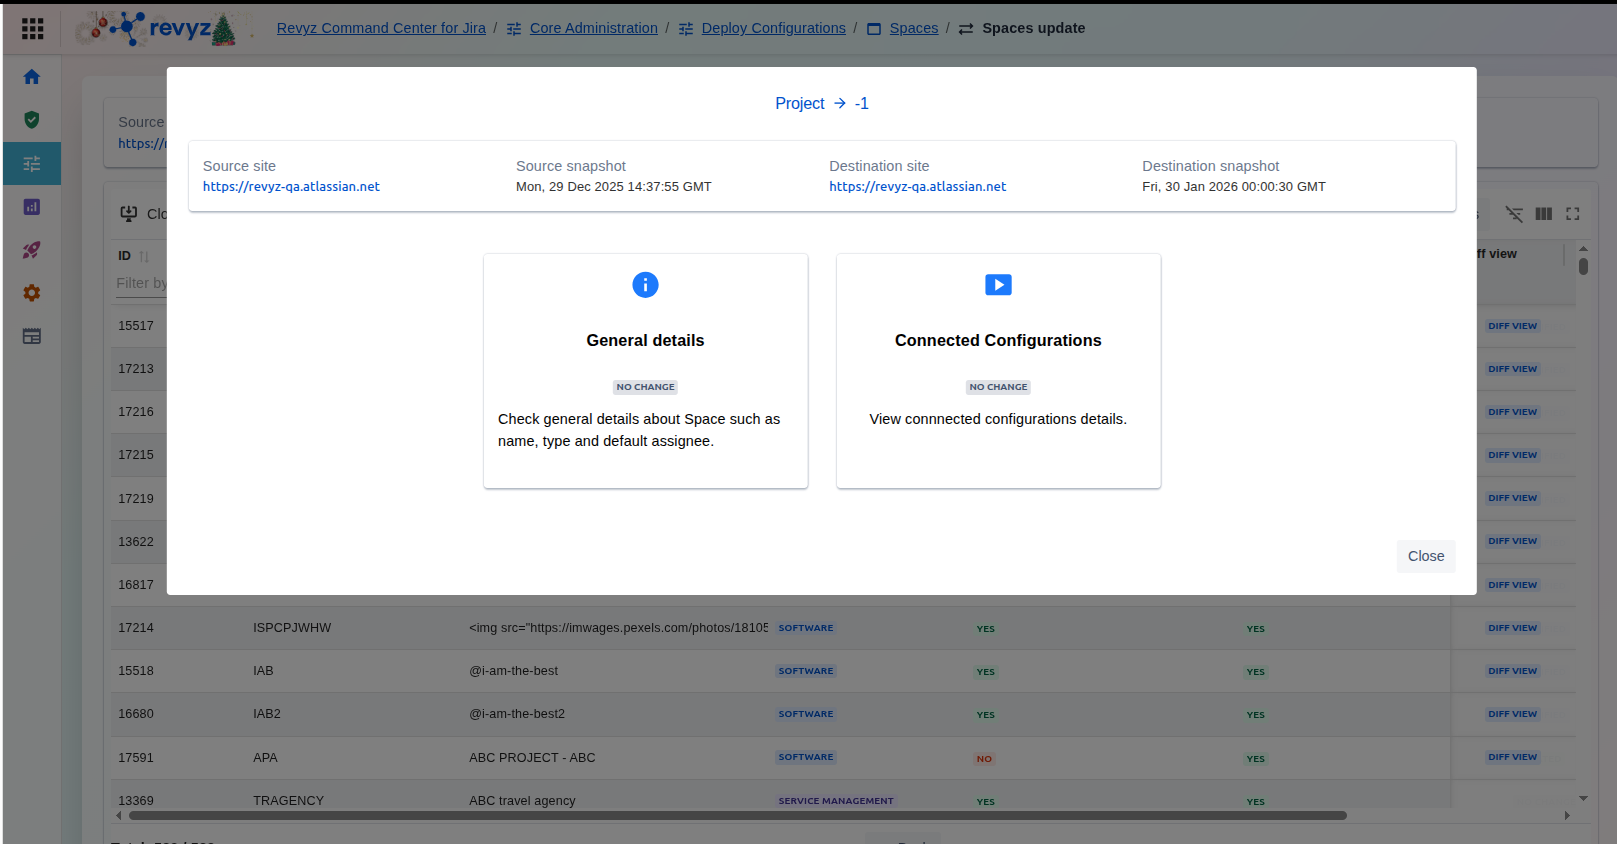
Click on View Differences.
The current display of "NO CHANGE" in both sections indicates that the specific project being viewed is currently identical in both the source and destination environments, meaning no configuration updates are necessary for this item.