About this Page
This document provides a step-by-step guide on how to recover a deleted issue using the Revyz app.
Please see the guided demo here:
Self-guided demo: How to recover a deleted work item in Jira using the Revyz app?
Recover the deleted issue
-
Go to the first Atlassian site https://site-1.atlassian.net
-
Click on Apps and then select Revyz Command Center for Jira app
-
After the app loads,
-
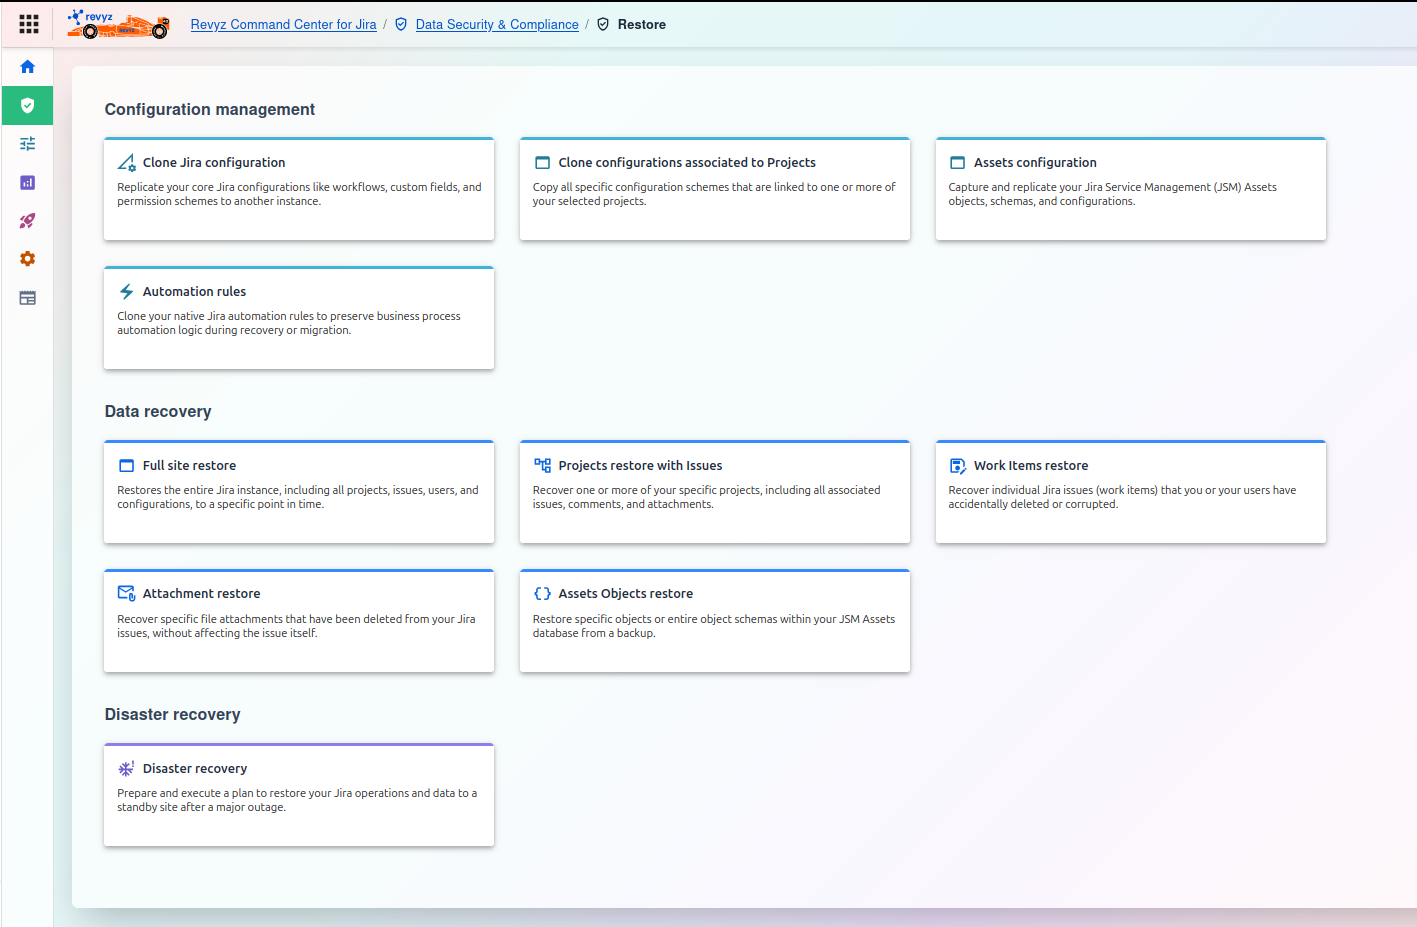
Select Data Security & Compliance - > Data Restore - > Work Item Restore panel inside the App.
-
Select the Work Items restore card
-
-
Source Site Details:
-
The source site (i.e., the site from which you're accessing the app) will be automatically selected. In this case, it is https://site-1.atlassian.net.
-
Choose the snapshot that contains the backup of the deleted issue. If you've followed the steps in order, this will likely be the first snapshot in the list and should be auto-selected.
-
Select the source project, which in this example is Project2, where the deleted issue originally existed.
-
-
Destination Site Details:
-
Site: Choose the site where the issue will be restored. Since the goal is to restore the issue to the same project, select https://site-1.atlassian.net.
-
Destination Project: Select the project where the issue(s) should be restored. In this case, choose Project2, the same project used as the source.
-
Click Next to continue.
-
-
Select the deleted issue from the list. Since the issue that was removed was “Issue1,” select the one with the summary “Issue1.”
-
Click “Next: Map Issue Types.”
-
The issue types for the source and destination projects will be automatically mapped based on their names. Since both the source and destination are the same project, all issue types will be matched automatically.
-
Click “View Summary.”
-
Review the issue(s) selected for restoration.
-
Click “Restore.”
-
When the confirmation prompt appears, click “Restore” again to proceed.
-
You will be redirected to the “Jobs” tab in the Revyz app.
-
Once the restore job is completed, follow these steps:
-
Click on the Job ID
-
Download the job details related to the restored issue by clicking the download icon.
-
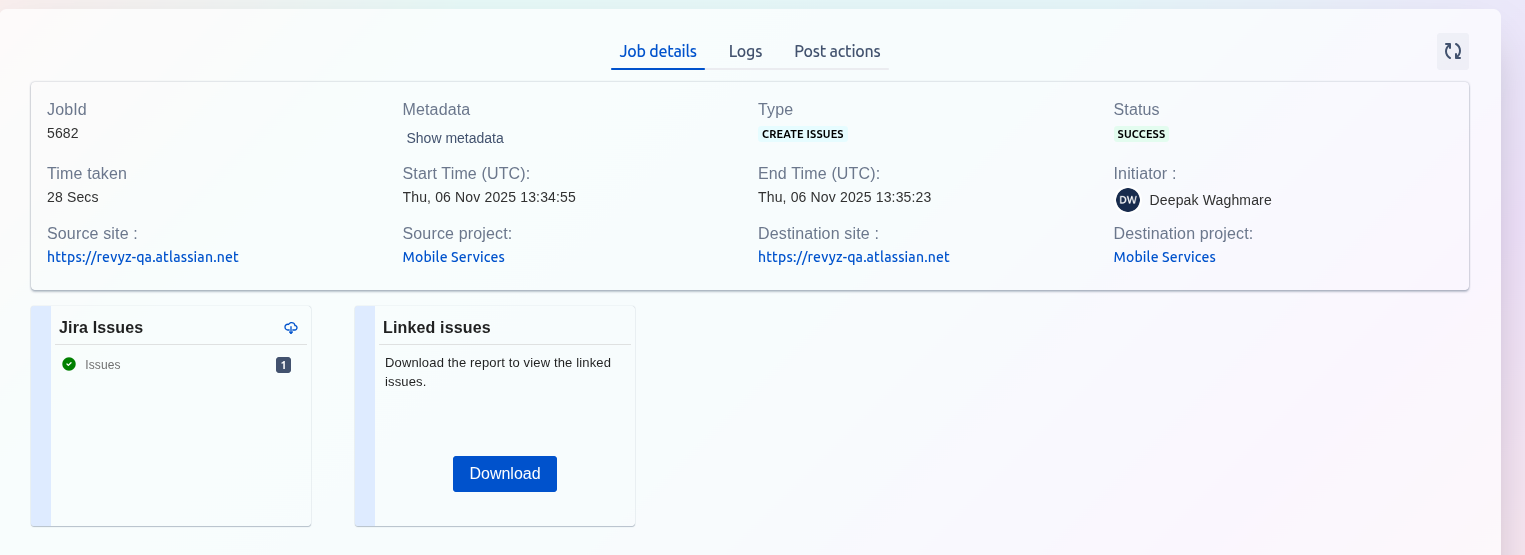
The downloaded file will contain a "New Issue Key" column, which displays the new key for the restored issue.