About this Page
This document aims to guide you through the process of using the Revyz app to deploy configuration changes from one site to another. Instead of manually replicating modifications, the Revyz app allows you to efficiently deploy updated configurations between sites.
Self-guided demo
For detailed steps on how to test for deploying modified Jira configurations, see below video.
Before clone
-
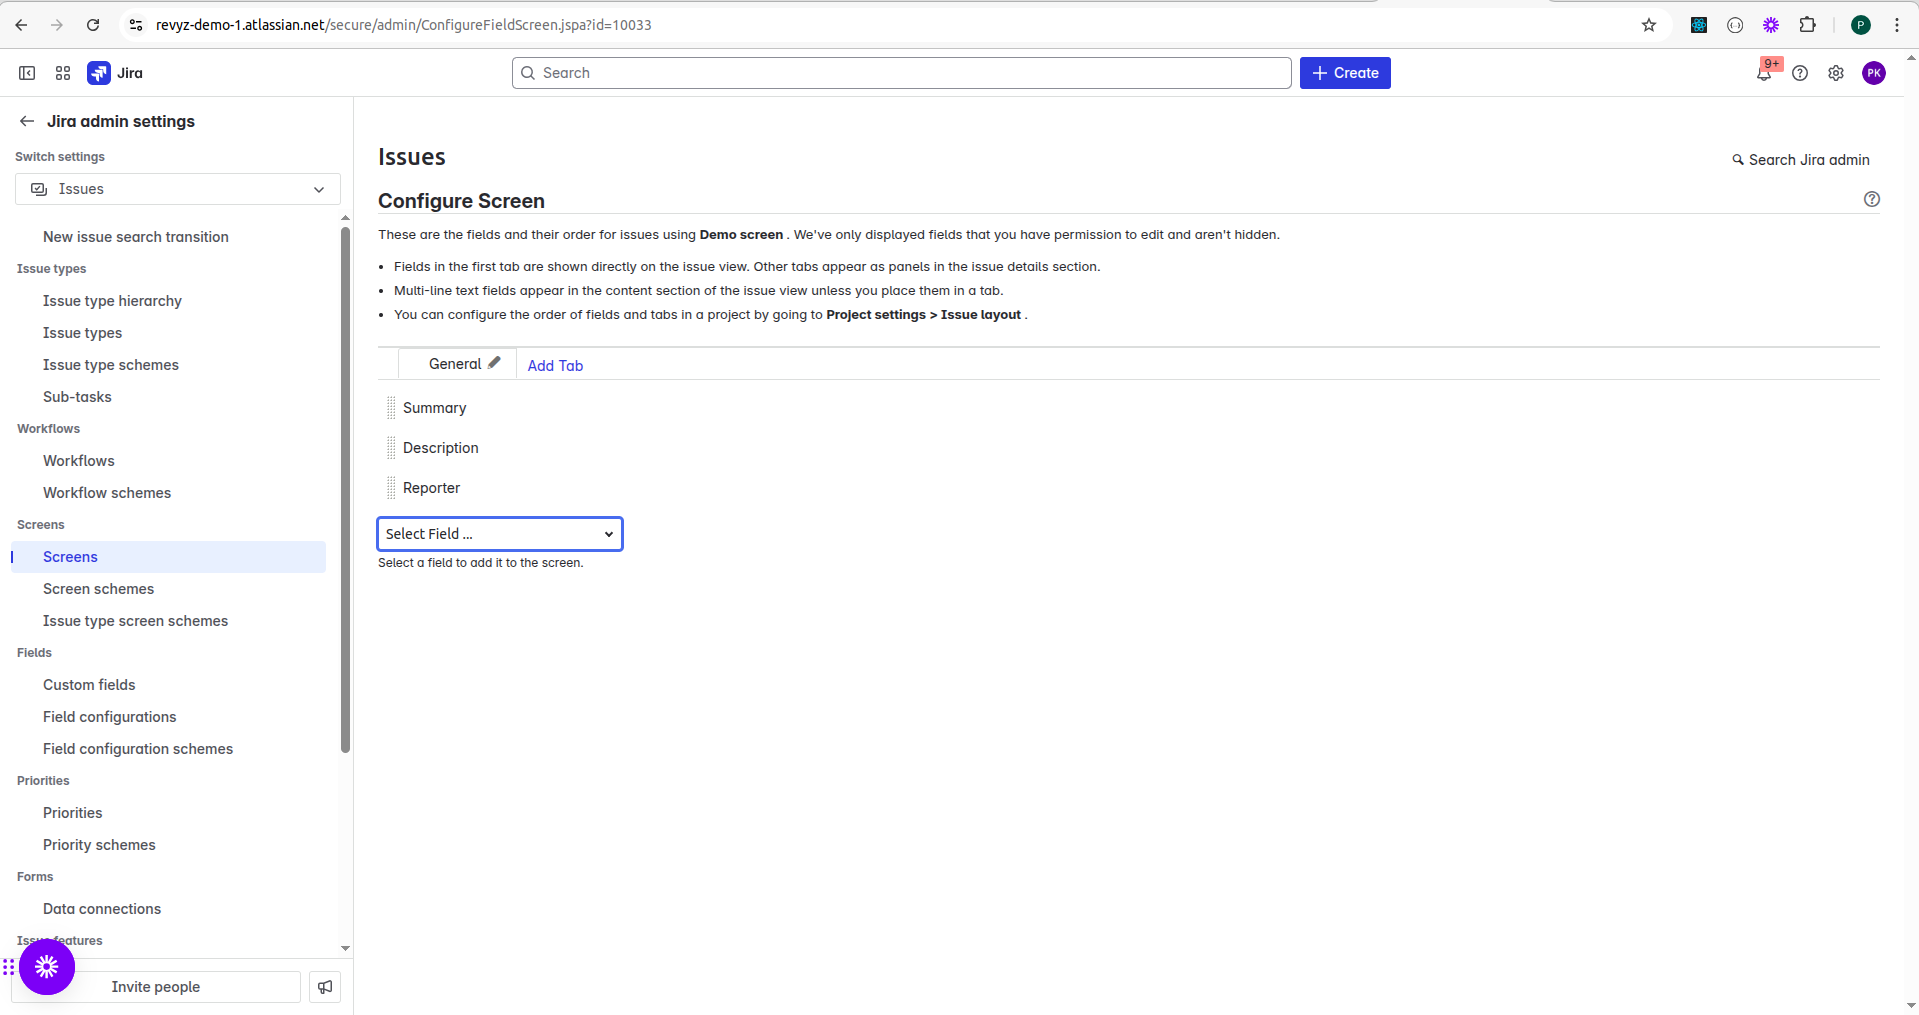
Create a configuration (screen) on both Atlassian sites—https://site-1.atlassian.net and https://site-2.atlassian.net—with the same name.
-
For clarity, let’s name the screen “Demo screen 1”.
-
Add the following fields to the Demo screen 1:
-
Summary
-
Description
-
Reporter
-
-
Repeat the same steps on the second Atlassian site to ensure both screens are identical.
-
-
Next, take a fresh backup (Backup type: Jira Configurations) on both sites: https://site-1.atlassian.net and https://site-2.atlassian.net. Learn how to trigger a backup
Important: Proceed only after the backup job completes successfully.
-
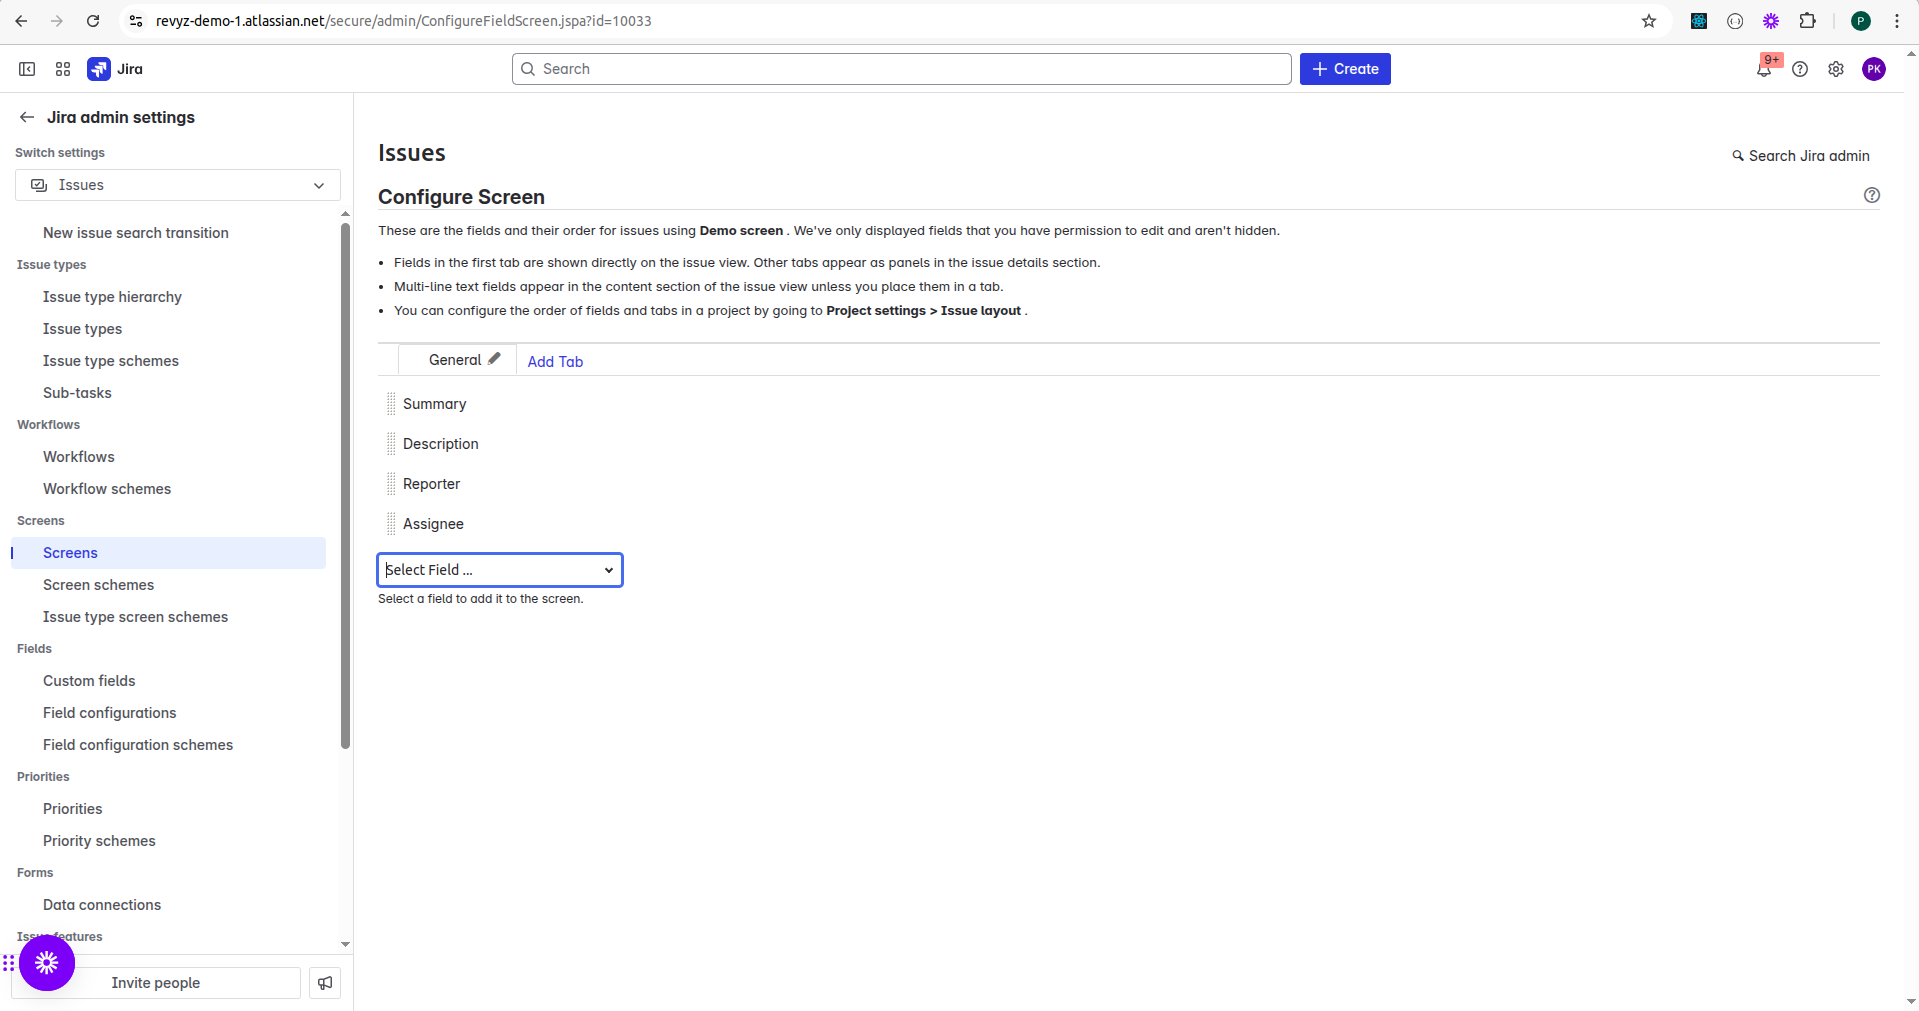
Modify the Demo screen 1 configuration on https://site-1.atlassian.net by adding a new field—for example, the Assignee field.
Migrate modified configurations
-
Go to the first Atlassian site (https://site-1.atlassian.net).
-
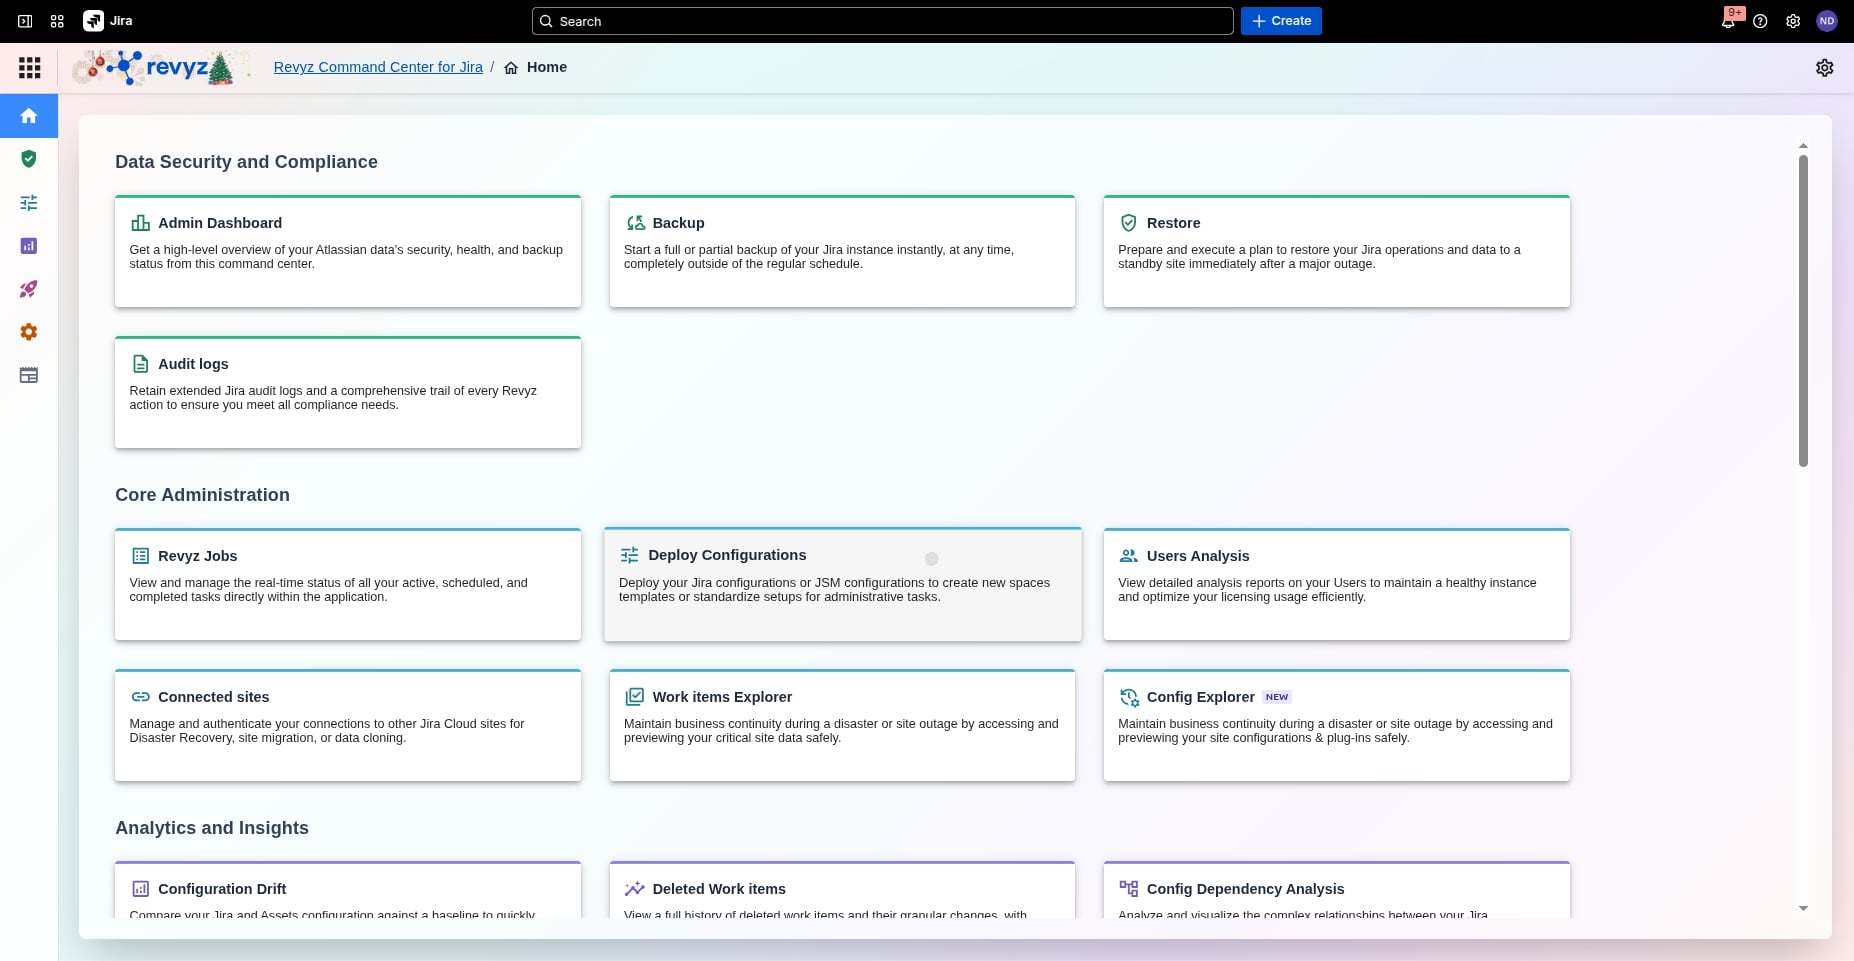
Navigate to Apps → Revyz Command Center for Jira app → Core Administration → Deploy Configuration.
-
Select the "Deploy Jira configurations" card.
-
Source Site Details:
-
Source site: The site containing the updated configuration (https://site-1.atlassian.net).
-
-
Destination Site Details:
-
Destination site: The target site where the modified screen will be cloned (https://site-2.atlassian.net).
-
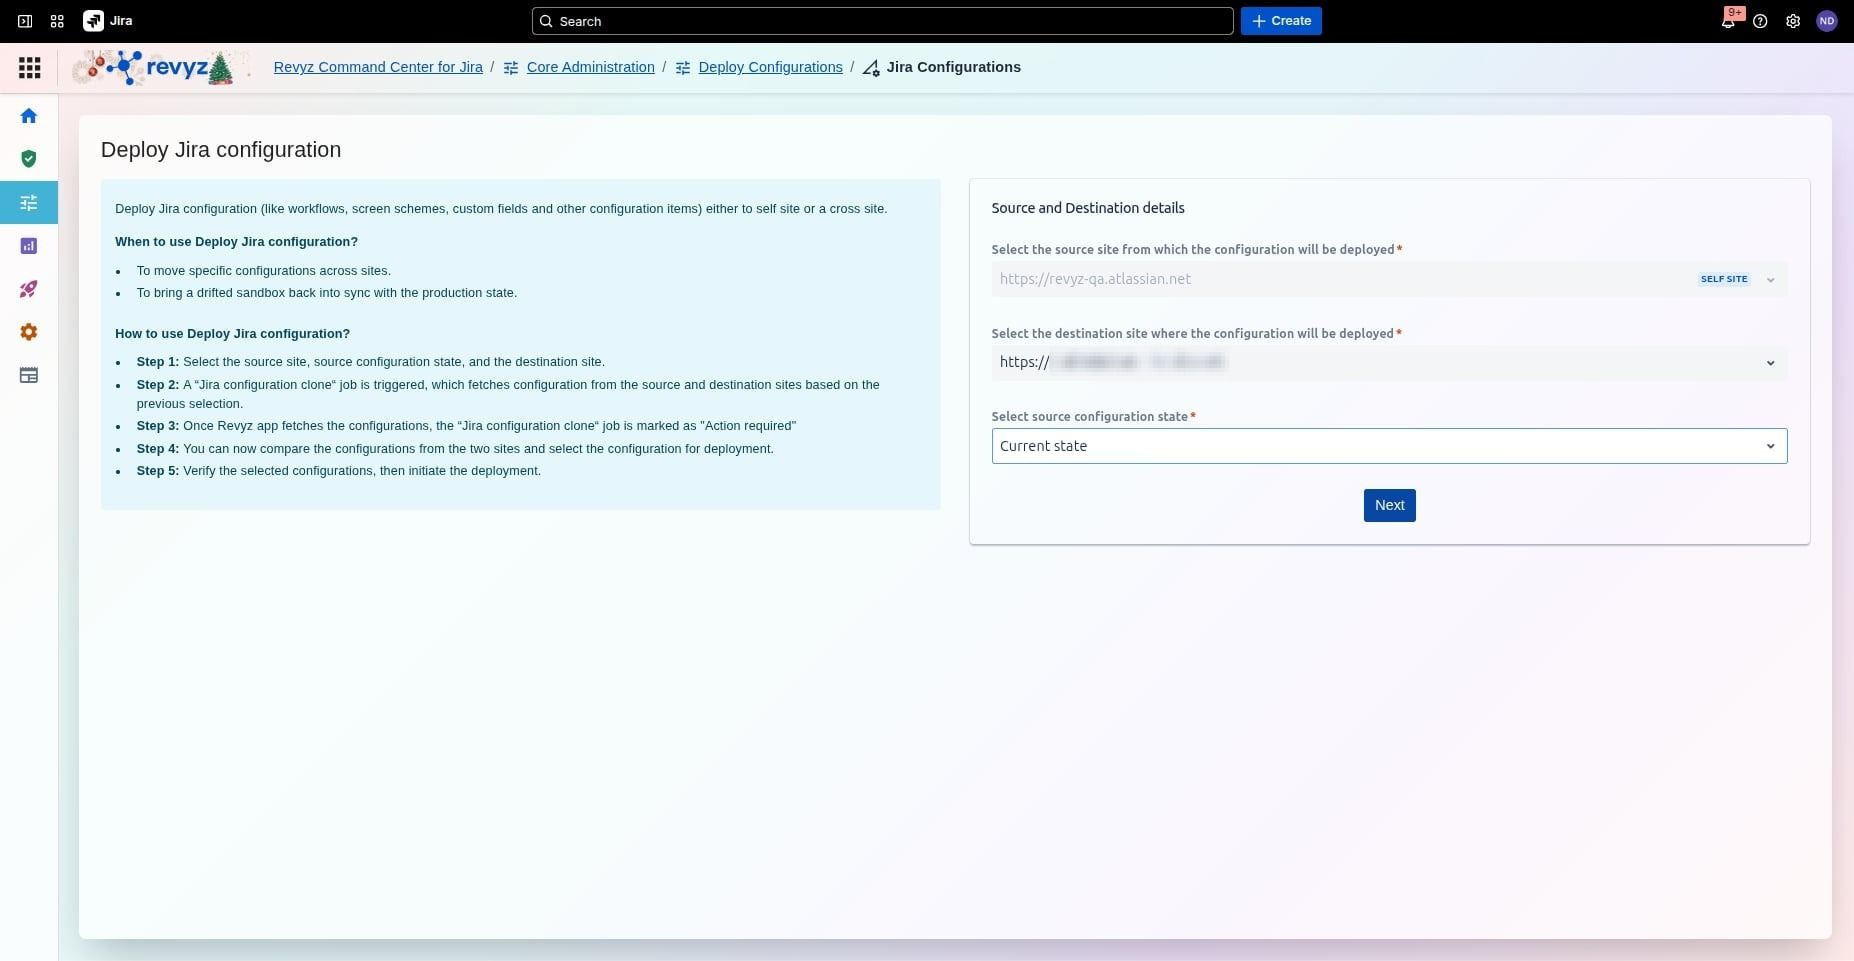
Select “current state” under the “Select source configuration state”.
-
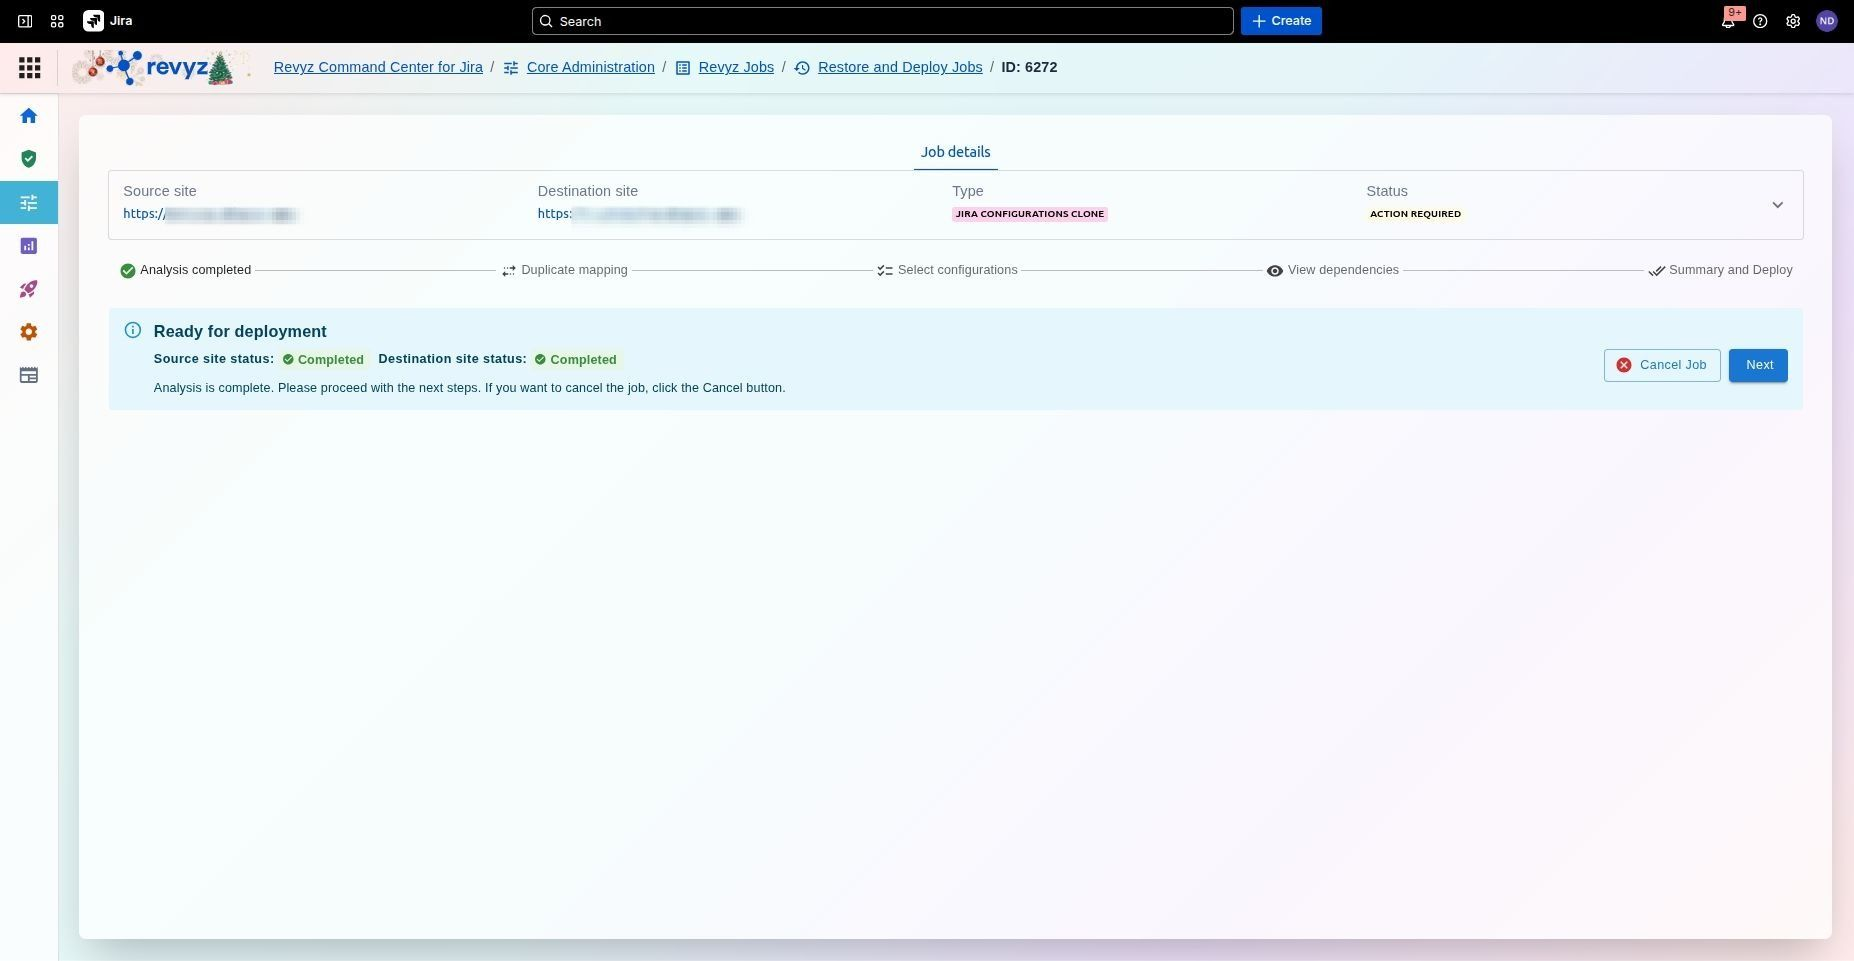
You’ll be redirected to the Revyz Jobs page, the page will transition from Analysis to Action Required.
-
Once the job status becomes “Action Required” click on Next.
-
-
For more information on how to deploy Jira configurations, visit this page.
-
You’ll see either “Map configurations” or “Compare snapshots” button.
-
Map configurations: If there are configurations with the same name on, the app will flag them and display auto-mapped configurations.
-
Review the auto-mapped configurations, then click “Compare snapshots”.
-
-
Configuration listing page
-
Locate the Screens section and expand it.
-
Locate “Demo screen 1” in the list. Its status will appear as “Modified”, indicating differences between the version on the source site and the one on the destination site. Select this screen to proceed.
-
Click “Review dependencies”.
-
-
On the Dependencies page, you’ll see configurations linked to the screen.
-
Since the fields (Summary, Description, Reporter, and Assignee) are associated to the screen, they will appear under dependencies.
-
Change the object status filter to include “No change”.
-
As these fields are already present and identical on both sites, their status will show as “No change”.
-
Click “View summary”.
-
-
Summary page
-
Review the summary and click “Deploy”.
-
(Optional) Add job notes to document the purpose of the job for future reference.
-
Enter the CAPTCHA in the command prompt and click Deploy.
-
You’ll be redirected to the Jobs tab in the Revyz app.
-
After the job completes
-
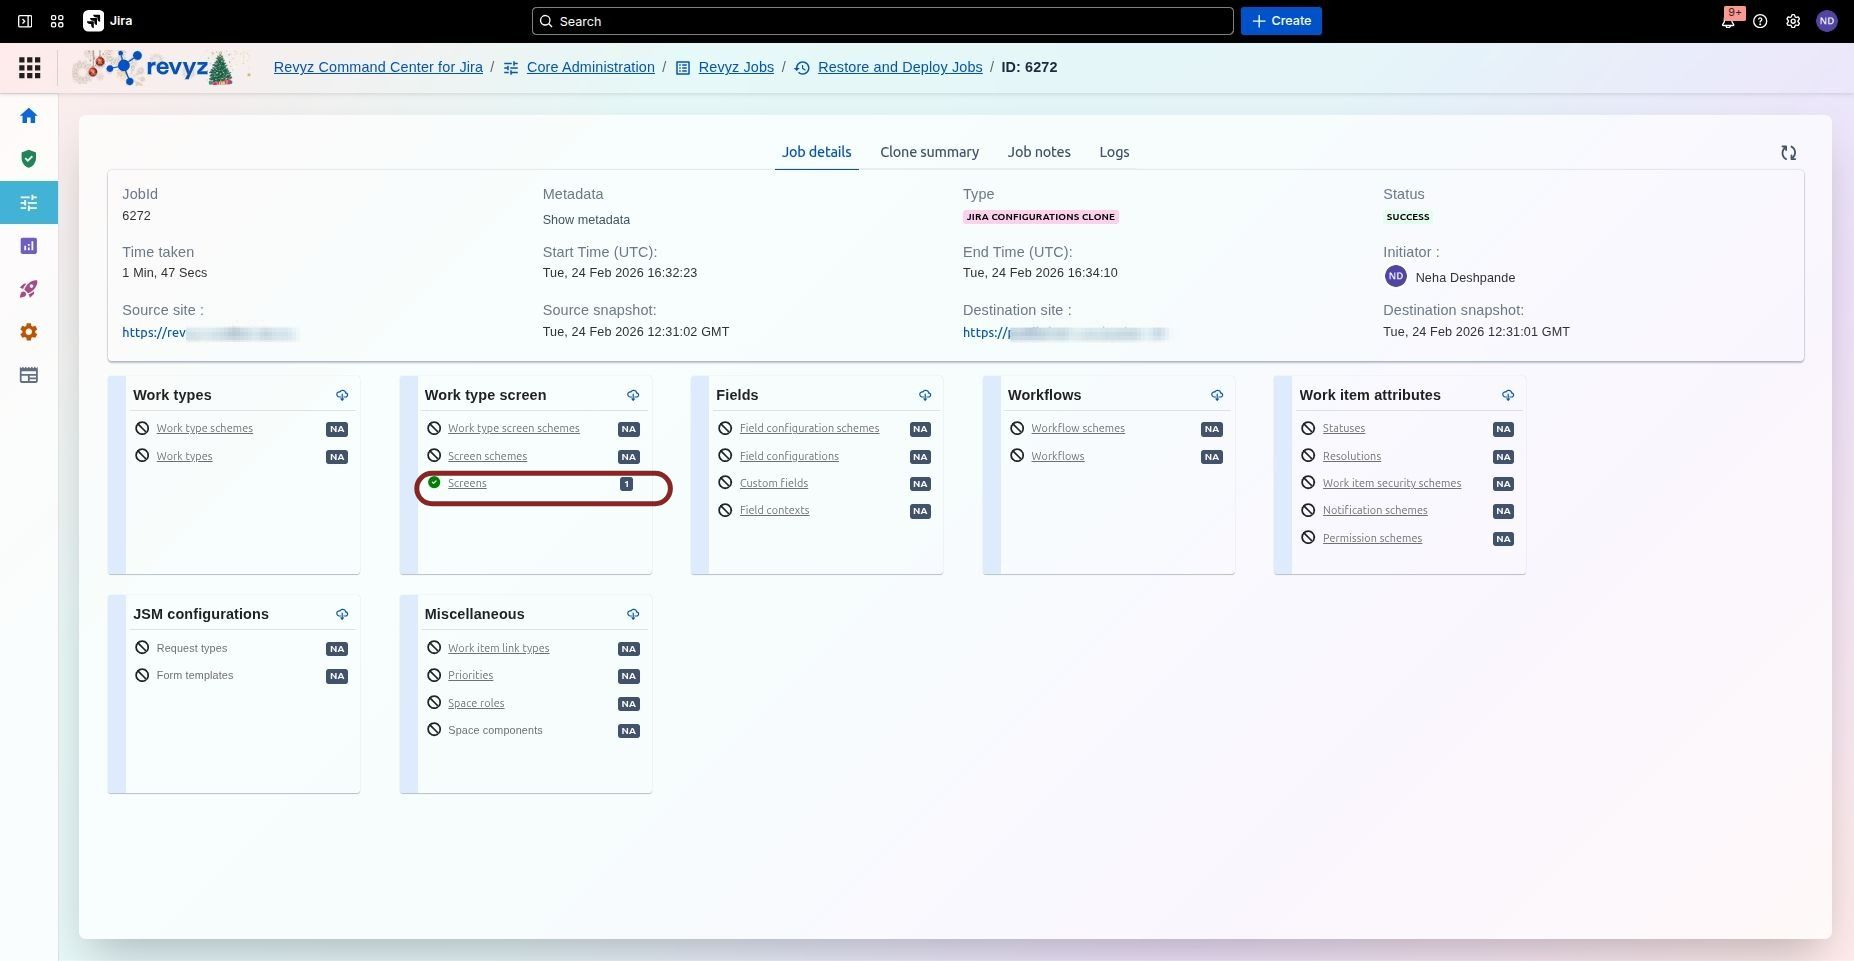
Click on the Job ID.
-
View the job details displayed in the cards. You can download the details by clicking the download icon.