About this Page
This page guides users through the entire Configuration Management process for Cloning Automation Rules, which is critical for the migration and restoration of specific asset configurations. The workflow involves selecting a trusted configuration snapshot, filtering the desired rules, and exporting them for deployment to another environment.
What is the use case?
The primary use case is to initiate the migration or backup of specific Jira Automation Rules. An administrator would use this page to select a trusted, stable backup of a source environment (like a production or staging instance) before moving on to select and transfer those rules to a different instance or simply download them for archival or review.
If you change your automation rules and mess them up, or accidentally lose them, you can use the restore feature to roll them back because the system maintains versioning of your automation rules and backs them up daily. If you know the automation worked well on a specific date, you can select that snapshot to restore the automation and get your system running again.
This feature is applicable to:
command center for jira
How to Restore Automation Rules?
Step 1: Restore Automation Rules
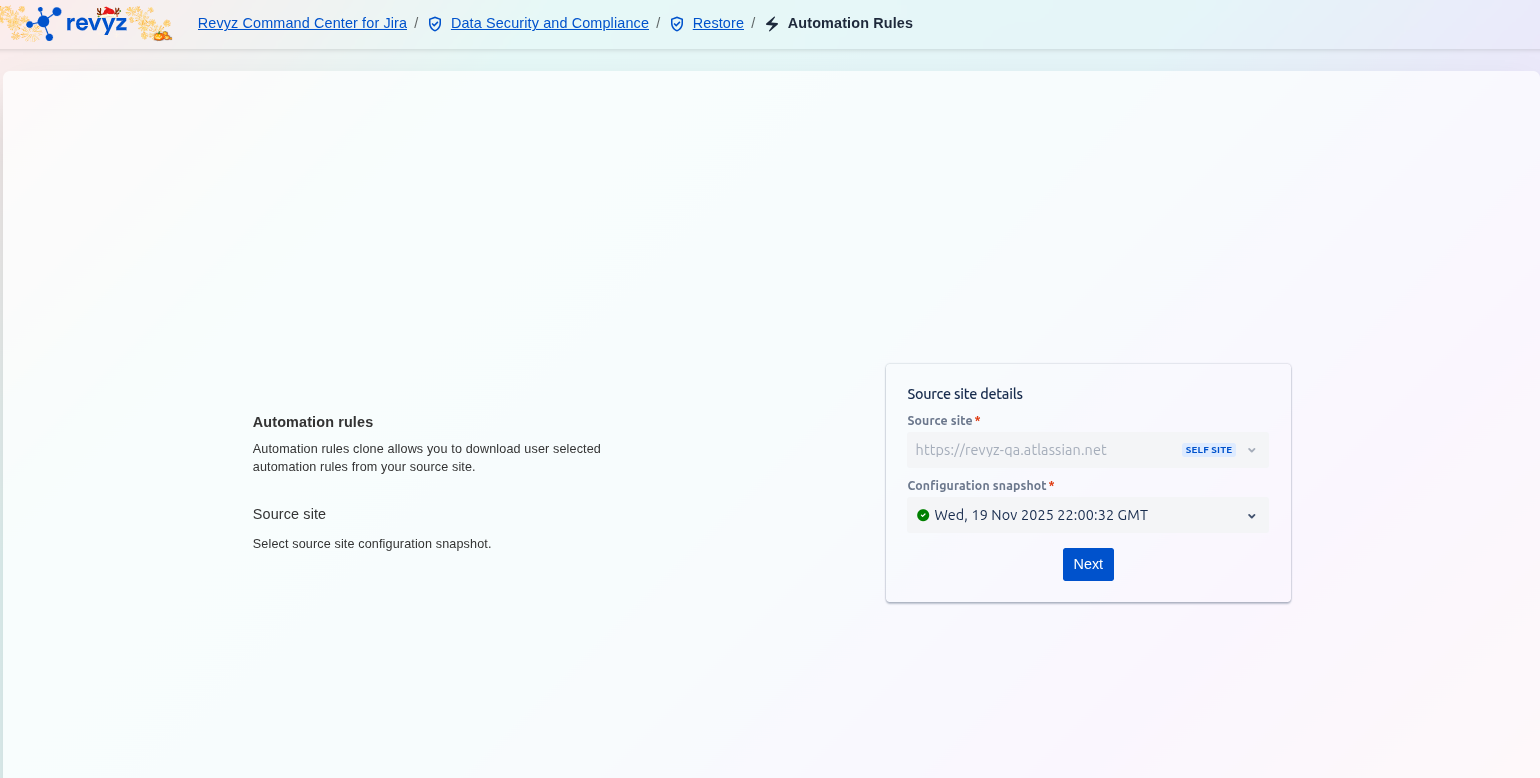
This is the entry screen for defining the origin of the rules that need to be copied, where you select a trusted, stable backup of a source environment.
-
Source Site Details: The user must specify the Source site* (the Jira instance to copy rules from, shown as
https://revyz-qa.atlassian.net) and select a specific Configuration snapshot* (a dated point-in-time backup, shown asWed, 19 Nov 2025 22:00:32 GMT). -
Select a historical snapshot and click Next to proceed to the filtering and selection of the specific automation rules you want to clone or export.
Step 2: Select the Automation Rules
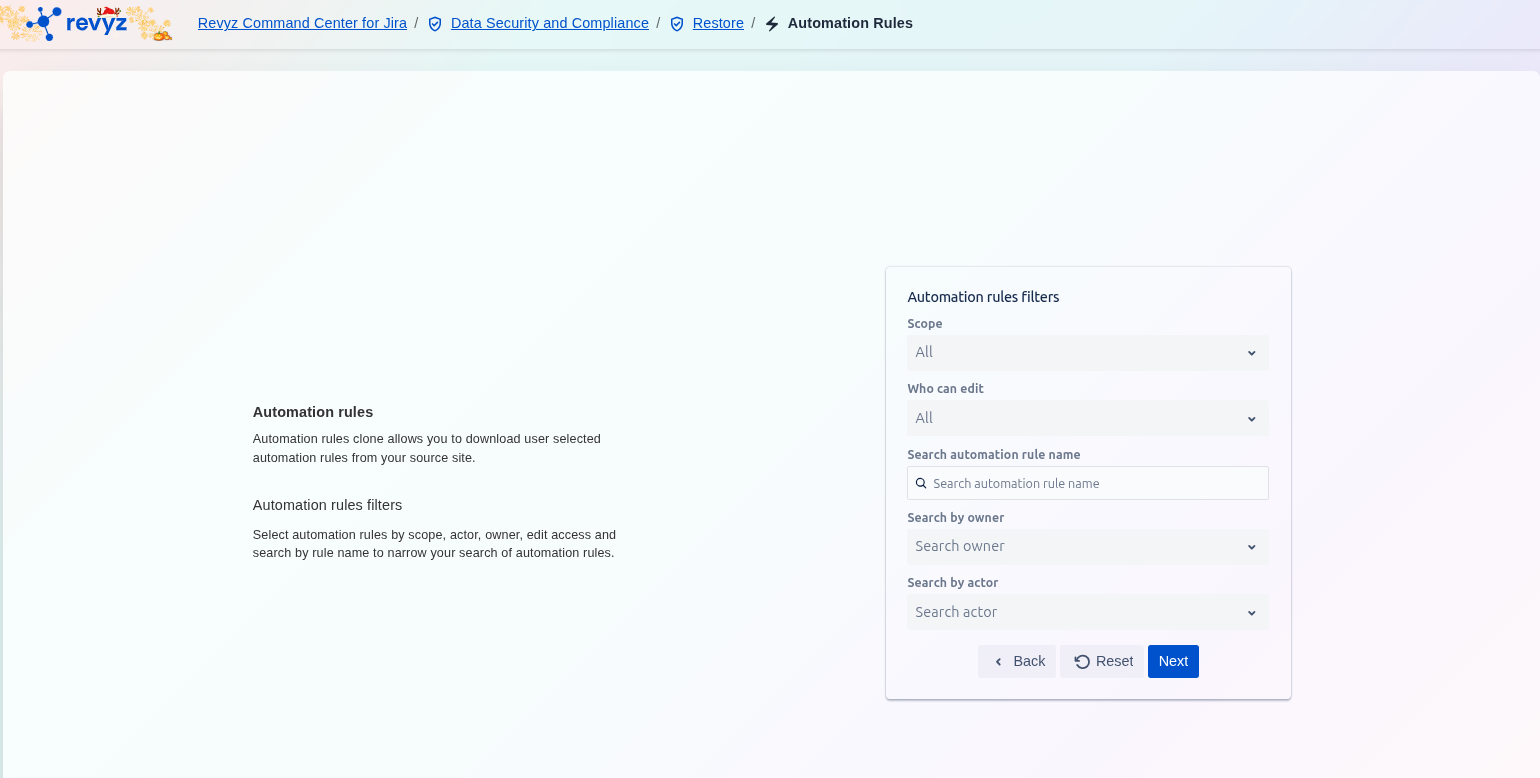
This step provides filtering options based on rule attributes like scope, owner, and edit access. The user interacts with these fields to efficiently narrow the list of available automation rules for migration.
Selection Parameters:
-
Scope: Select the rules' location (e.g., Global, Project-specific) to view a subset of rules.
-
Who can edit: Filter rules based on their edit access permissions.
-
Search automation rule name: Use keywords to quickly find rules by name.
-
Search by owner: Filter rules created by a specific user or team.
-
Search by actor: Filter rules based on the user or account that triggers the rule.
The Next button advances the user to the final review or execution step after filters are applied.
Step 3: Automation Rules
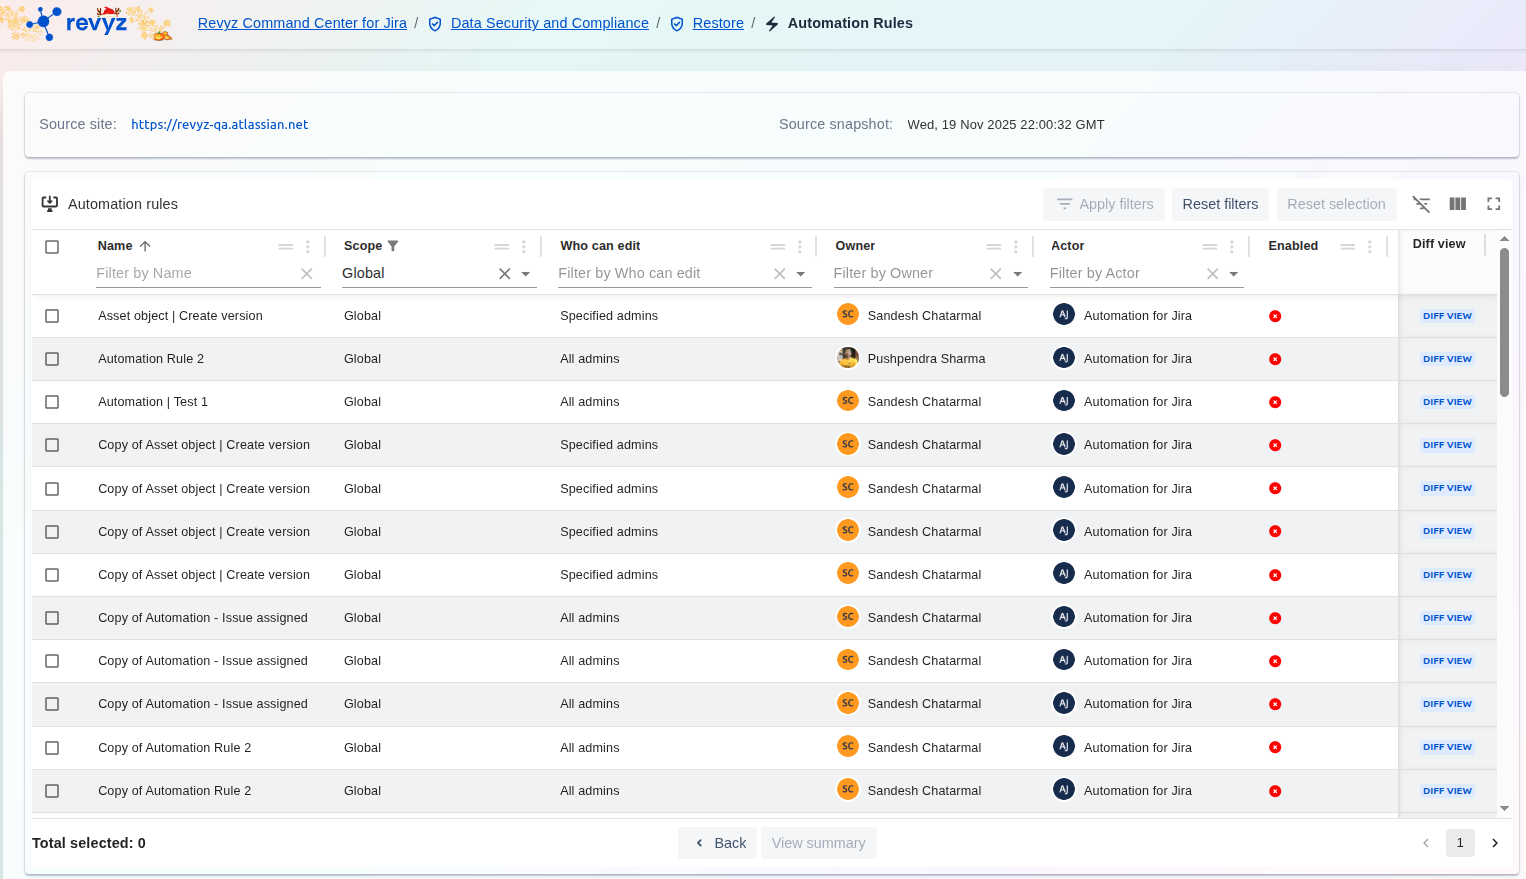
This step follows the filtering step and presents a detailed, sortable, and filterable list of all automation rules available in the selected source snapshot.
Step 4: Select Automation Rules
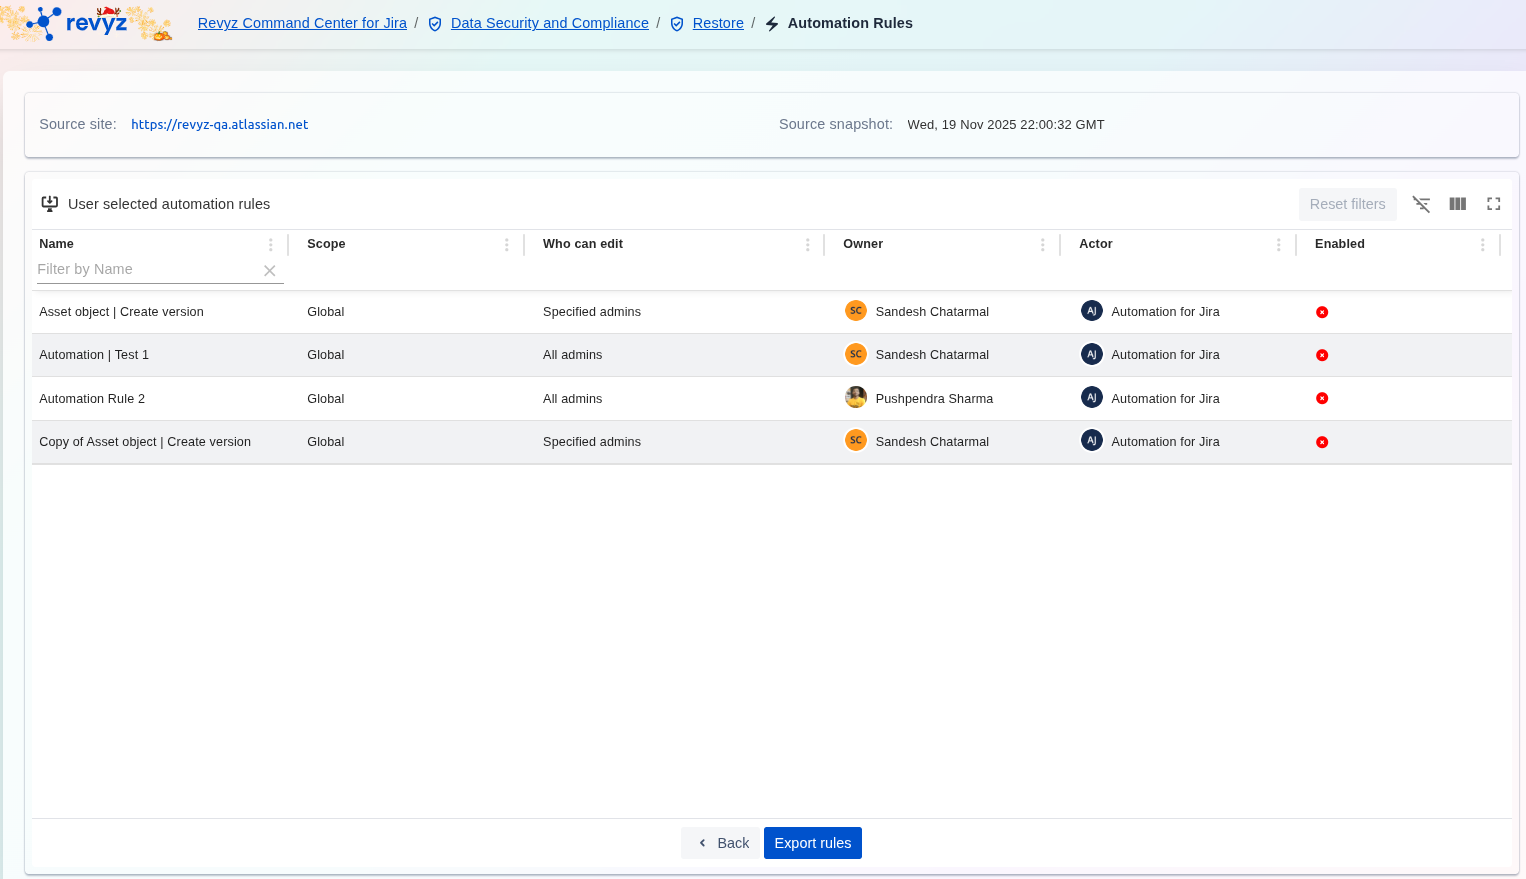
Select the desired automation rules and click on “Export Rules”.
Step 5: Completion of Cloning of Automation Rules
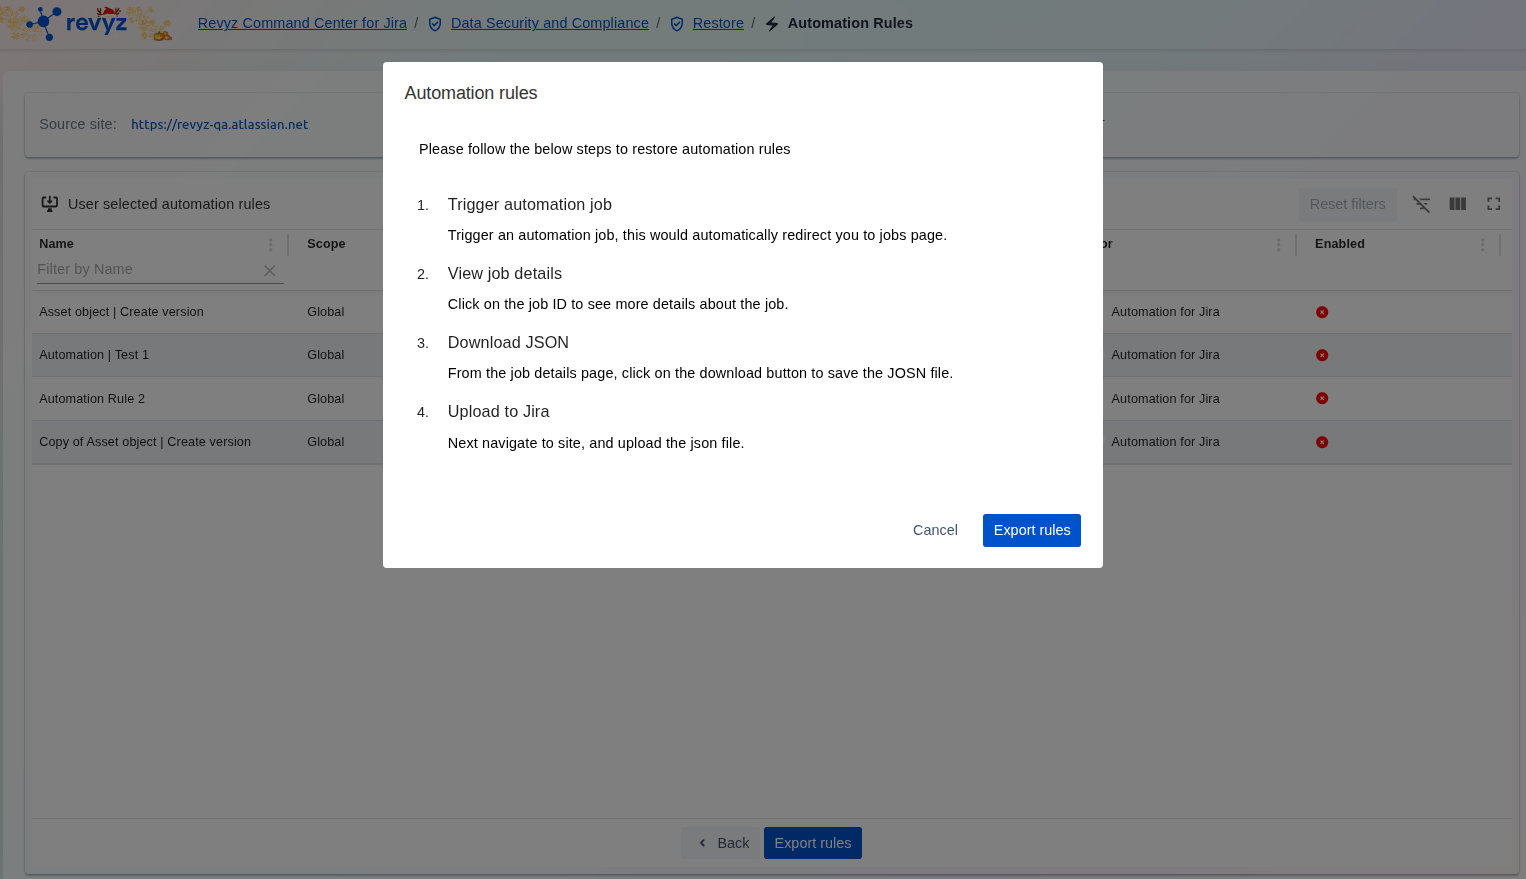
Follow the steps to start exporting the automation rules. Click on “Export Rules” to complete the process.
Step 6: Check Revyz Jobs
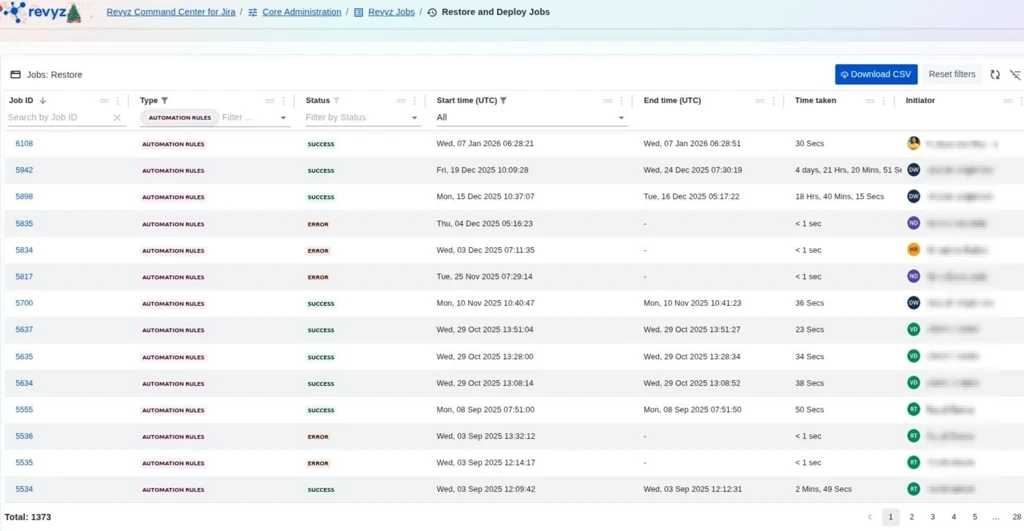
Triggered job will be shown on “Jobs” page. Select the relevant job ID.
Step 7: Download Export Rules
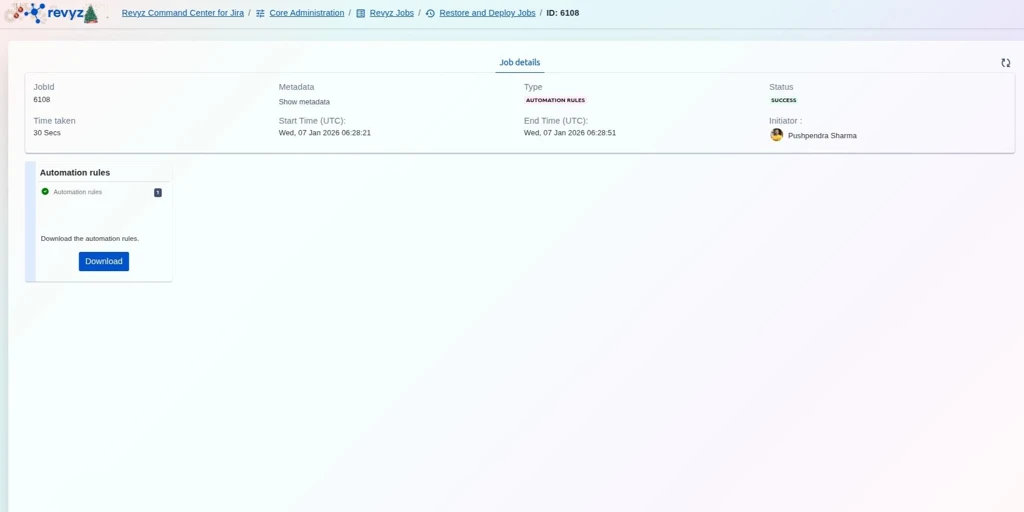
-
Job Status will transition from “Action Required” to “Success”. To download selected automation rules, Click on Download button which will give selected rule details in JSON format.
-
Confirm prompt message & again click on “Download“
How to upload the JSON file to the Jira site?
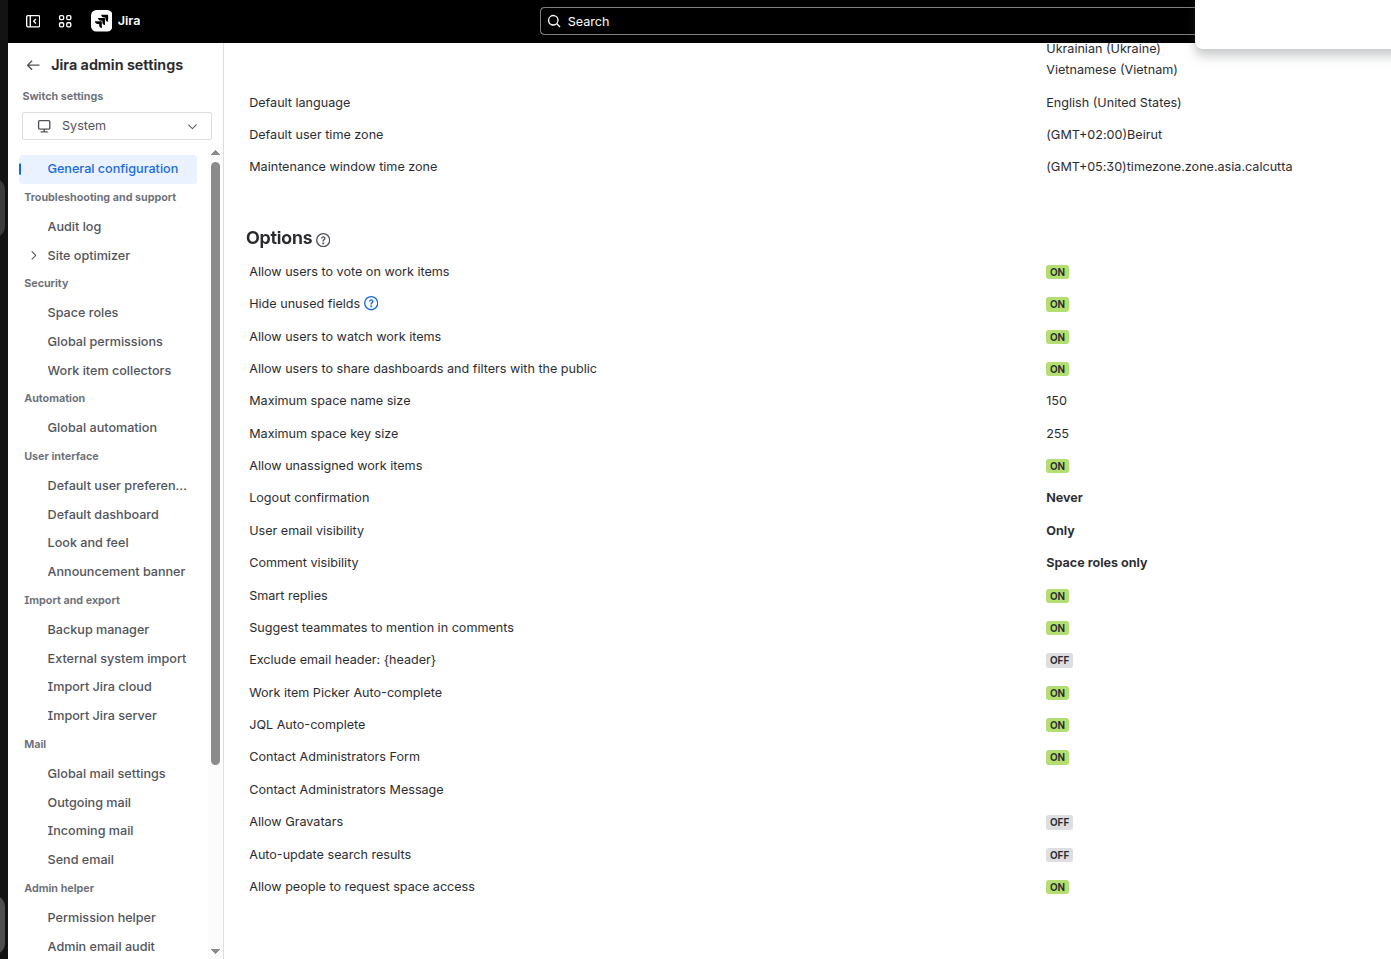
Step 1: Go to Settings
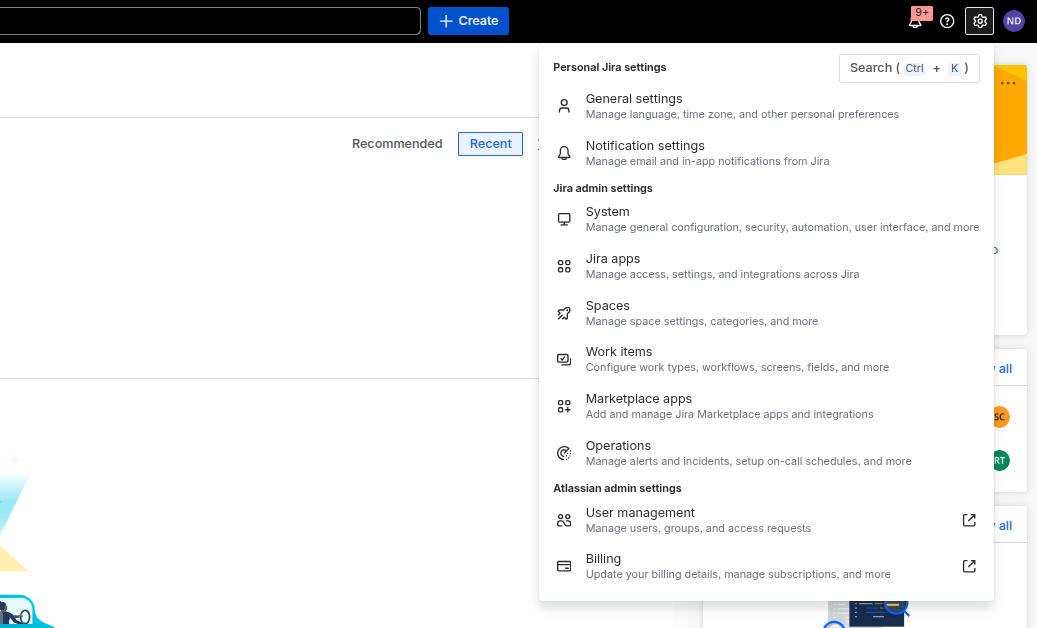
Login to your Jira site and click on Settings on the right navbar and Select “System”.
Step 2: Select relevant rule
Click on “Global Automation”.
Step 3: Click on Import Rules
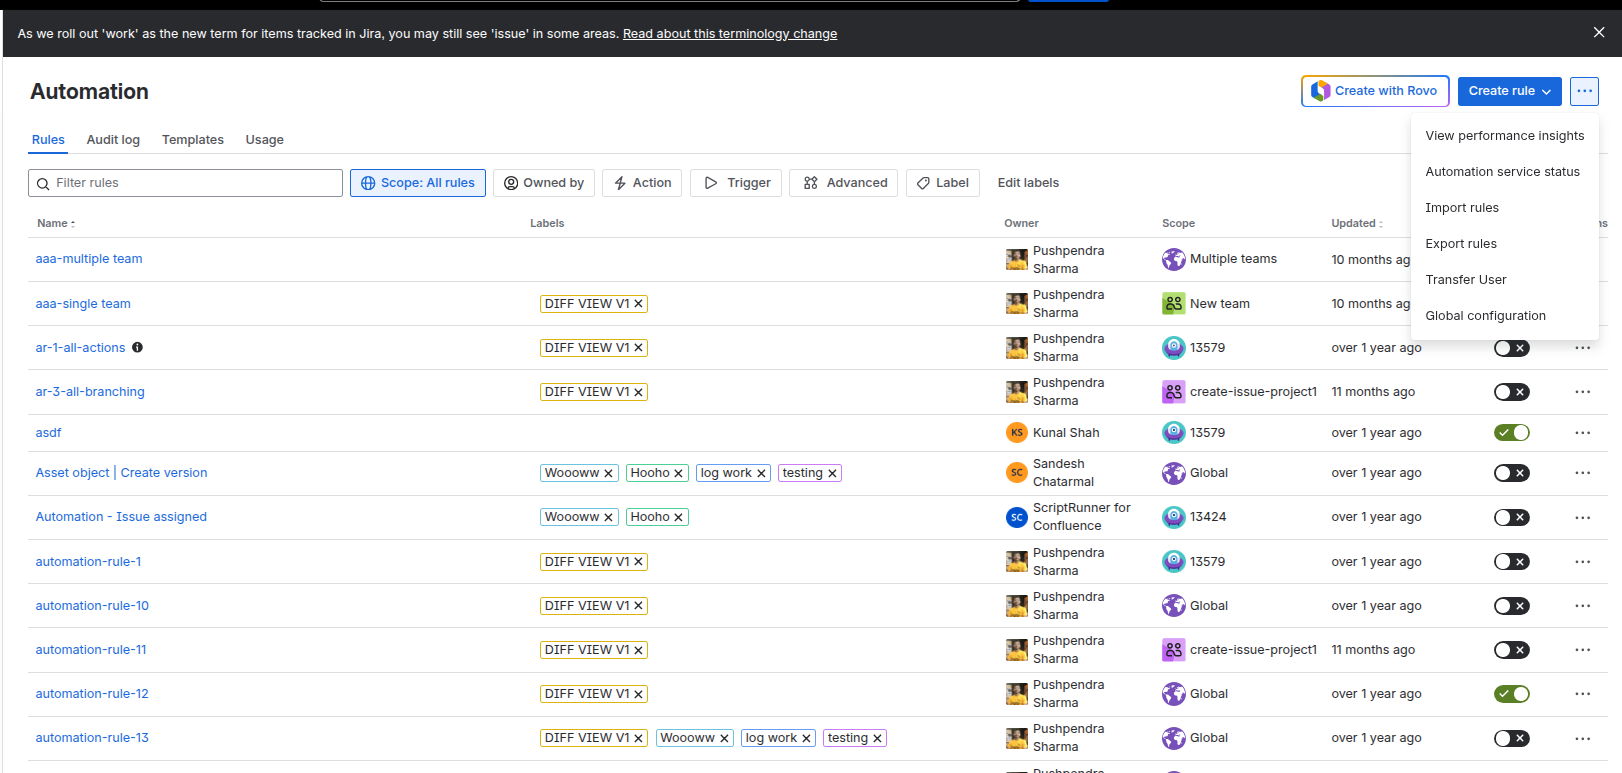
Click on the three dots on the right hand corner and select “Import Rules”
Step 4: Upload the JSON file
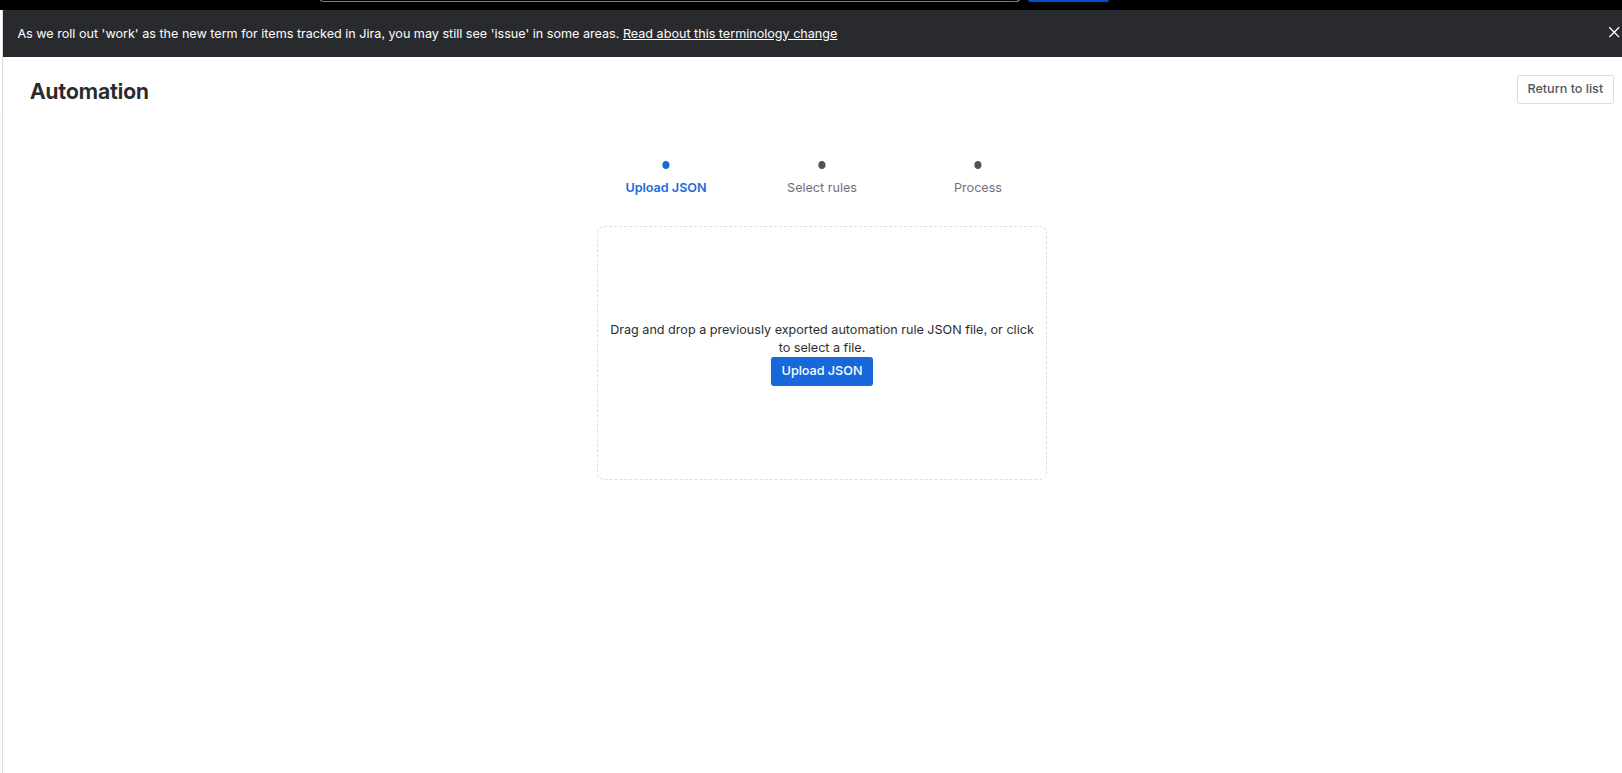
Upload the downloaded JSON file.
Note: Once the upload is complete, it is essential to review your configuration settings to ensure the environment is fully operational.
If you have performed a cross-site restore, pay close attention to mapping and connectivity settings, as some parameters may require manual adjustment to align with the new site's environment.