About this Page
This is a management dashboard that allows you to create, view, and authenticate secure connections between your current Jira Cloud site and other Jira Cloud sites.
What is the use case?
Use this to set up the necessary links for cross-site operations. These connections are a prerequisite for performing Disaster Recovery, migrating projects, or cloning configurations and data between different instances.
This feature is applicable to:
command center for jira config manager for jira Assets data manager for jira

Cross-site connections Dashboard
This page displays a list of all existing cross-site connections and allows you to manage them. The purpose is to set up a connection between this site and another Jira Cloud site to facilitate project migration between them.
Available Actions
At the top right, you have several management options:
+ Add connection:
Click this button to start the process of creating a new connection to another Jira Cloud site.
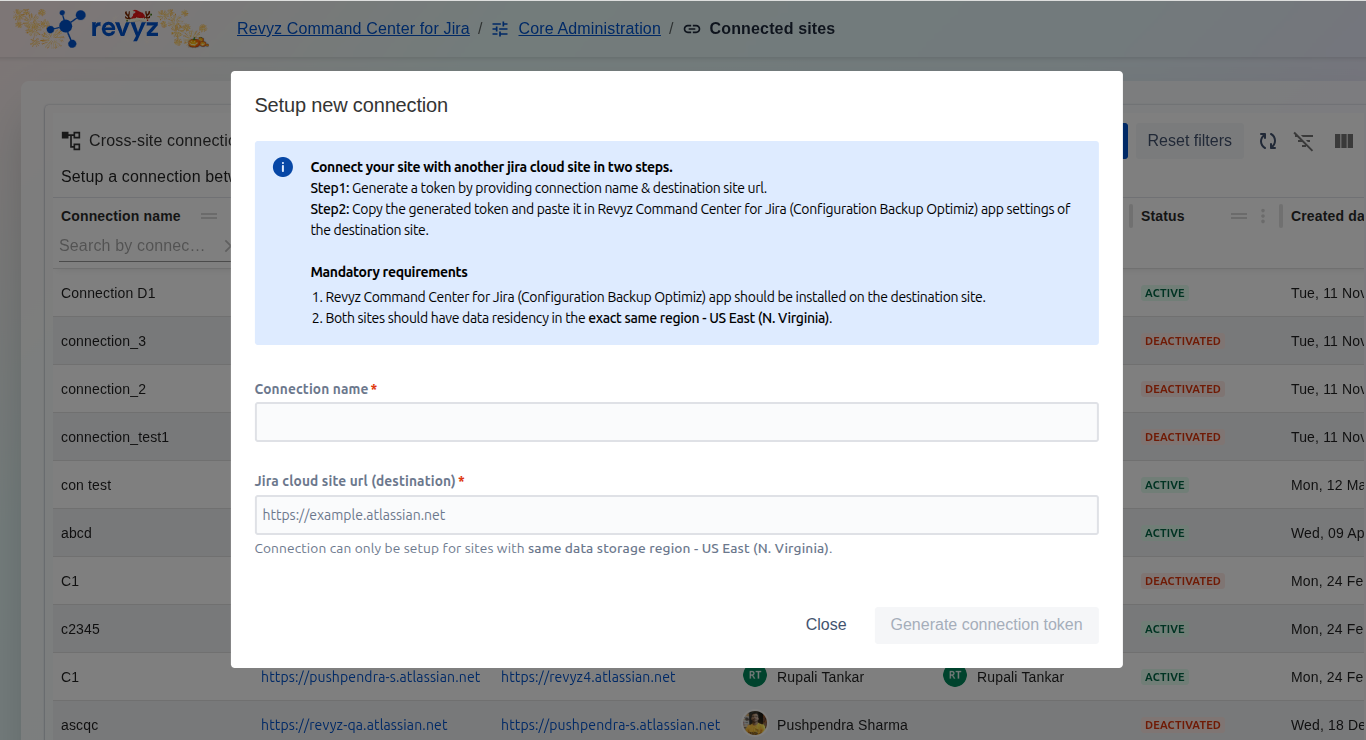
This pop-up, "Setup new connection," is the starting point for linking your current Jira site to another "destination" Jira site using the Revyz app. This connection is a mandatory prerequisite for performing cross-site operations, such as cloning configurations or projects between your two sites (e.g., from a sandbox to a production environment).
The process works by generating a secure, one-time token on your source site, which you then paste into the Revyz app settings on your destination site to complete and validate the connection.
Mandatory Requirements
As shown in the modal, you must meet two critical requirements before you can create a connection:
-
Revyz App Installed: The "Revyz Command Center for Jira" app must be installed and licensed on both the source and destination sites.
-
Identical Data Residency: Both Jira sites must be located in the exact same data storage region (e.g., both must be in "US East - N. Virginia"). Connections between sites in different regions are not supported.
How to Set Up a New Connection (Step-by-Step)
This is a two-part process that starts on your source site and finishes on your destination site.
Part 1: Generate Token (on your Source Site)
-
Navigate to the Revyz app and go to Core Administration > Connected Sites.
-
Click the "Setup new connection" button to open this pop-up.
-
Connection name: Enter a descriptive name for the connection (e.g.,
Prod-to-Sandbox-Link). -
Jira cloud site uri (destination): Enter the full URL of the other Jira site you want to connect to (e.g.,
https://your-other-site.atlassian.net). -
Click the "Generate connection token" button.
-
A unique token will be displayed. Copy this token to your clipboard.
Part 2: Validate Token (on your Destination Site)
-
Log in to your destination Jira site (the site you entered in step 4).
-
Open the Revyz Command Center for Jira app.
-
Navigate to the app's Settings section.
-
Find the settings page for Cross-site connections (or a similar name).
-
Paste the token you copied from the source site into the validation field.
-
Save and confirm the connection.
After completing Part 2, the connection will be validated. You can return to the "Connected Sites" page on your source site, and the new connection should appear in the list with an ACTIVE status.
Note: When setting up a cross-site connection, you must enter the original site URL to ensure a seamless connection and data transfer. For more, refer: https://support.revyz.io/revyz-data-manager/why-original-site-url-is-required-while-setting-up
Activate connection
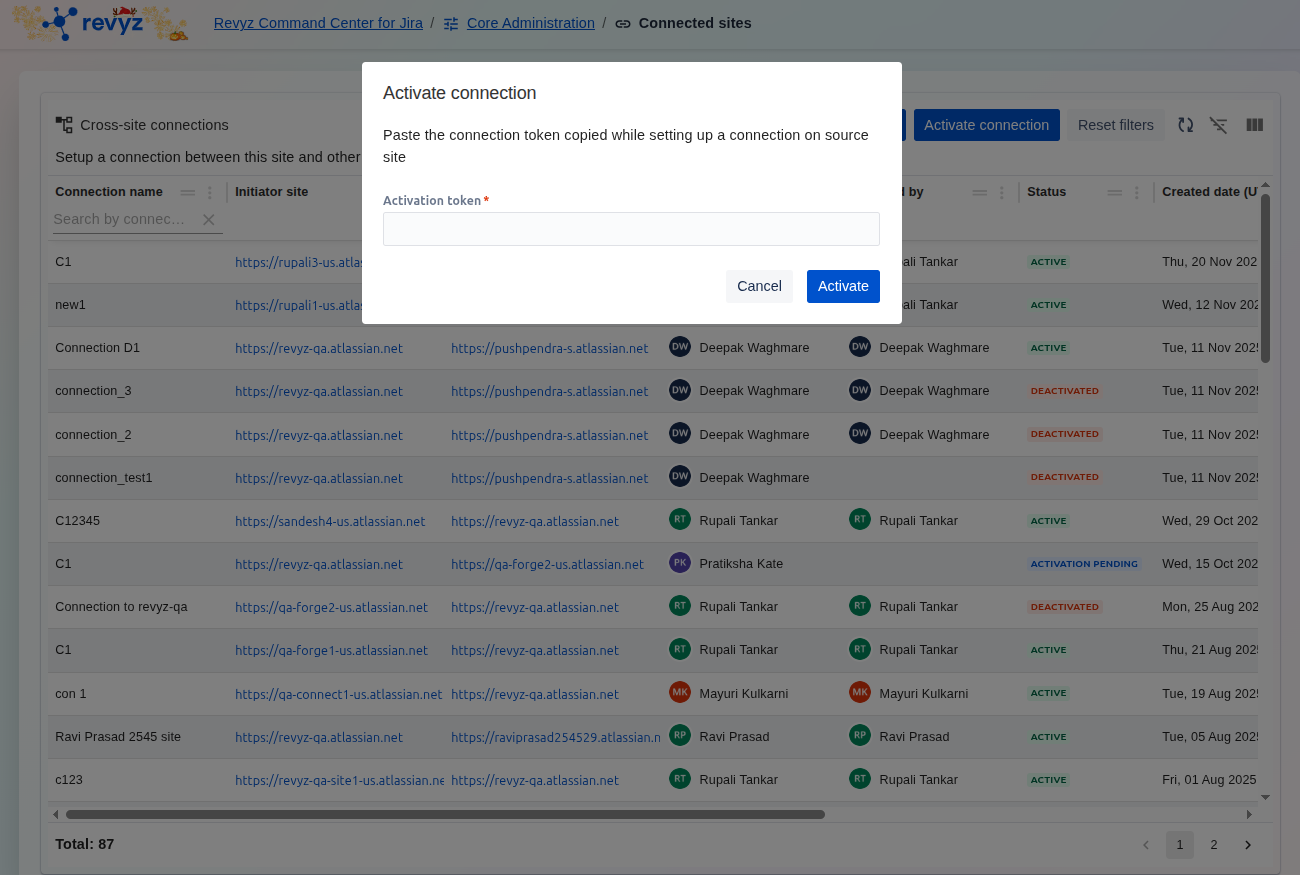
Select an existing, pending connection from the list and click this button to activate it.
Connections Table
The main table provides a detailed list of all configured connections. You can filter each column to find a specific connection.