About this Page
This article guides users through configuring Azure Blob Storage within the Revyz app's setup wizard. It covers selecting the storage option, entering the specific Azure storage account and container names, and inputting necessary credentials like Tenant ID. The process completes after verifying the app has the required read/write permissions for the storage.
This step follows the last step detailed at the Installing the App page, if the user selects Azure Blog Storage from the Customer Managed Storage option.
Steps to complete Azure Blob storage setup.
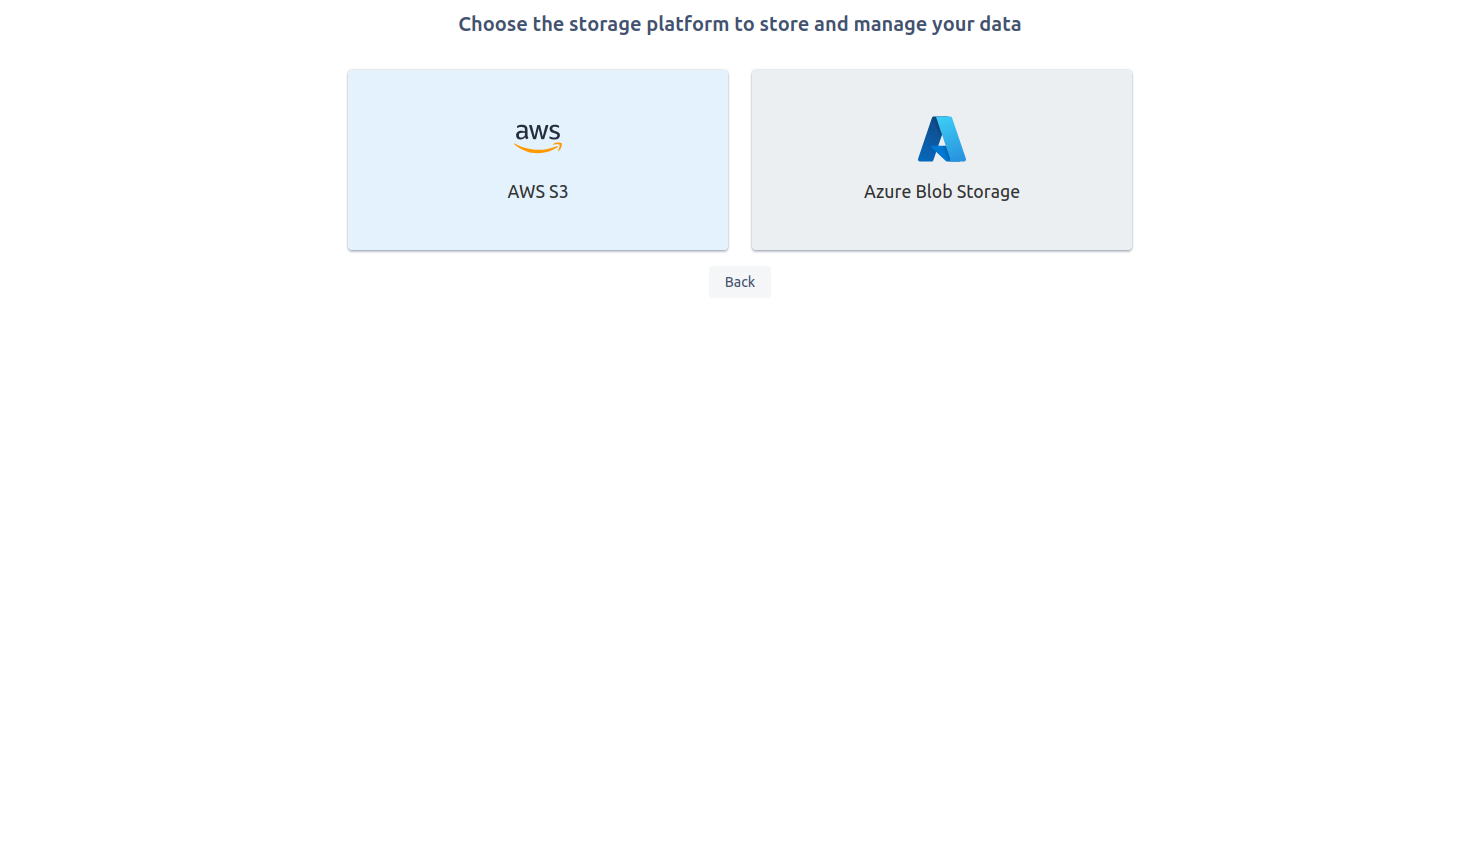
Step 1: Select Azure Blob Storage
Step 2: Setting up an Azure Blob Storage
-
Complete the process detailed in the screenshot below to successfully set up an Azure blob storage. Note that you need necessary permissions to create and manage the resources. For details on how to complete steps on creation of the storage, refer this doc.
To add address to access Revyz app on your Atlassian site, refer this page: IP Address based on Data Residency
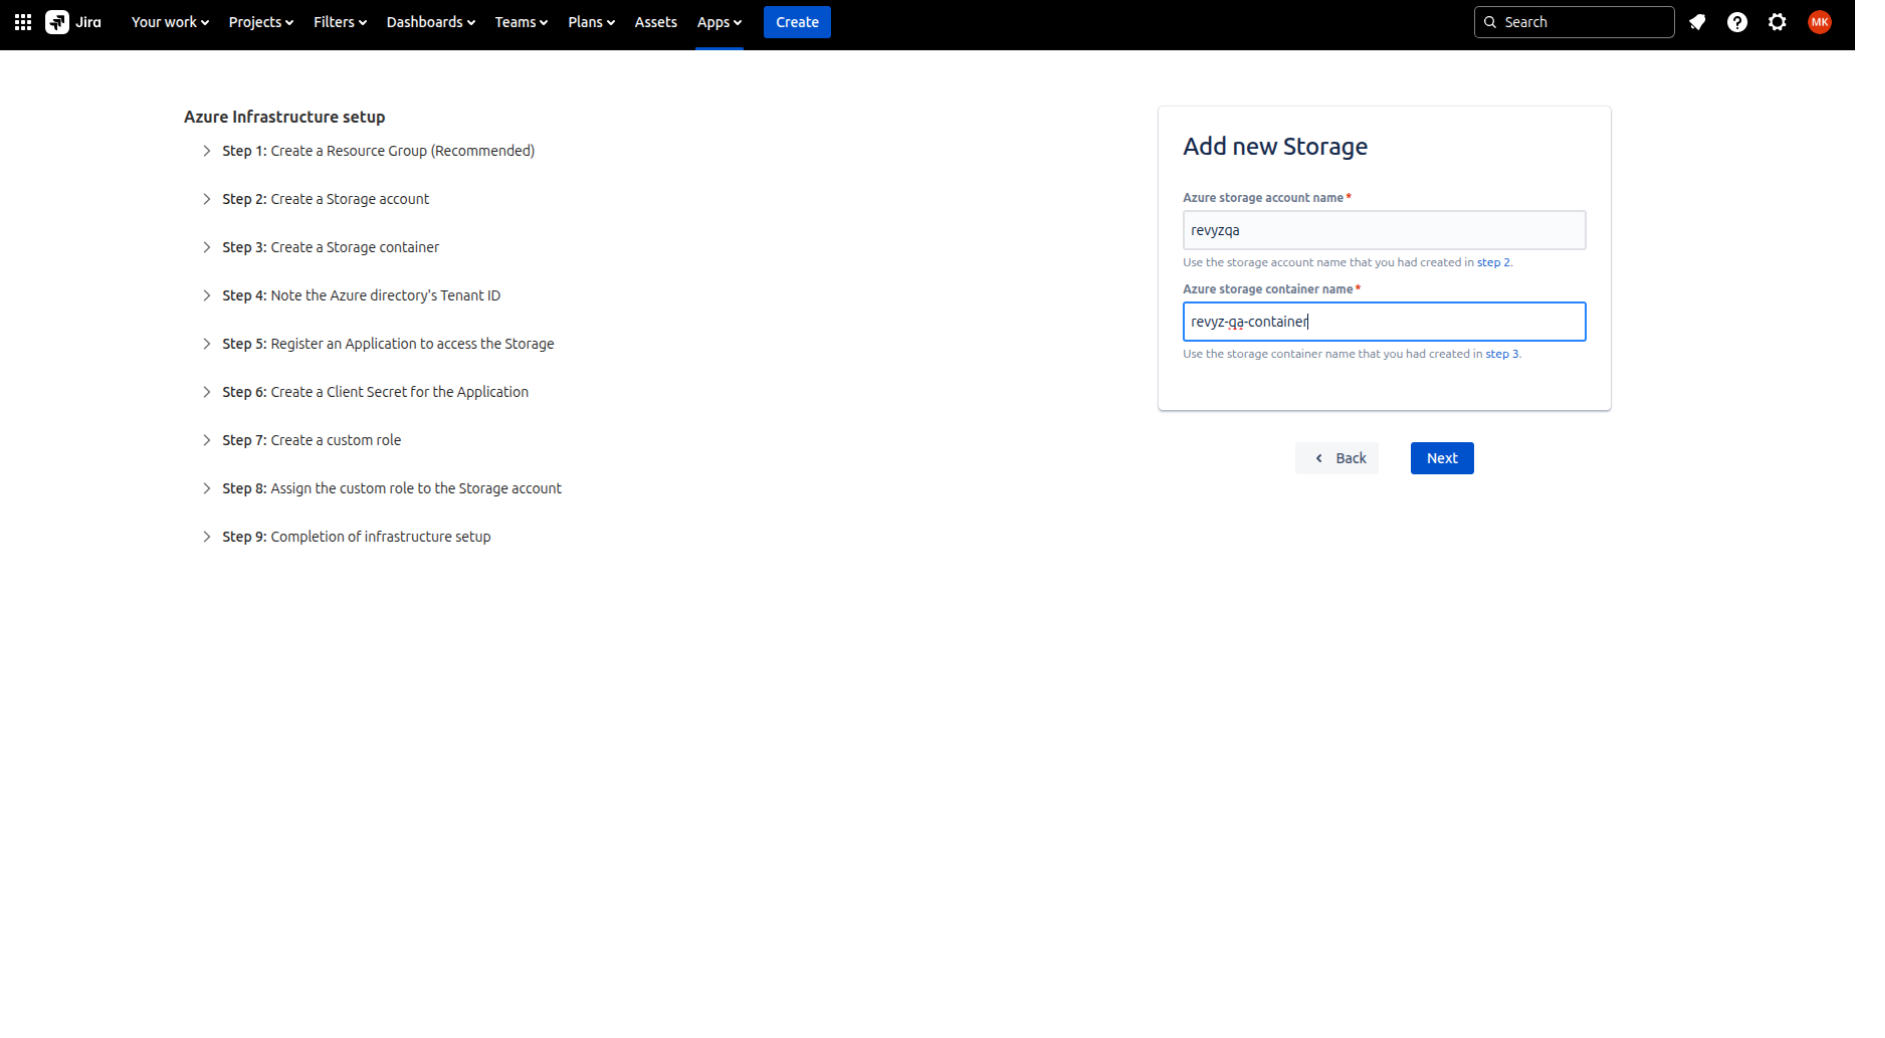
Step 3: Enter the Azure Storage Account name
-
Give Azure storage account name and Azure storage container name which was created in your Azure account.
-
Click on 'Next'.
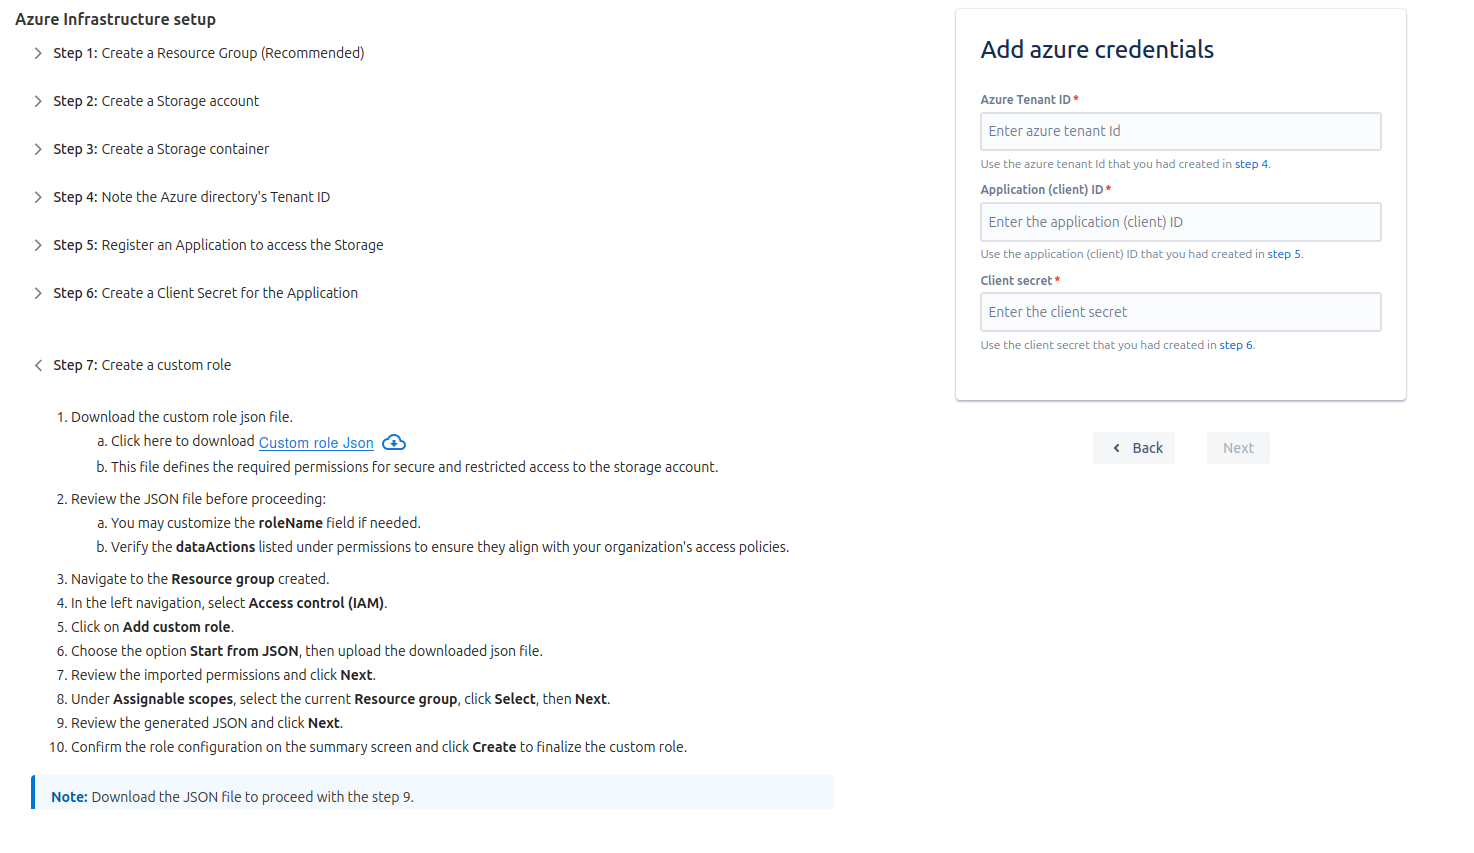
Step 4: Adding Azure Credentials
-
On the next page, Add Azure Credentials:
-
Azure Tenant Id - Which is copied from Microsoft Entra Id.
-
Application (client) Id - Which is copied after creating the app.
-
Client secret - The value is copied after creating secret.
-
-
Click on 'Next'
Step 5: Creating Custom Role in Azure RBAC
-
To follow the principle of least privilege, you will create a custom role in Azure RBAC (Role-Based Access Control). This role will define only the specific permissions Revyz needs (Write, Read, Tag) and nothing more.
-
For details:
This is a critical security step. Instead of giving the application a broad, built-in role (like "Contributor" or "Owner"), you will create a custom role using a JSON file. This ensures the application follows the principle of least privilege—it only gets the exact permissions it needs (to read, write, and tag data) and is explicitly denied dangerous permissions (like delete).
-
Download the Custom Role JSON File
-
In the setup wizard, click the Custom role .json link to download the template.
-
This file contains the specific
dataActions(permissions) required for the application to function correctly while restricting all other actions.
-
-
Navigate to Your Resource Group
-
Log in to the Azure portal.
-
Go to the Resource Group you created for this setup (as per Step 1 of the full guide).
-
-
Open Access Control (IAM)
-
In the left-hand navigation menu for your Resource Group, select Access control (IAM).
-
Azure Link: What is Azure role-based access control (RBAC)?
-
-
Add Custom Role
-
At the top of the IAM pane, click the Add button, then select Add custom role.
-
-
Start from JSON
-
A new "Create a custom role" wizard will open.
-
On the Basics tab, for the "Baseline permissions," select Start from JSON.
-
Click the folder icon next to "Select a file" and upload the
Custom role .jsonfile you downloaded in the first step. -
Azure Link: Tutorial: Create an Azure custom role using the Azure portal
-
-
Review Permissions
-
Click Next to go to the Permissions tab.
-
Azure will have automatically imported the permissions from the JSON file. You can review them here if you wish, then click Next.
-
-
Set Assignable Scopes
-
This step defines where this role can be assigned. It should already be scoped to your Resource Group.
-
If the scope is not set, click Add assignable scopes and select your Resource Group. Click Next.
-
-
Review and Create
-
The final Review + create tab shows a summary of the role.
-
Confirm the details and click Create.
-
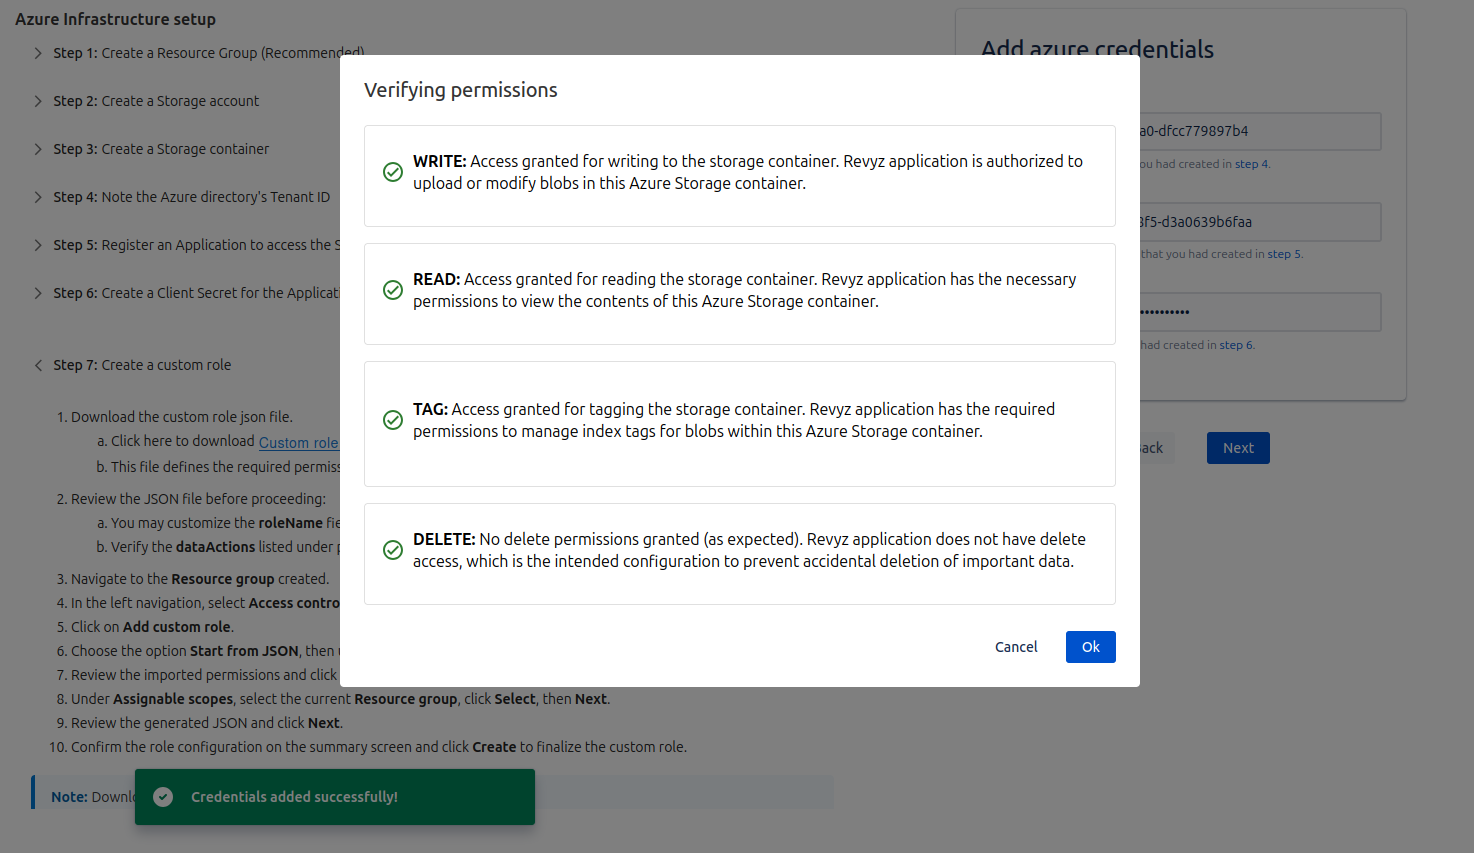
Step 6: Verifying the Permissions
-
On the next page, it will verify the permissions:
-
WRITE: The Revyz application is confirmed to have write permissions, enabling it to add or alter blobs within this Azure Storage container.
-
READ: Read access for the storage container is verified, permitting the Revyz application to look at the contents held inside.
-
TAG: Tagging privileges are enabled, which allows the Revyz application to handle index tags for blobs in the container.
-
DELETE: By design, delete access is blocked; the Revyz application lacks permission to remove data, preventing accidental erasures.
-
-
Click on 'Ok'
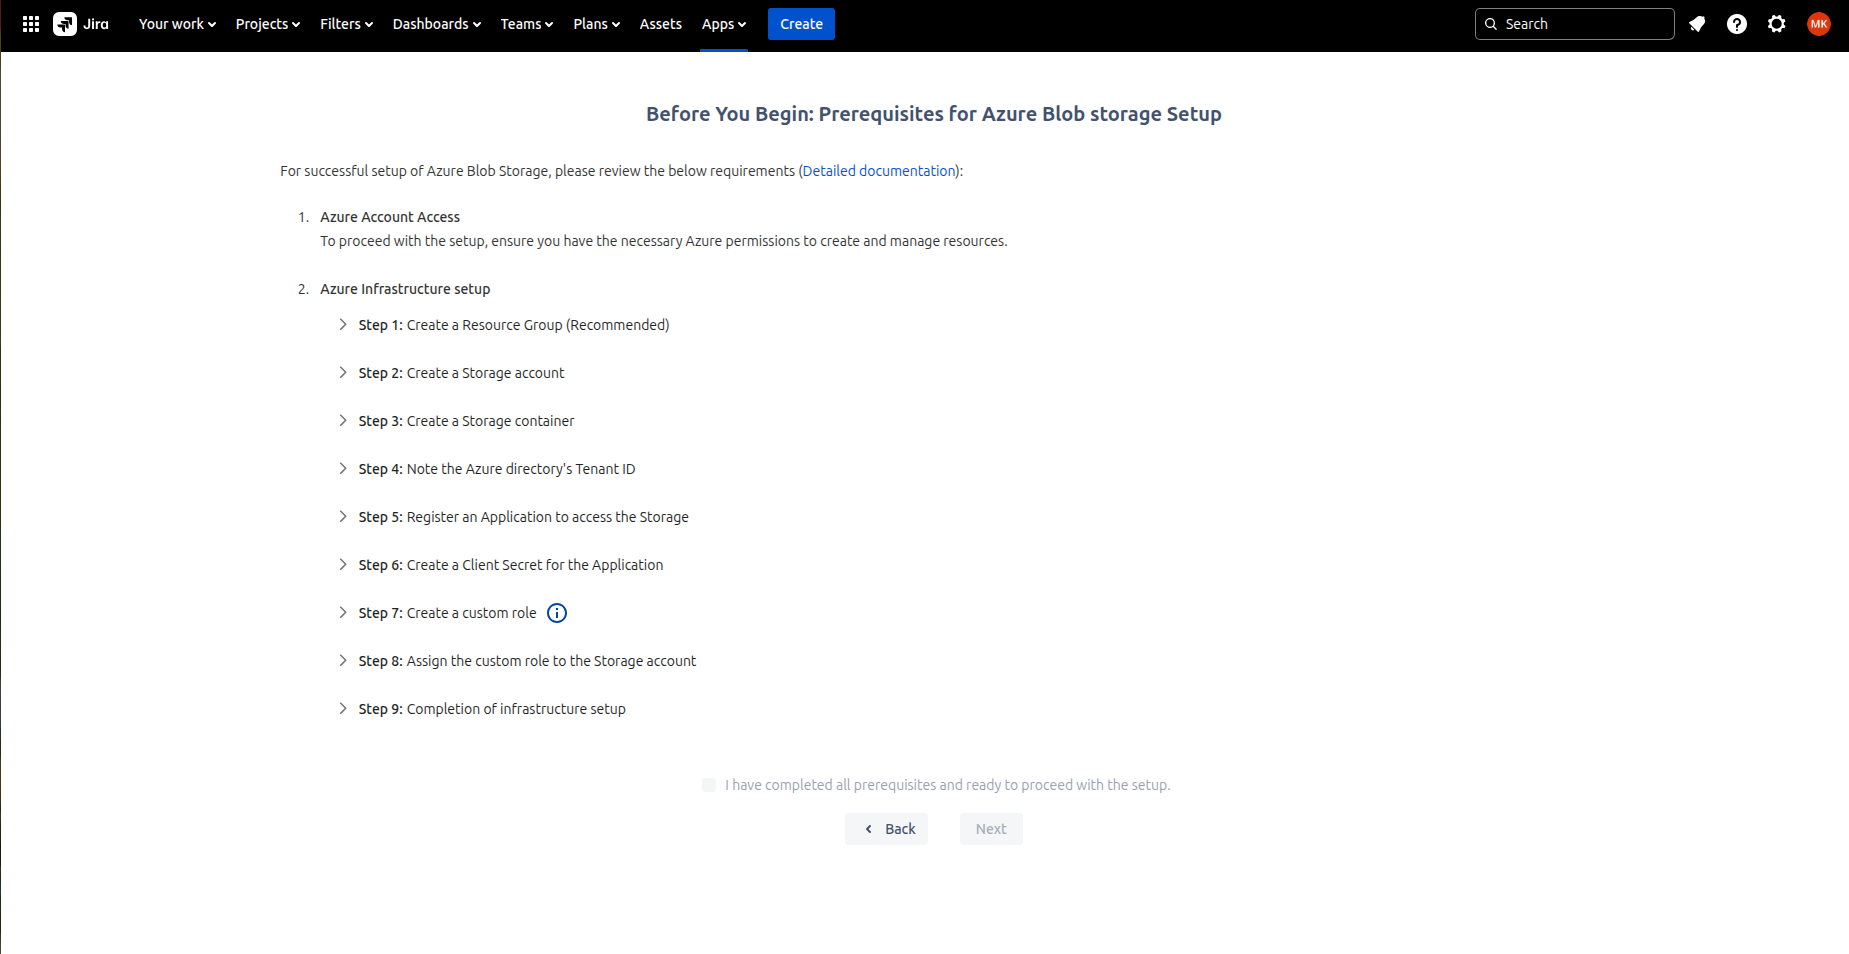
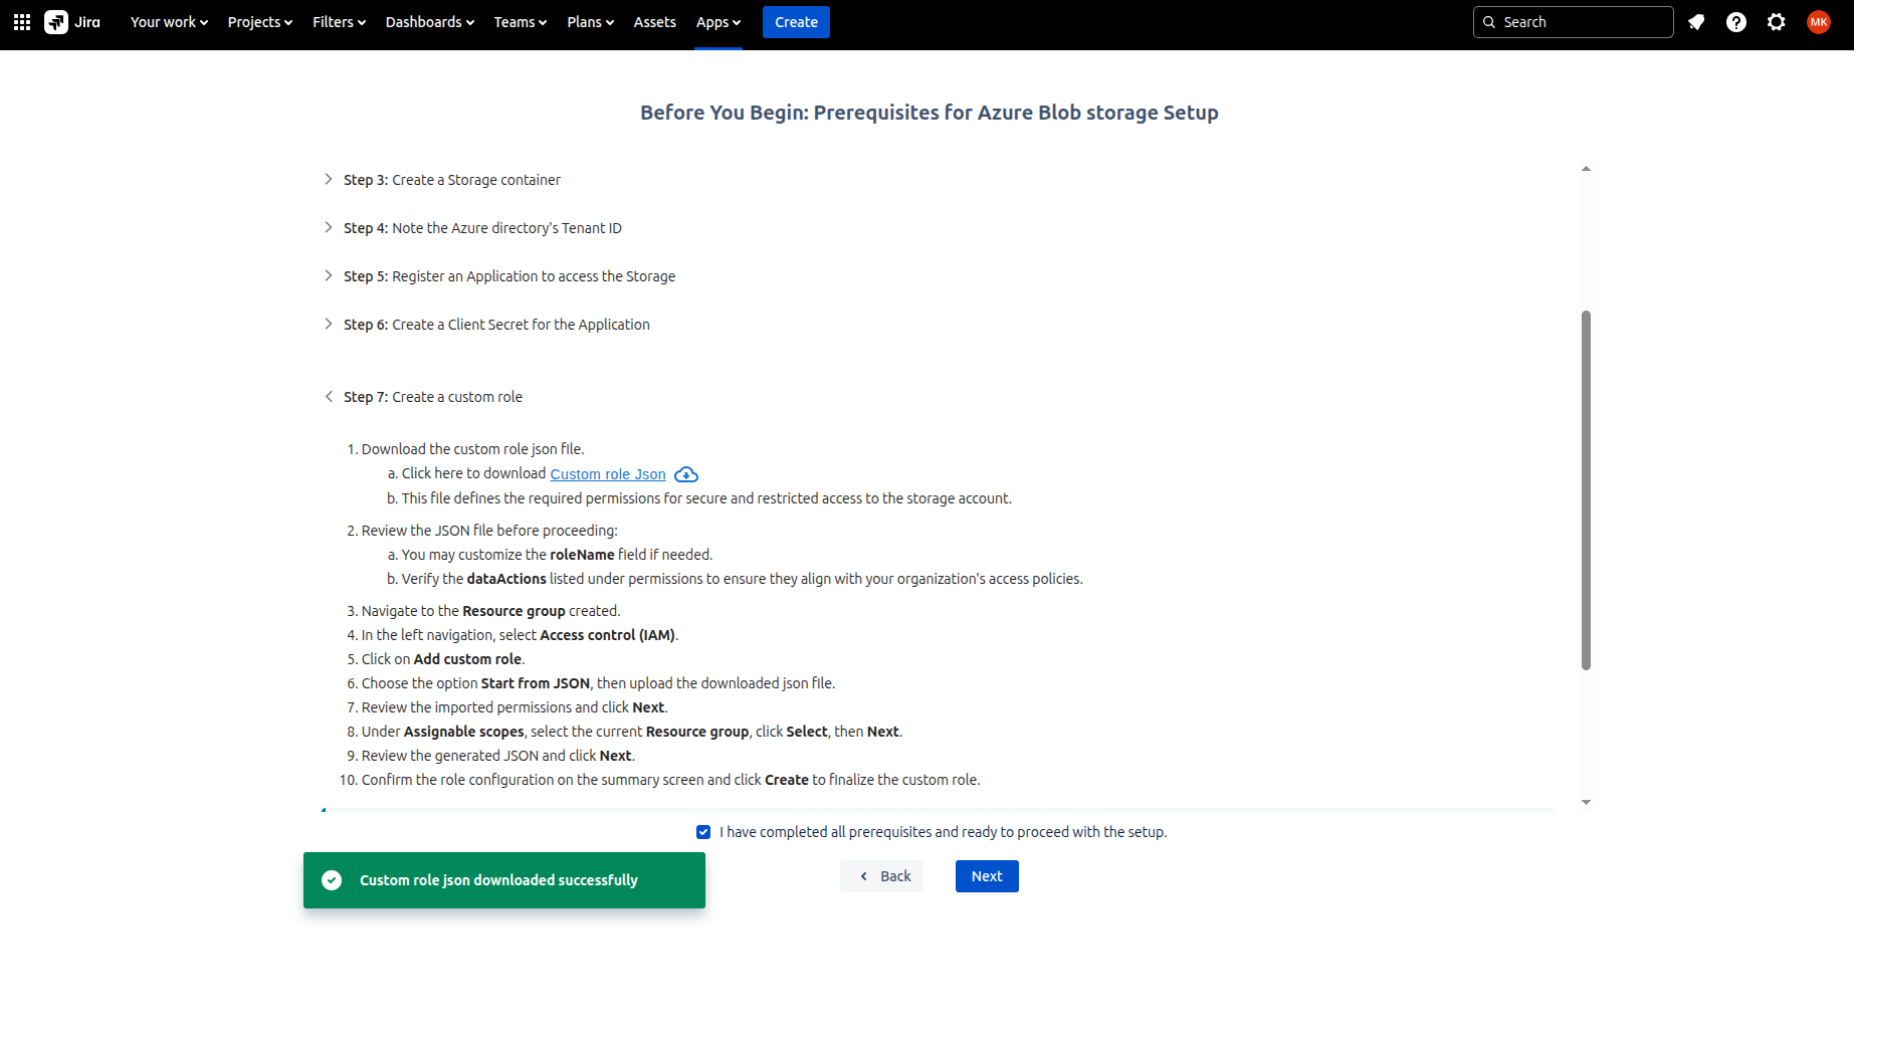
Step 7: Completing the prequisites
Download the JSON from Step: 7 and check ‘I have completed all prerequisites and ready to proceed with the setup’ and click on 'Next'.
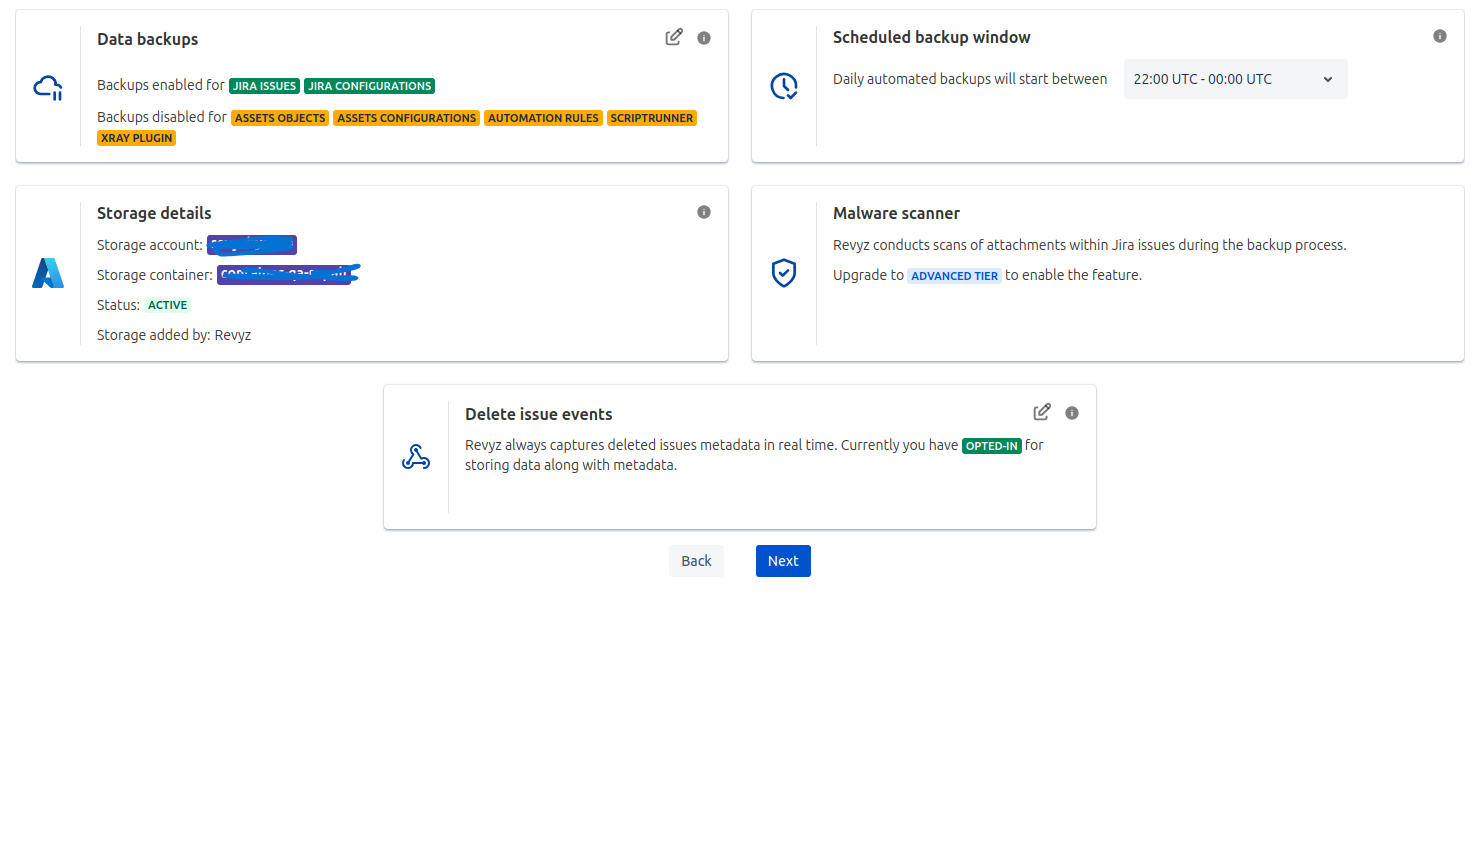
Step 8: Manage the Settings Page
-
Check settings page, confirm storage details.
-
Click on 'Next'.
-
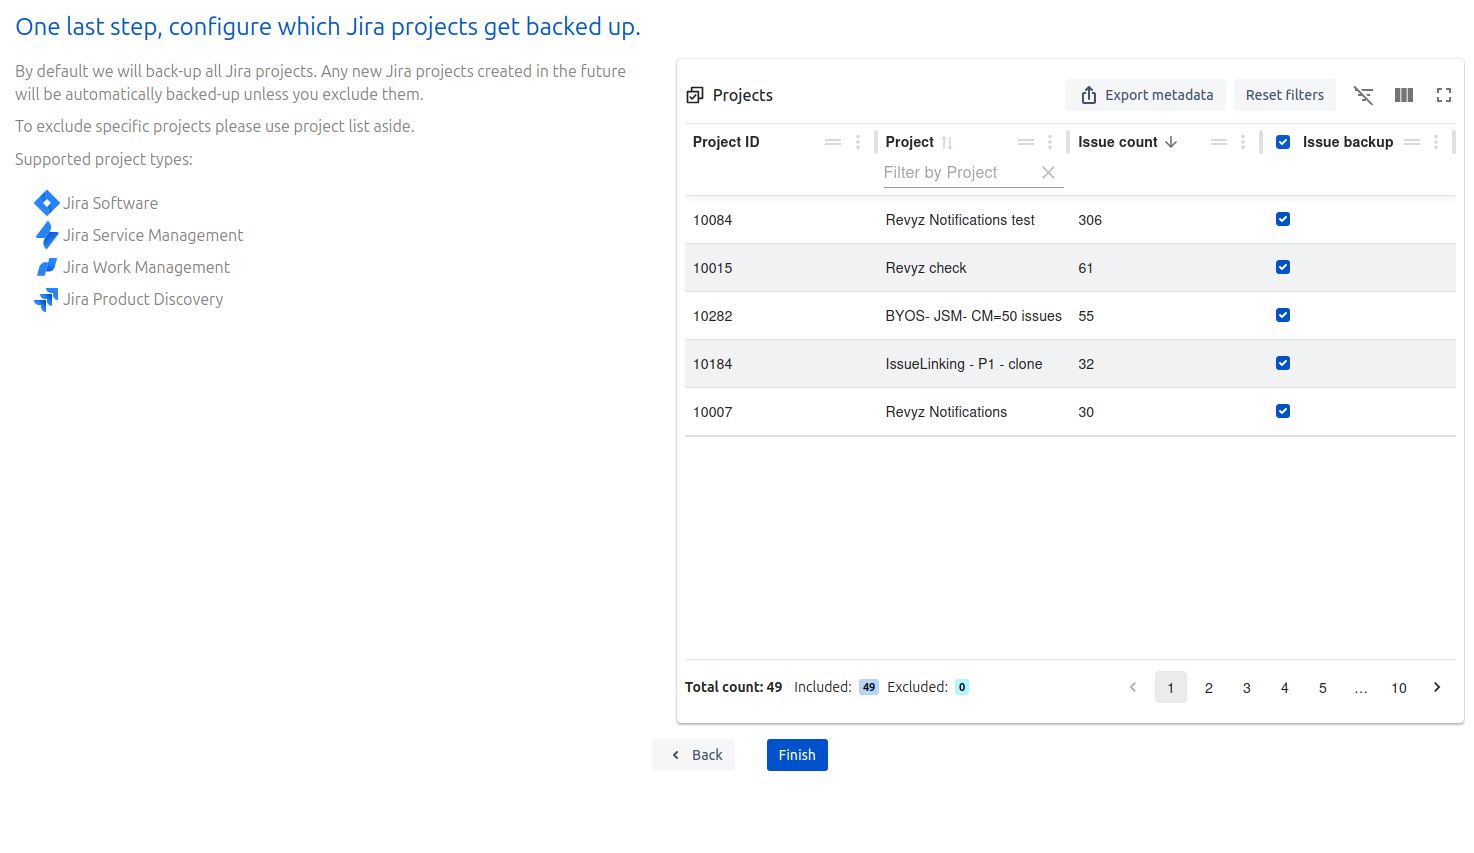
Check Project list and click on 'Finish'.
-
If you want to run backup immediately, then select Run data immediately option
-
If you want to include new project’s issues to be backed up, Check “Include all new projects in the issues backup”. We recommend to check this option.
-
Check ‘I agree to all the settings’ option.