About this Page
This page guides you through the process of tracking and restoring deleted work items within the Revyz application.
What is the Use Case?
Understand the prerequisite backup settings required before a restore can be performed and how to identify deleted work items, filter the deleted records, and restore them to a selected Jira space.
Prerequisites before Initiating a Work Item Restore
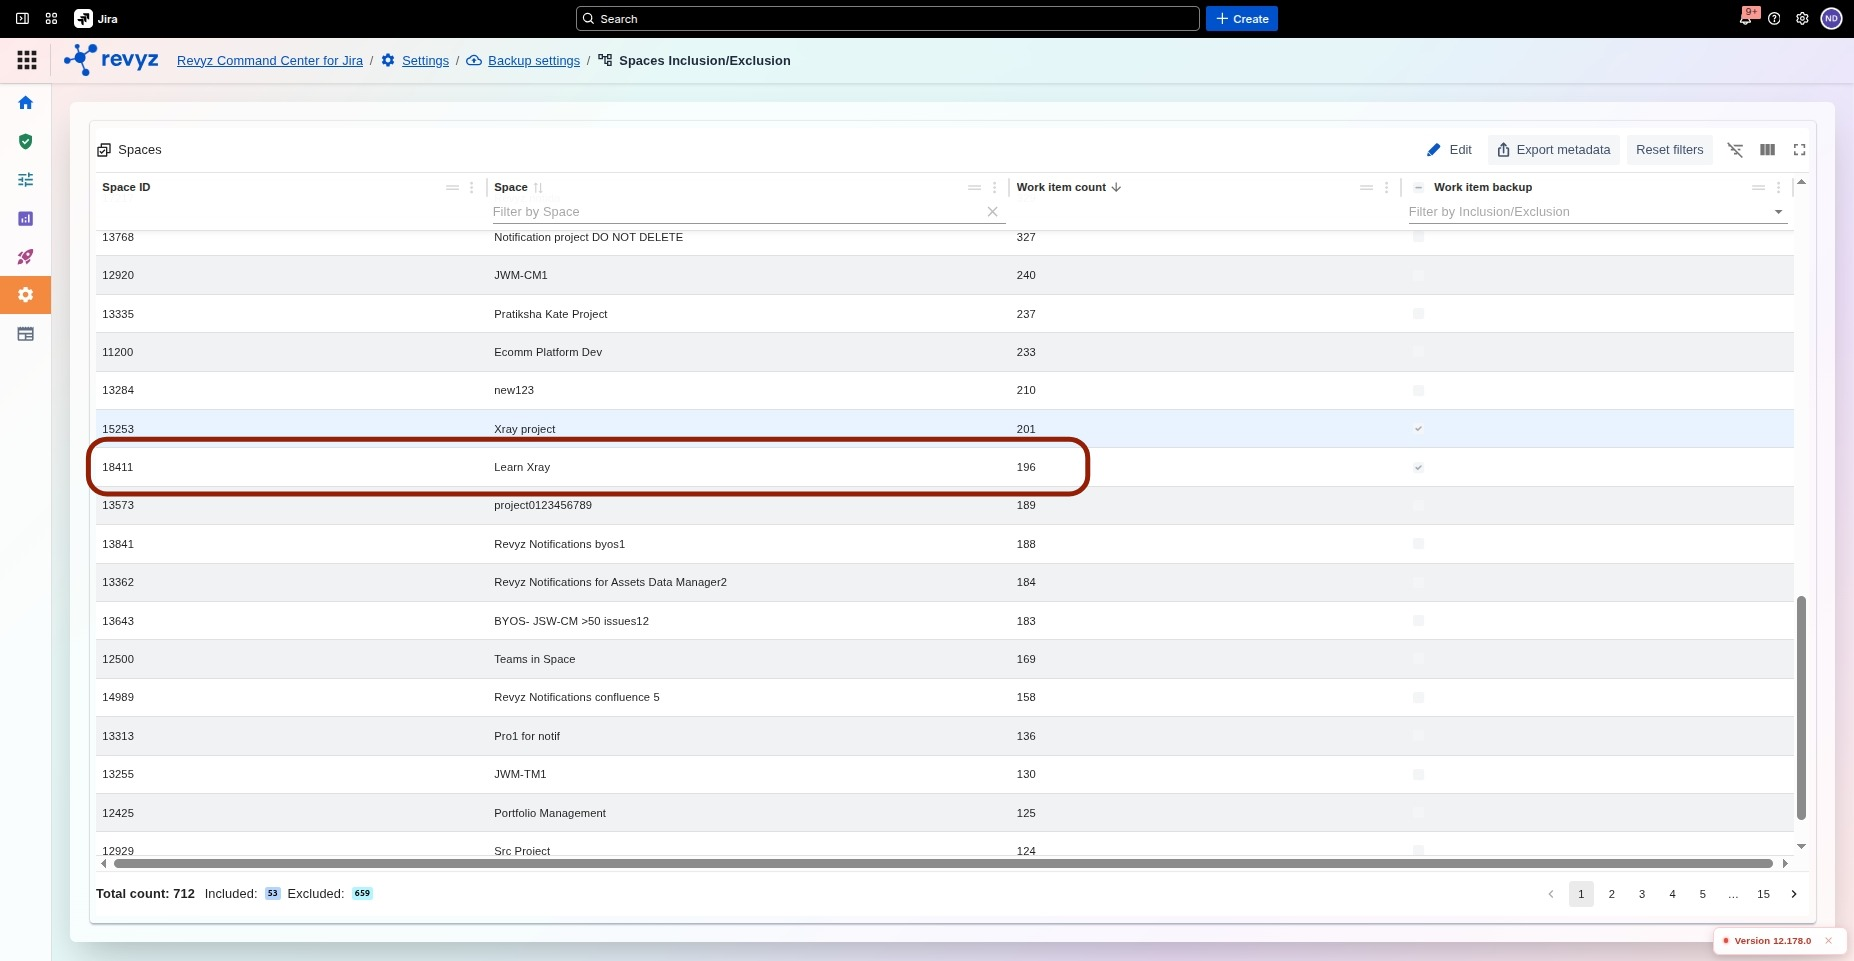
Verify Space Backup Settings
-
Navigate to Spaces → Space settings → Backup settings.
-
Review the Space inclusion and exclusion rules.
-
Verify that the target space is included in the space inclusion list for work item backups.
-
If the space is not included, add it before attempting any restore.
-
Confirm the backup configuration is saved so future snapshots include the space.
Note: If the space is not included under Backup settings, you will not be able to restore the deleted work items from that space.
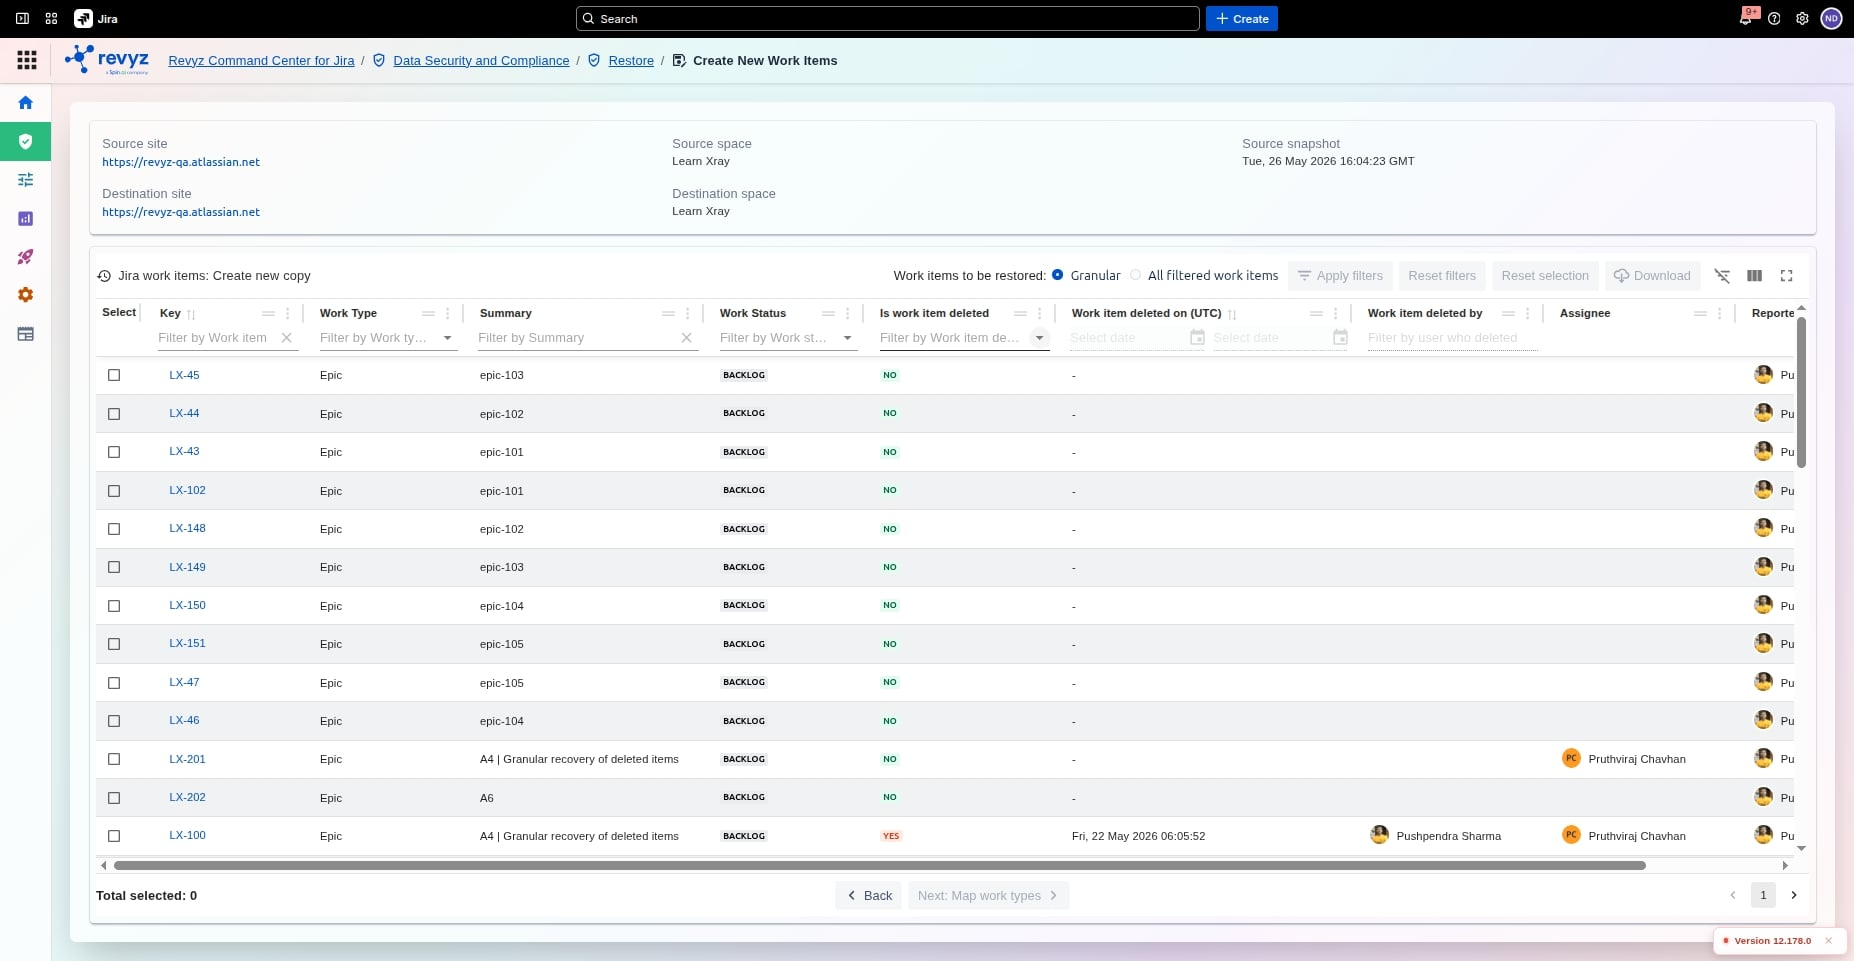
How to Restore a Deleted Work Item?
Restoring a work Item
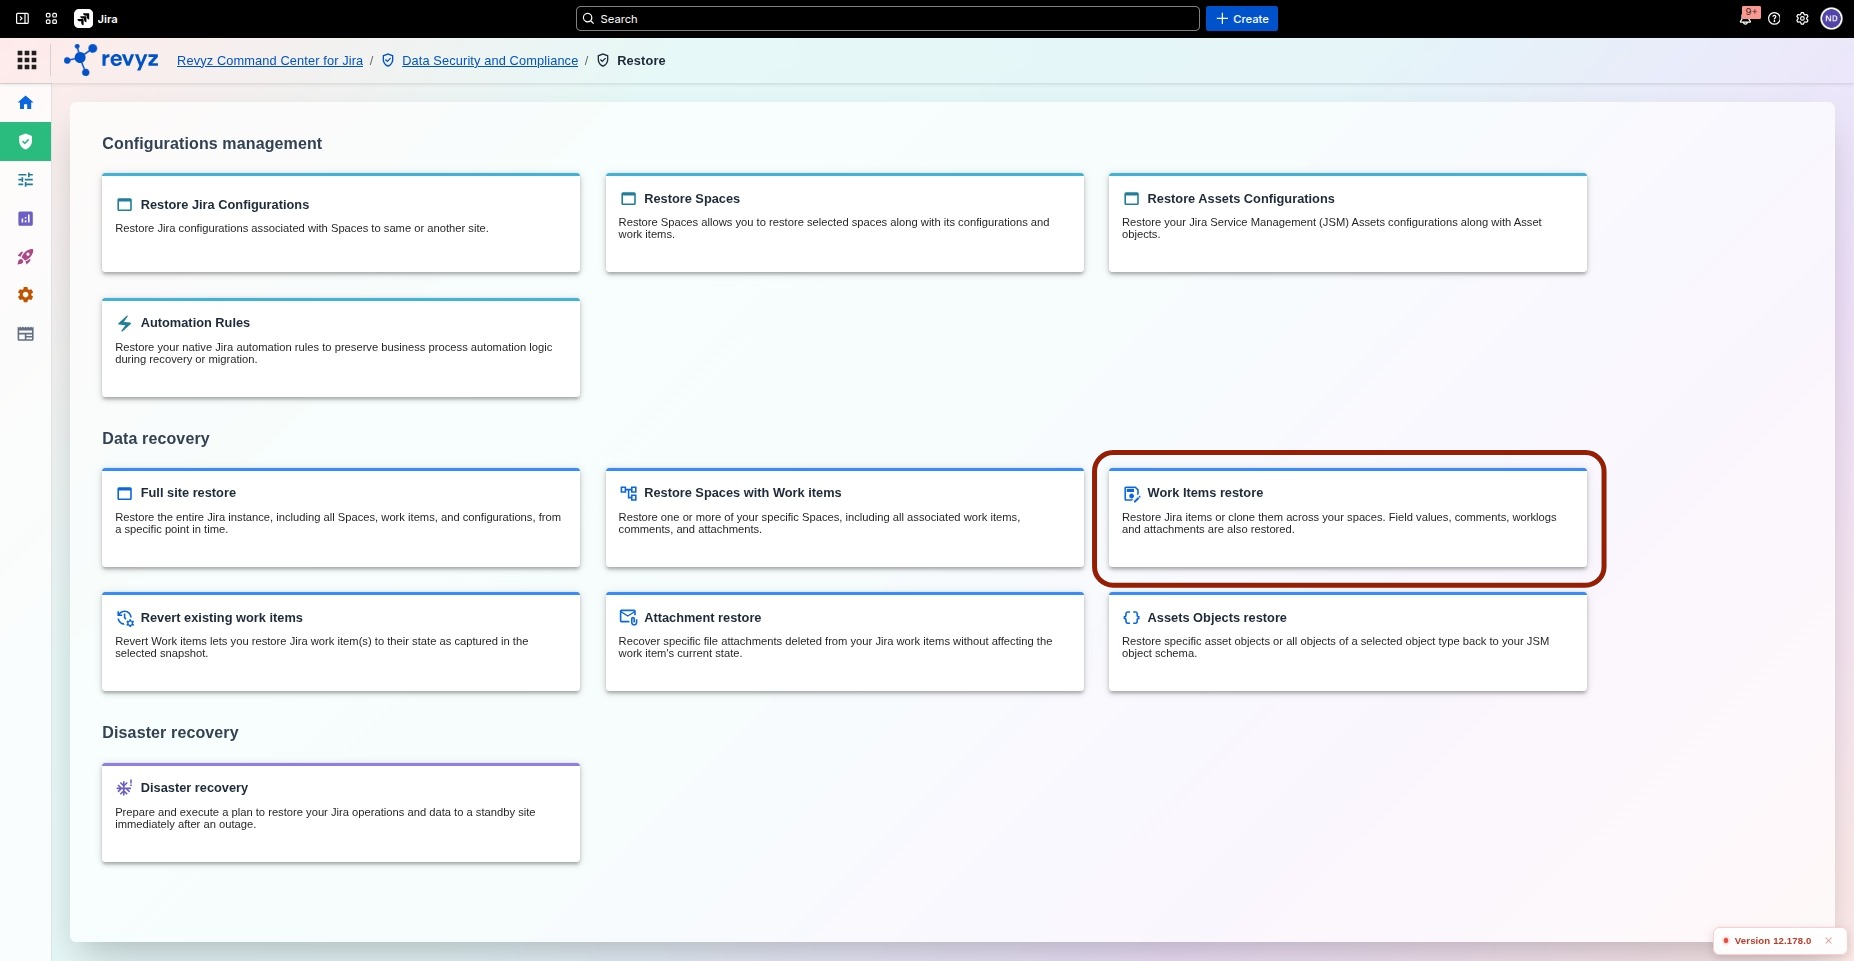
Initiate the Work Items Restore
-
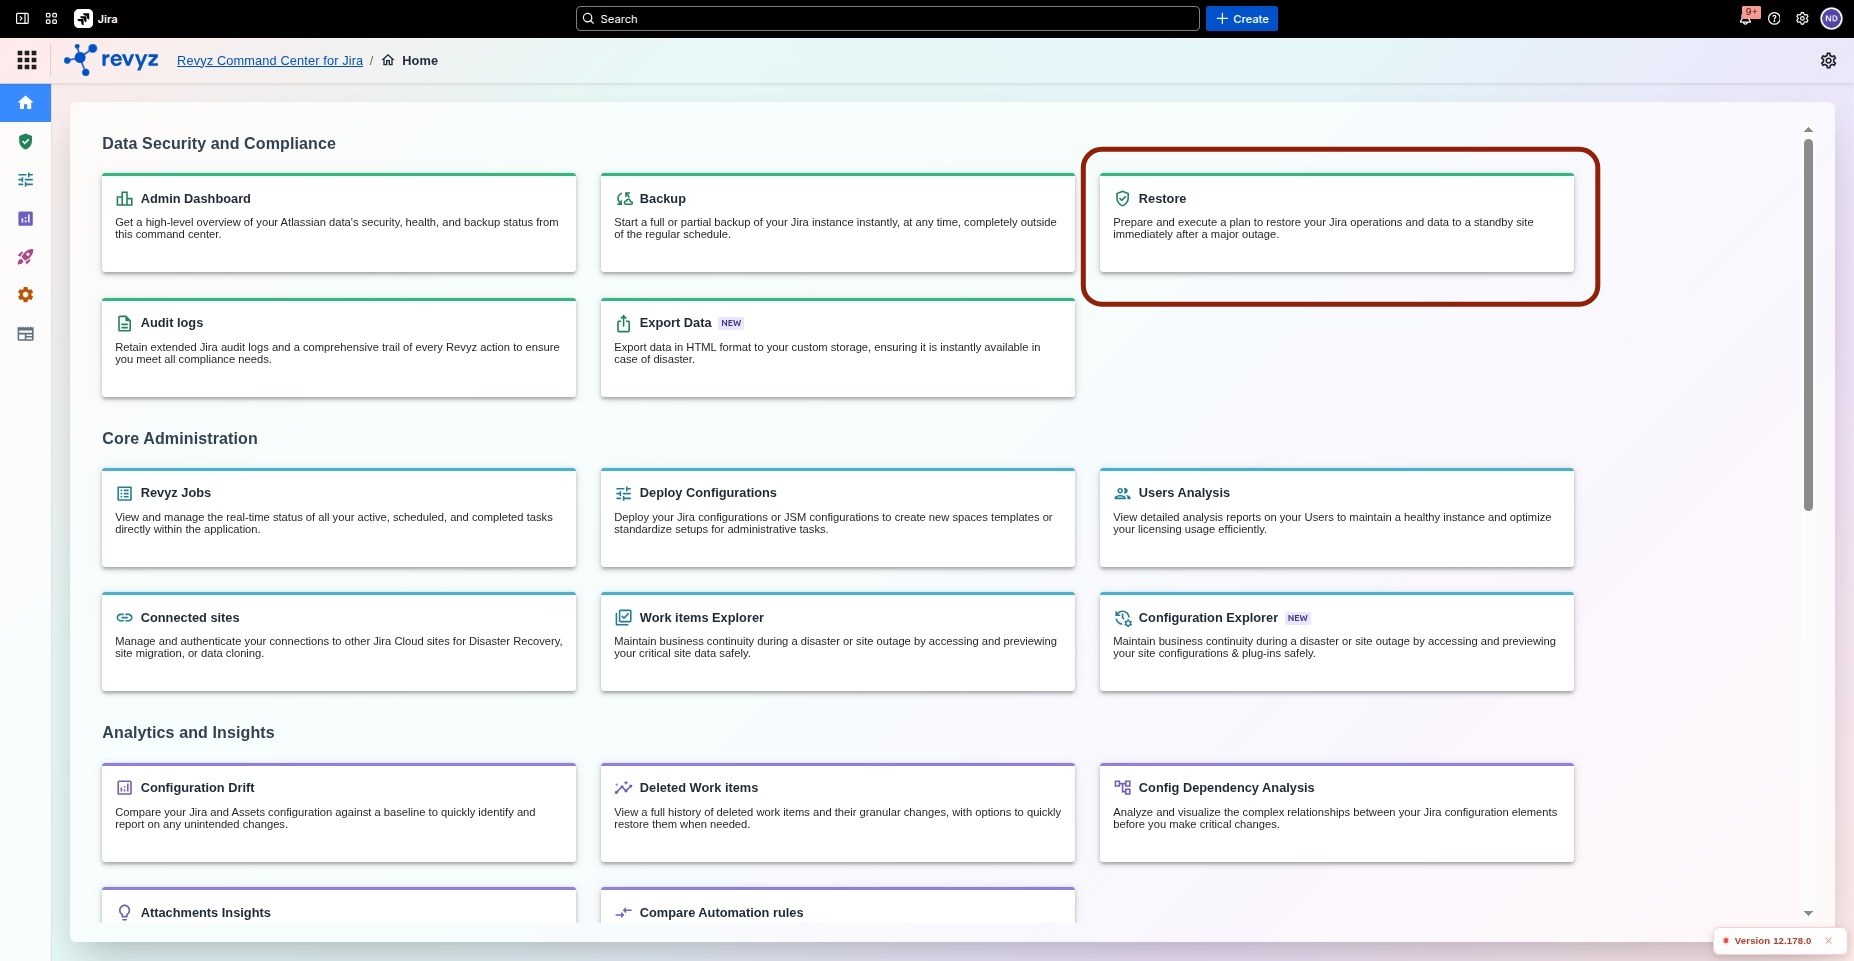
In the main navigation, go to the Restore section.
-
Click on Data Security and Compliance Restore.
-
Select Work Items Restore.
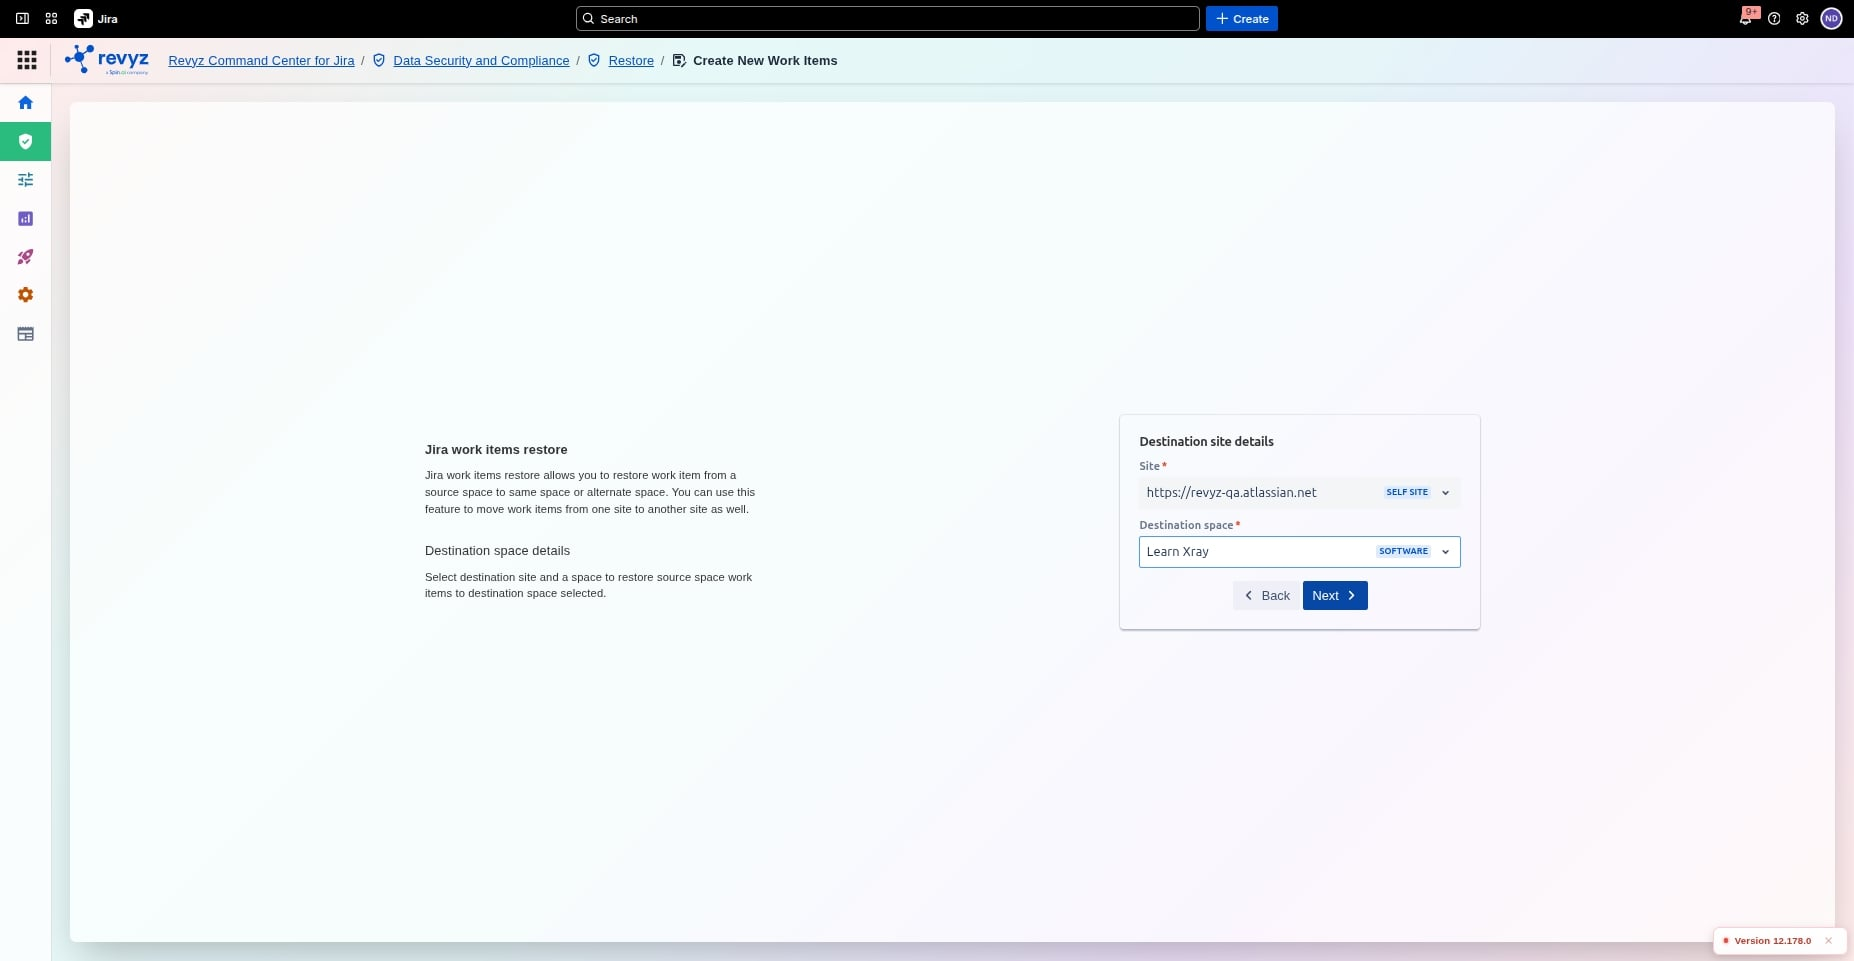
Select Source and Destination

-
Choose the backup site and the specific Snapshot you wish to restore from.
-
Source Space: Select the Jira space where the work items originally existed (e.g., LearnXray on app3).
-
Destination Site & Space: Choose the destination site and space. (For exact data recovery, select the same site and same space as the source).
Apply Deletion Filters
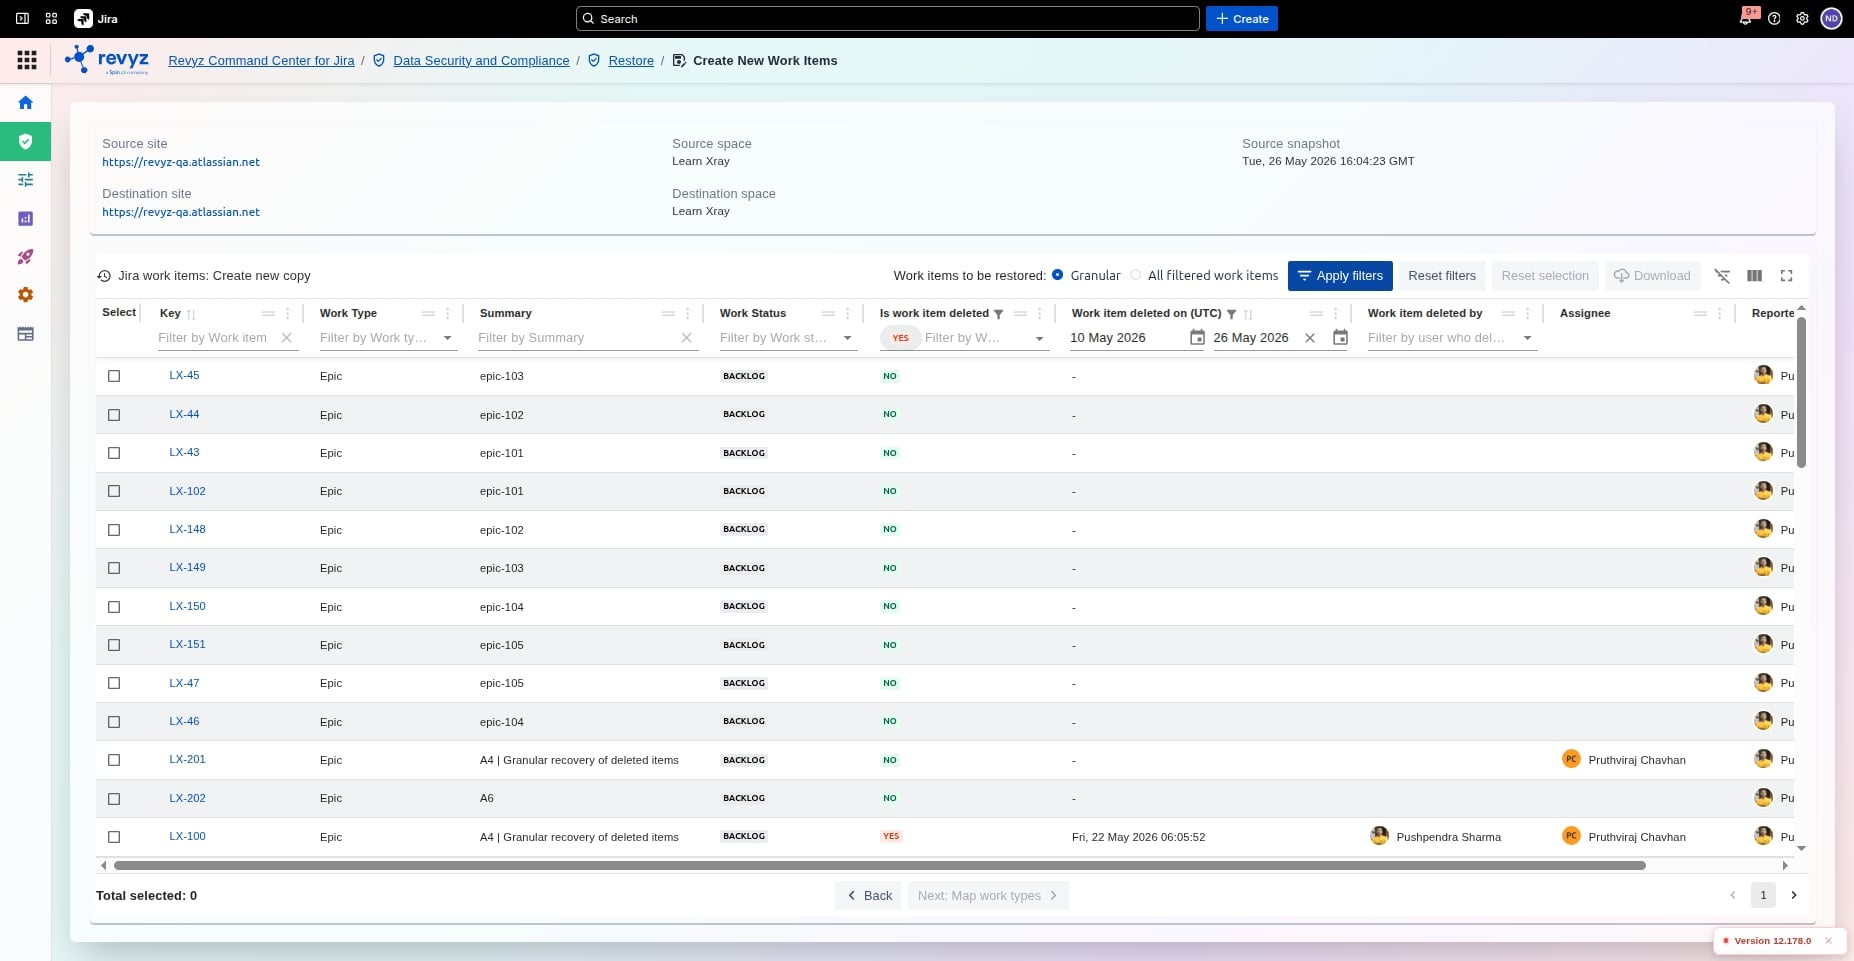
To isolate only the items that were removed, use the advanced filter options:
-
Status: Set the filter status to Deleted.
-
Date Range (Optional): Define a "From" and "To" date range (e.g., starting from 22 May) to find items deleted within a specific timeframe.
-
Deleting User (Optional): Filter by the specific user account that performed the deletion.
-
Click Apply Filter. The UI will refresh to display only the three deleted work items matching your parameters.
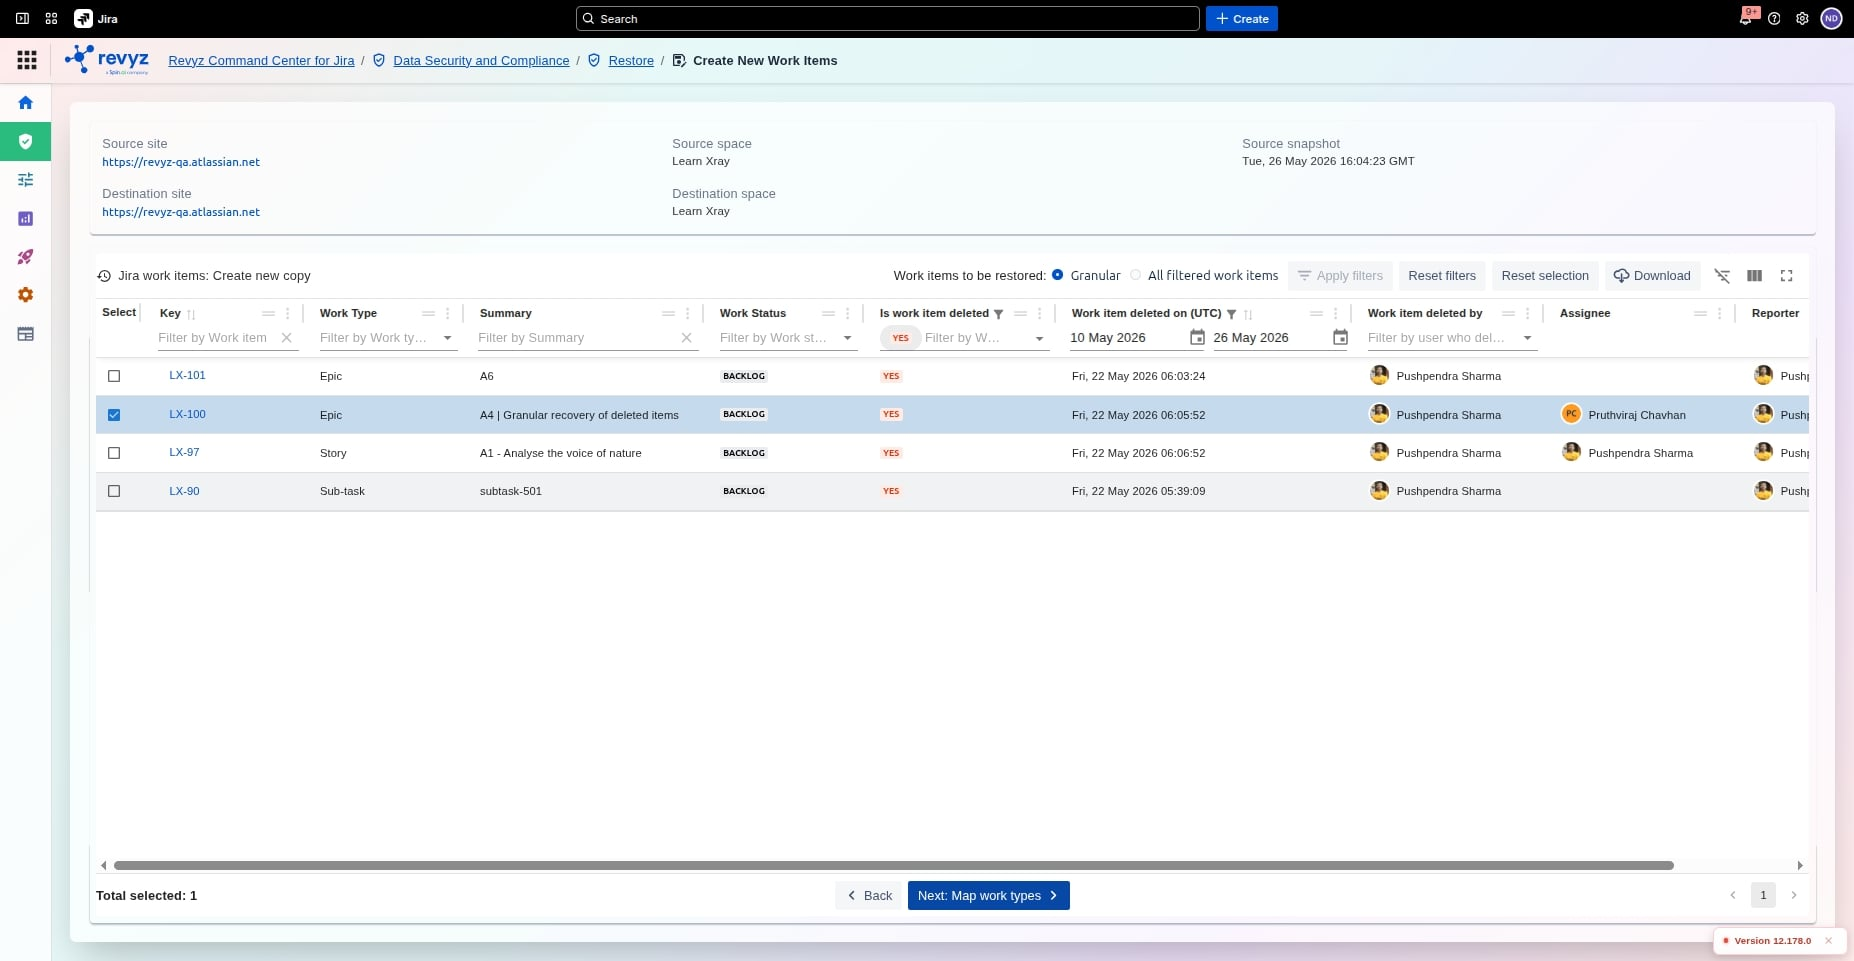
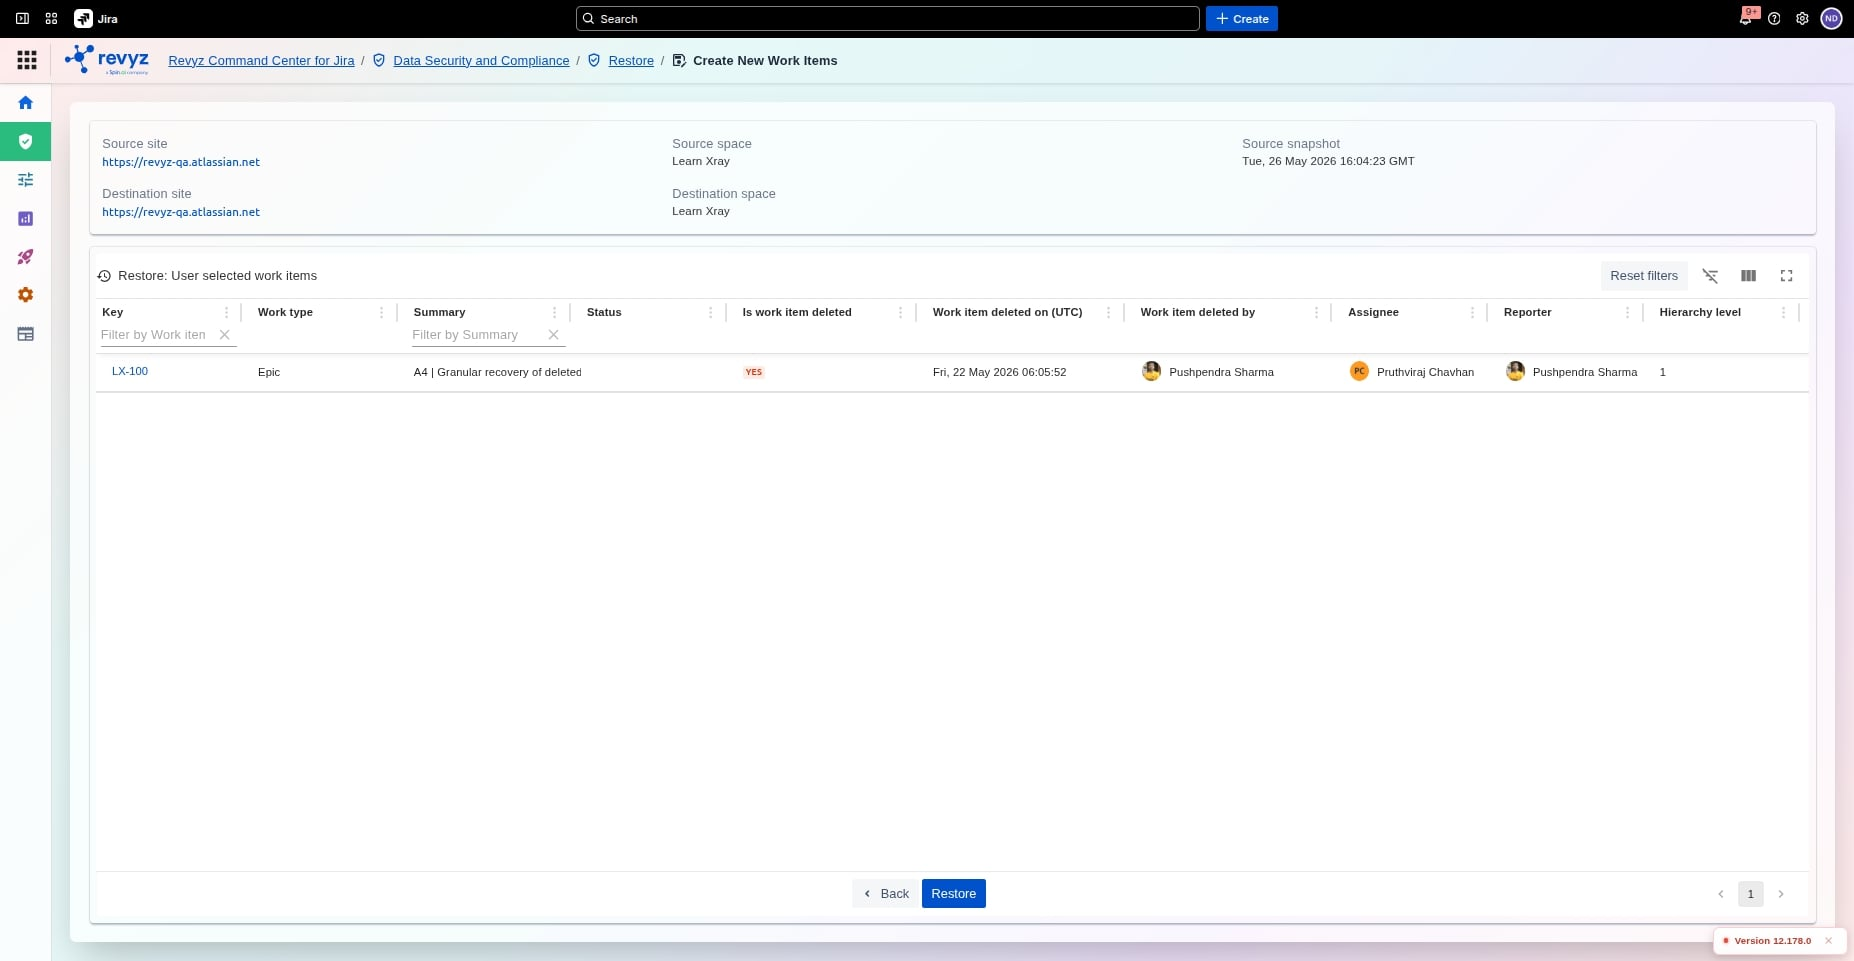
Select Items to Restore

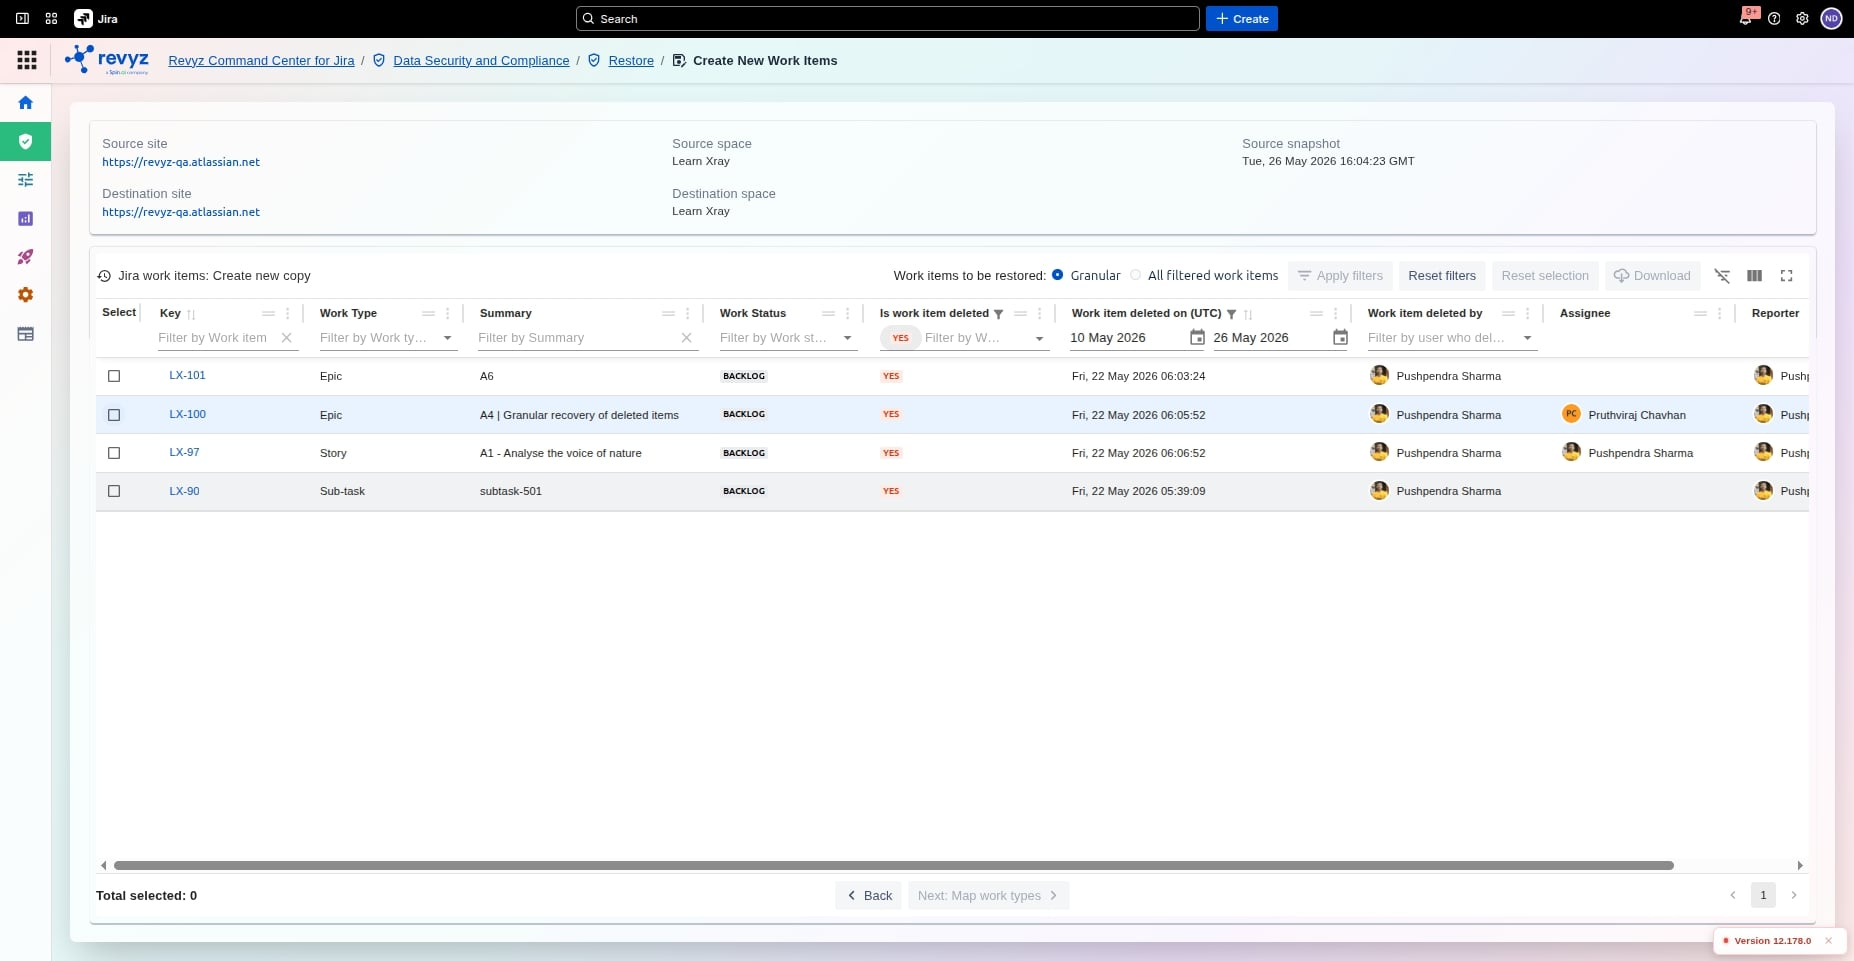
-
Granular Restore: Select individual checkboxes next to specific work items if you only want to restore a chosen few.
-
Bulk Restore: Check the top master box or click Restore All to select all filtered deleted items at once.
-
Click Next.
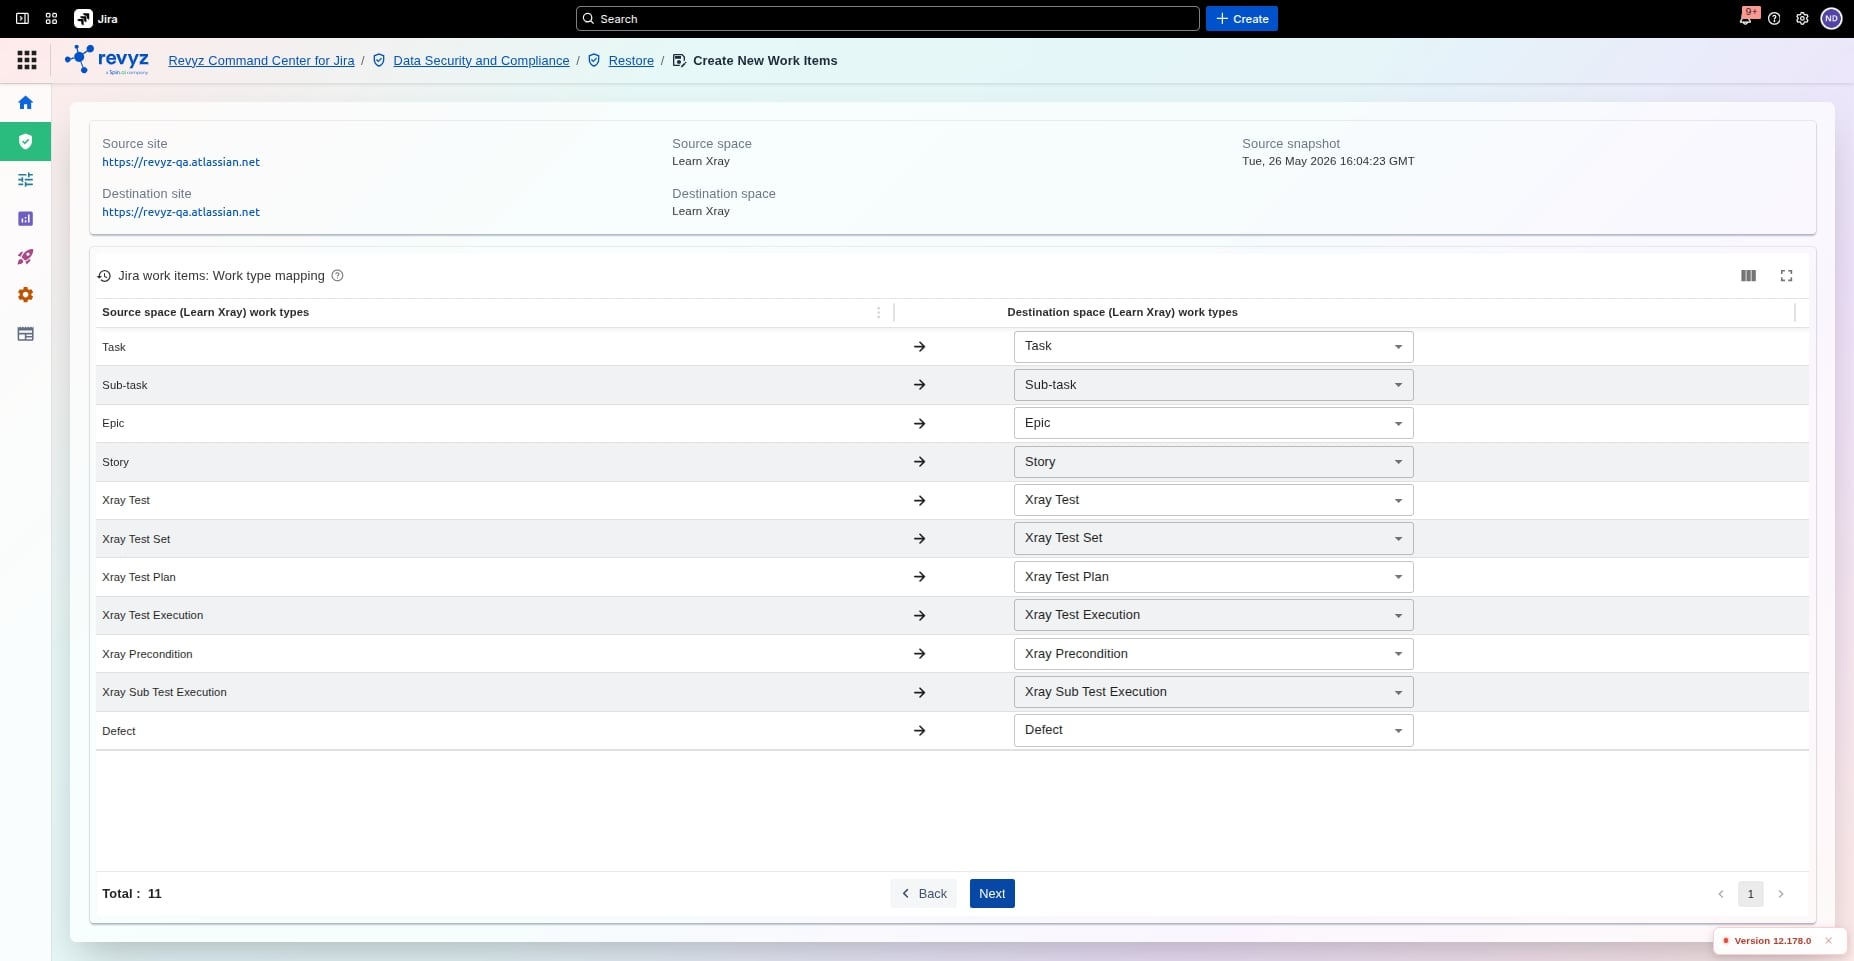
Map Work Types and Worklogs
-
Work Type Mapping: Map the work types from the source to the destination. If you are restoring to the same space, these will be auto-prefilled and typically require no changes. Click Next.
-
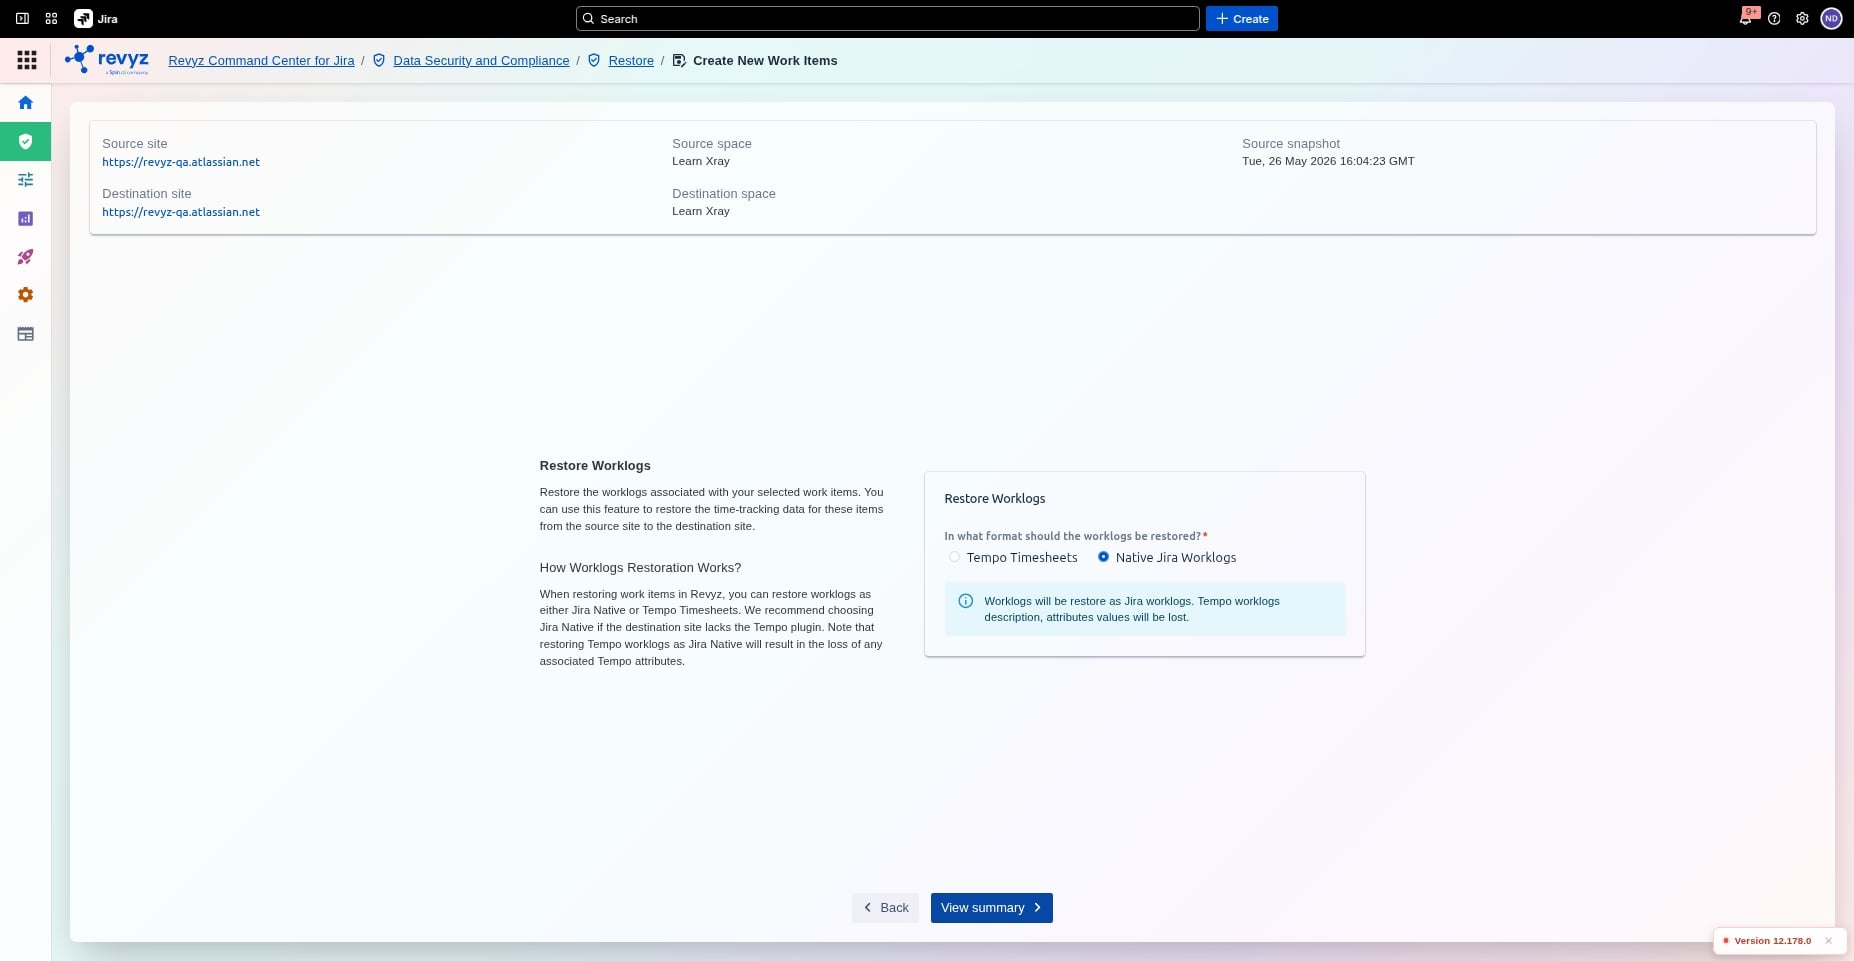
Worklog Configuration: Choose how to restore your worklogs based on your Jira applications:
-
Select Tempo if you utilize Tempo Timesheets.
-
Select Native Jira Worklogs if you use built-in Jira tracking.
-
-
Click Next.
Verify and Trigger the Job
-
Review: Review the confirmation page to verify that all selected work items and configurations are correct. If adjustments are needed, click Back.
-
Security Verification: Complete the CAPTCHA security check field.
-
Click Restore to trigger the recovery job.
How to Check Restore Status?
After triggering the restore, a background job is created:
-
Navigate to the Revyz Restore Job dashboard.
-
Locate your active job to monitor its progress.
-
Once the status updates to completed, navigate to your Jira instance to view the successfully restored work items live in your space.