-
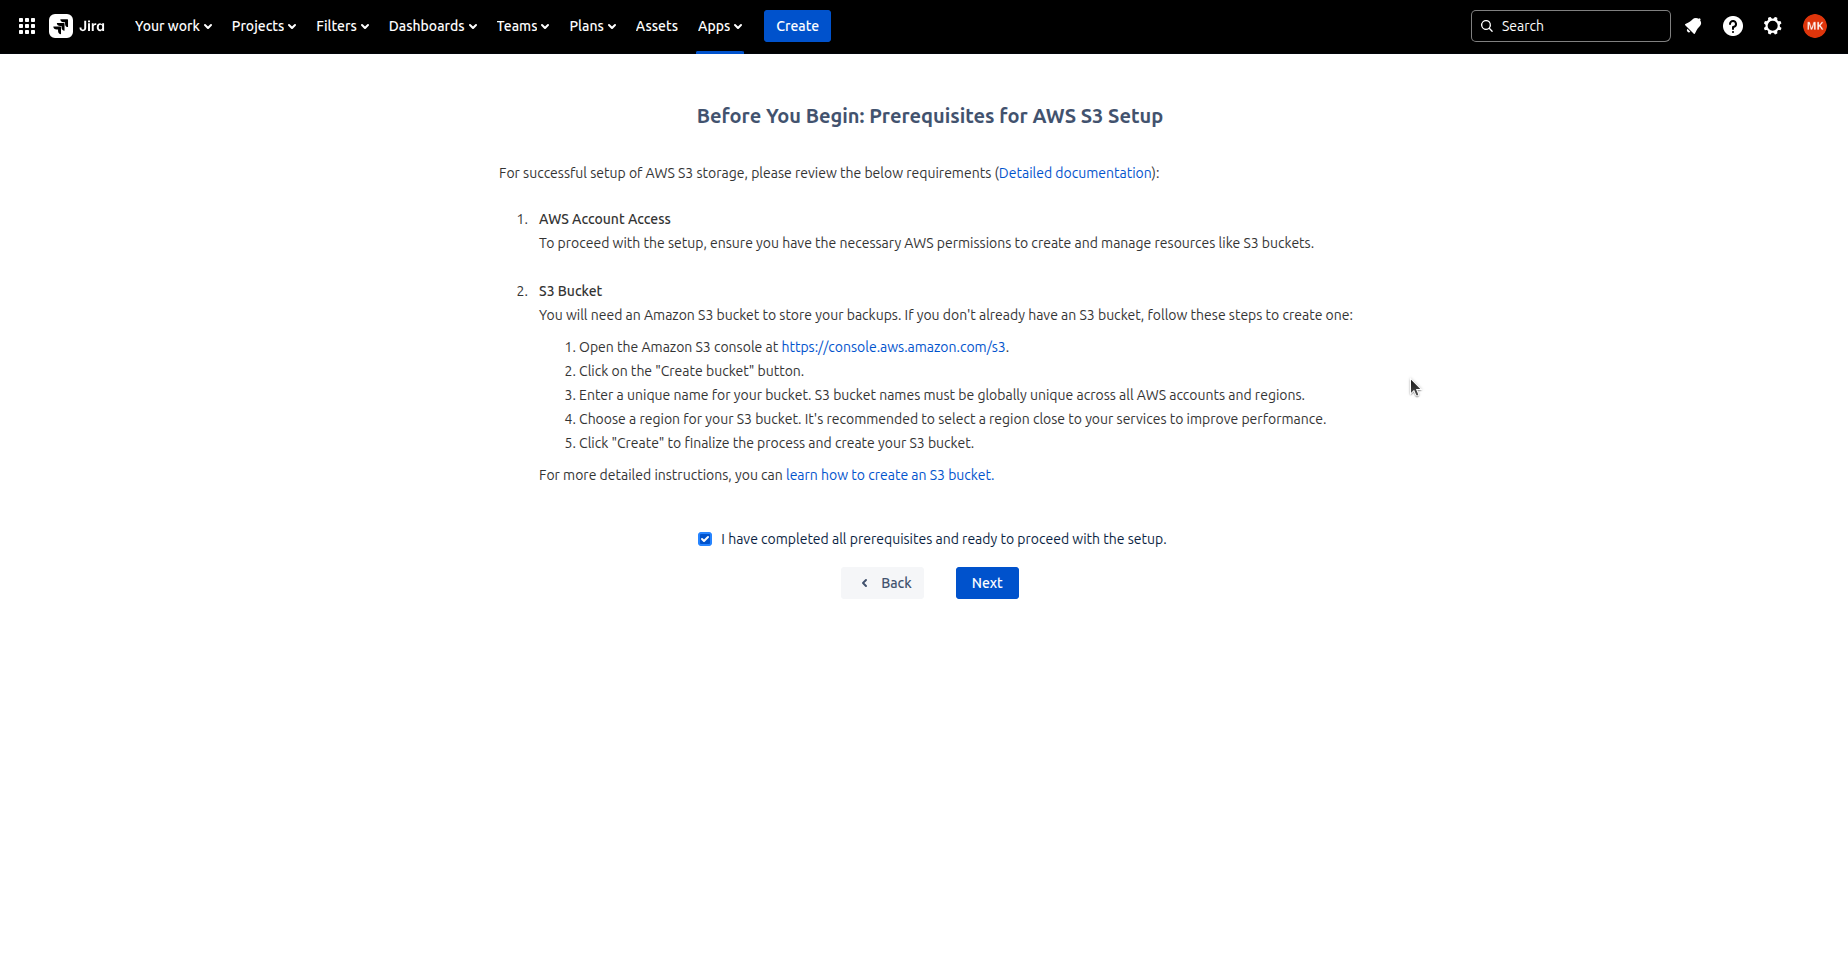
Before you begin, create an S3 bucket using this link https://console.aws.amazon.com/s3.
-
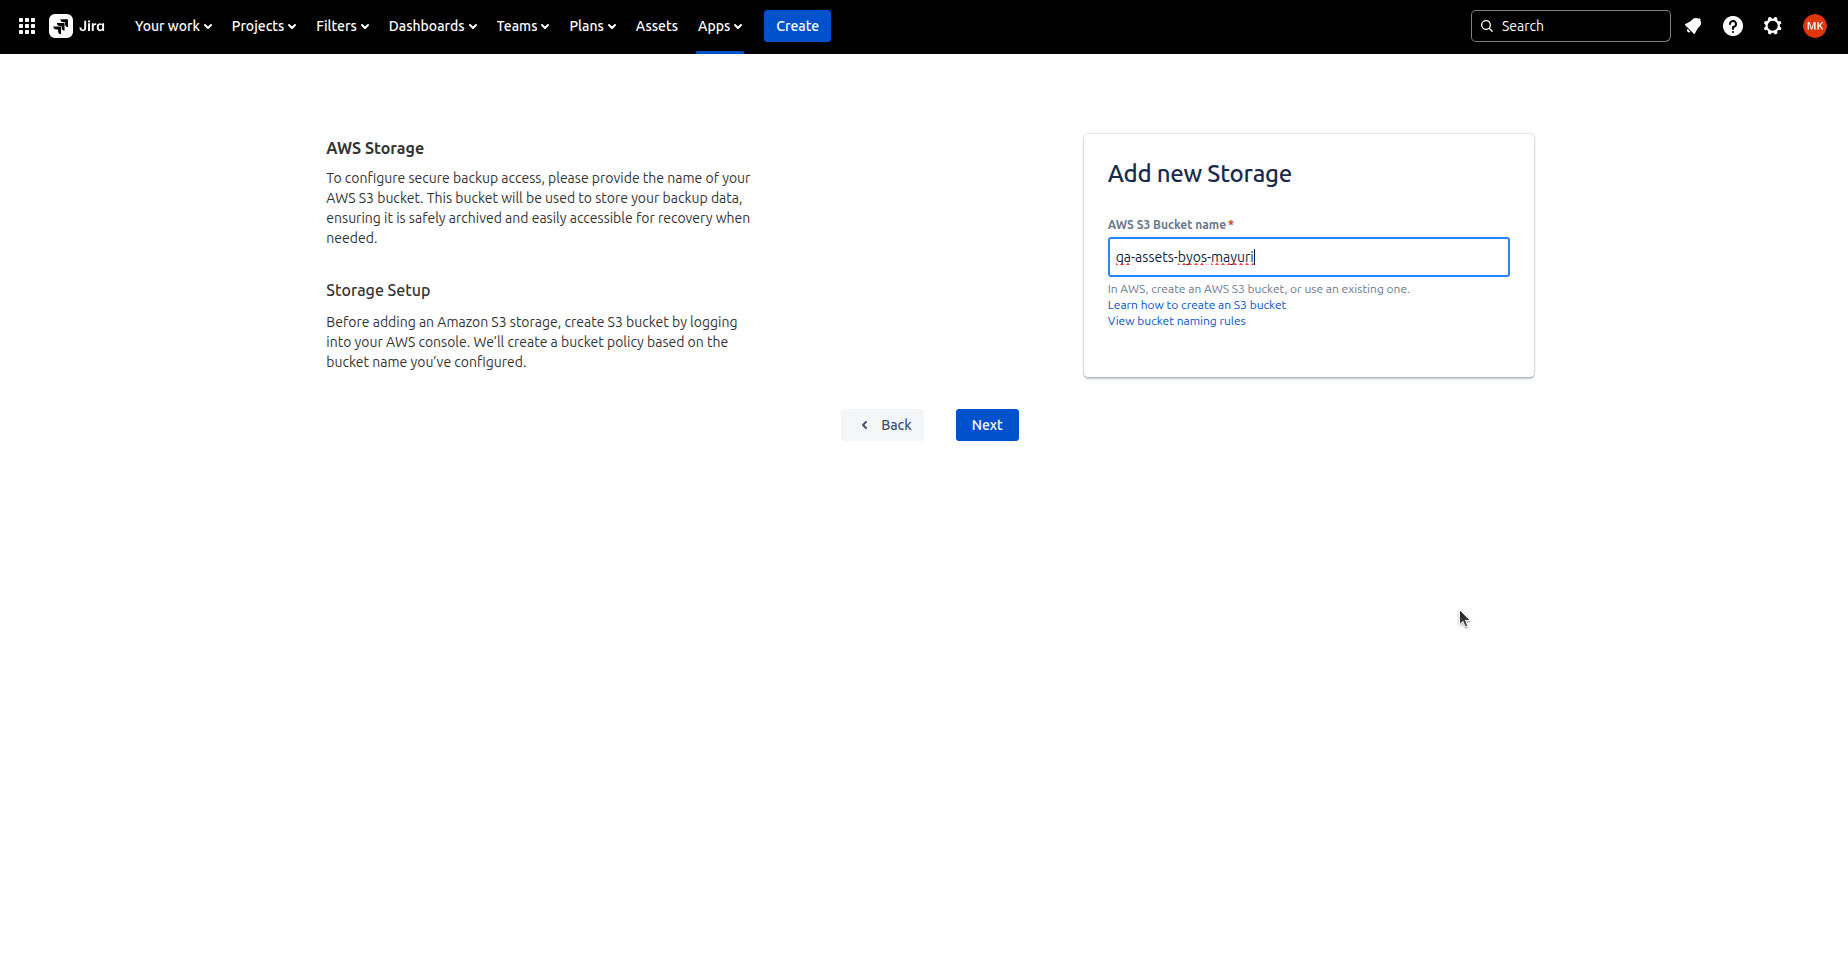
On next screen, you need to give a Bucket name which you have created for storage
-
Revyz will write data at the time of backup in the given bucket
-
Revyz will read data from the same bucket for restore
-
-
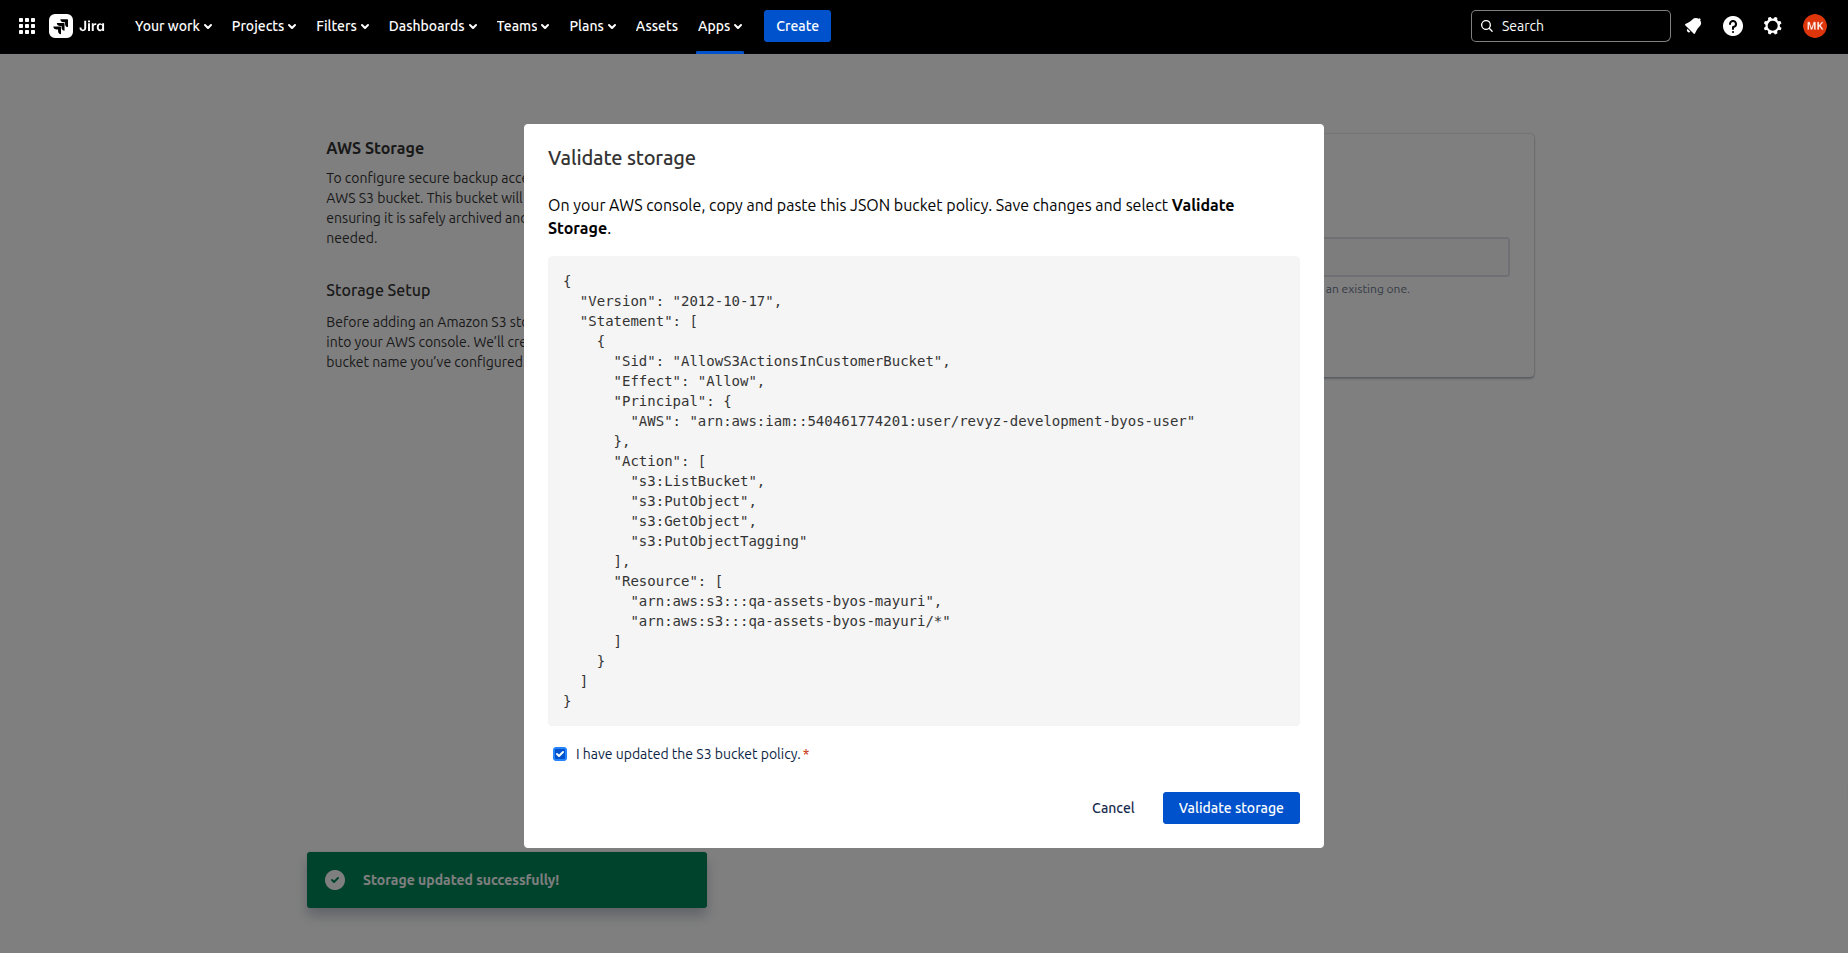
On next screen, you will get a bucket policy which will allow Revyz IAM user to read, write, tag objects in your s3 bucket.
-
Copy that JSON bucket policy and paste it in Permissions section of your bucket in AWS.
-
It's important to ensure that the necessary policy is added to the bucket before clicking the Validate Storage button to avoid any configuration or access issues.
-
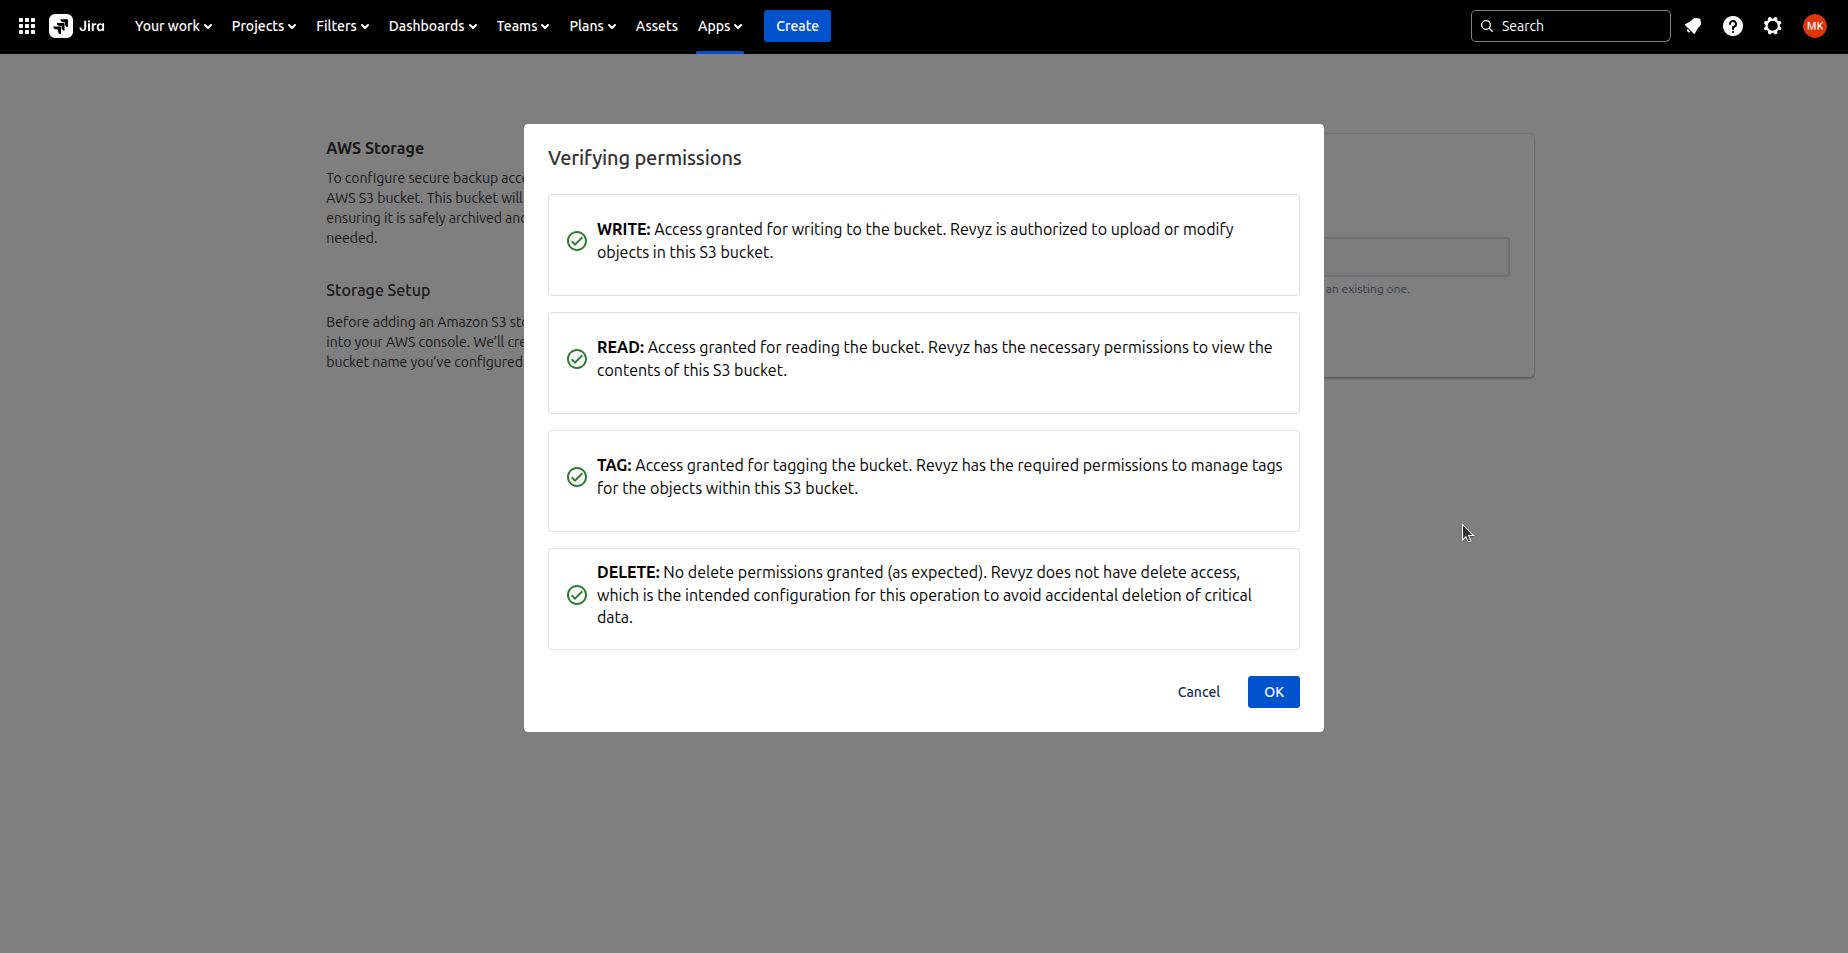
On next screen it will verify the permissions once bucket policy is added.
-
Permissions are assigned to the IAM user.
-
If required permissions are not added in the bucket policy then setup will not be completed i.e you will not be able to install the BYOS app.
-
Revyz also checks the “Delete“ permission and Revyz has no delete access to your bucket so it is confirmed that Revyz can not delete any object from your bucket.
-
Click on Ok, which will activate your storage.

-
Click on 'Next'.
-
Configure which Jira spaces gets backed up.
-
If you want to run backup immediately, then select Run data immediately option.
-
Check ‘I agree to all the settings’ option.